|
|
#341 |
|
Senior Member
Join Date: May 2010
Location: Lancaster, CA
Posts: 917
|
Look what came in today!
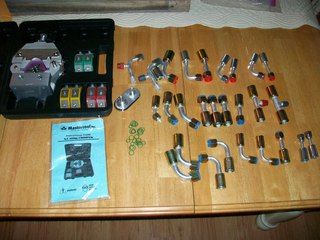 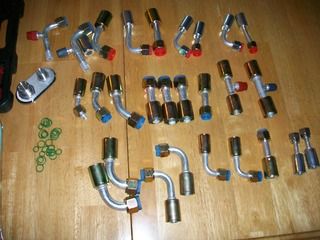 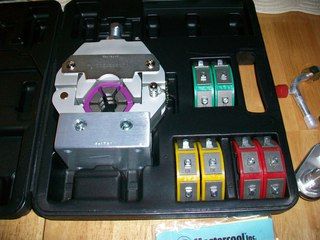 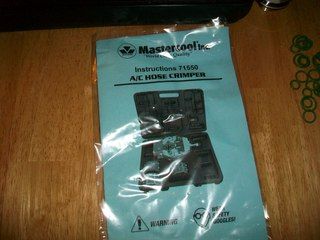 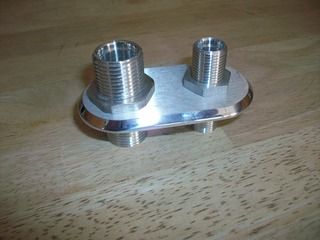 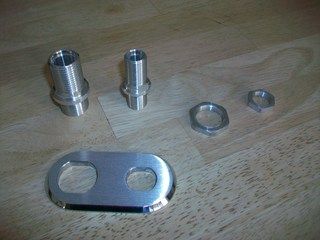 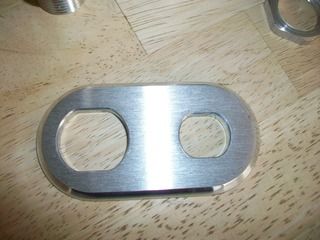 The AC kit I ordered some time ago has plenty of fittings/etc for a standard install, but this install is not going to be "standard".  I wanted a clean pass through the firewall, hence the bulkhead fitting. Also, since I am using a Vintage Air bracket that puts the compressor extremely low. I am going to use inline service ports for the HI and LO sides. I also ordered a small plethora (is that even a phrase?)  of various fittings and sizes so that I won't be locked in to the fittings from the original kit (with the bulkhead I needed fittings anyway). I like where the condenser, drier, compressor, and evaporator are all sitting. It will now be a matter of plumbing all of this up while using the original heater parts and controls. of various fittings and sizes so that I won't be locked in to the fittings from the original kit (with the bulkhead I needed fittings anyway). I like where the condenser, drier, compressor, and evaporator are all sitting. It will now be a matter of plumbing all of this up while using the original heater parts and controls.I did plunk down some change for the Mastercool crimper. I did some research and read reviews - they all seemed to be pretty good on this unit. I will certainly let you know what we discover. When I found out how much places wanted to crimp hoses I just decided it would be good to get my own crimper. I have to make quite a few for this AC install, and of course Mama keeps talking about a late 60s Mustang she wants to have done for her 25th wedding anniversary.  That car will have to have an AC unit as well. And.....that car will have to wait as well - gotta get this one done first. Anyone have a lead on a late 60's Mustang? That car will have to have an AC unit as well. And.....that car will have to wait as well - gotta get this one done first. Anyone have a lead on a late 60's Mustang?  I will be out of town again this weekend but hopefully I can get to some of this stuff. I did make myself a little diagram so that I can follow along as to how I am installing this system. Once I get the fittings chosen and the lengths of hose all dialed in I will add that to the diagram as well. 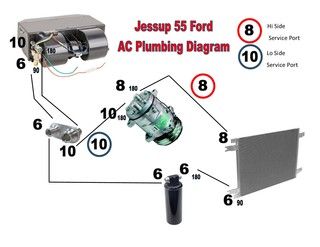
__________________
Lancaster, California Visit hotrodreverend.com to view hundreds of pictures and videos of the build of the 1955 Ford Club Sedan! |
|
|

|
|
|
#342 |
|
Senior Member
Join Date: May 2010
Location: Lancaster, CA
Posts: 917
|
And some outdoor shots on this trunk... I got home tonight and decided to get it out, go over it with 2000 and then run the buffer real quick - still want to do one more pass but my wife came by at the end and just dropped her jaw and stood and looked at the trunk and then looked at me. :clap:
I just nodded lol! Take a look - hopefully I can continue this trend through the build. before cut and buff: 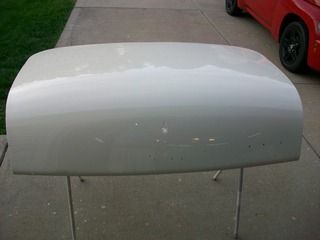 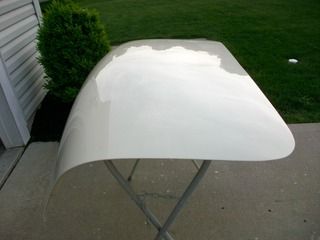 and then after: 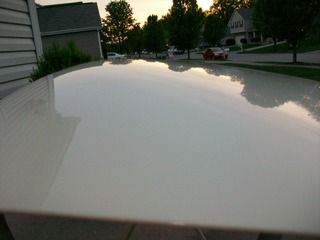 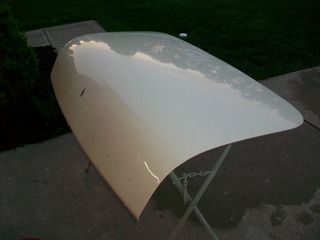 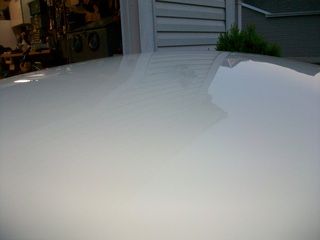 Flat out - it's awesome stuff. Take away the amateur portion of this work and the products used would really stand out. Now where did my wife get off to? :wink:
__________________
Lancaster, California Visit hotrodreverend.com to view hundreds of pictures and videos of the build of the 1955 Ford Club Sedan! |
|
|

|
| Sponsored Links (Register now to hide all advertisements) |
|
|
|
|
#343 |
|
Senior Member
Join Date: May 2010
Location: westbury ny
Posts: 854
|
looks great but do not wax it for at least a month the new paint is still ' breathing' ax would seal it and might cause it to react with the undercoats don't ask how I know
|
|
|

|
|
|
#344 |
|
Senior Member
Join Date: May 2010
Location: Lancaster, CA
Posts: 917
|
Ok, so buffing with a cutter like M105 from Meguiars is ok though right?
__________________
Lancaster, California Visit hotrodreverend.com to view hundreds of pictures and videos of the build of the 1955 Ford Club Sedan! |
|
|

|
|
|
#345 |
|
Senior Member
Join Date: May 2010
Location: westbury ny
Posts: 854
|
yes that's fine. you can wet sand out any imperfections and not have to sand the whole panel I wet sand most jobs and compound and polish 2000 is great to sand with it polishes out easy
|
|
|

|
|
|
#346 |
|
Senior Member
Join Date: May 2010
Location: Lancaster, CA
Posts: 917
|
Sponsored Links (Register now to hide all advertisements)
 , you know that I decided to plunk down some coin and purchase a crimping tool that would help me get the AC lines and fittings together. I figured it was a good idea since the wife wants me to start putting together a Mustang for her in a few years. , you know that I decided to plunk down some coin and purchase a crimping tool that would help me get the AC lines and fittings together. I figured it was a good idea since the wife wants me to start putting together a Mustang for her in a few years.The tool is from a company called "Mastercool" and seems to be very well made. It is designed to be placed in a vise as you crimp your lines. 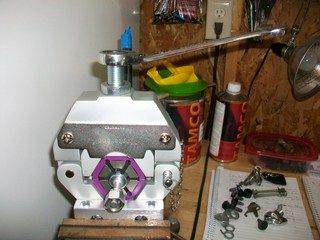 The main unit is heavy, and the tool comes with 4 different sizes of crimping inserts, 6, 8, 10, and 12. (did not need the 12 for this installation) The tool I purhased also came with a nice plastic, blo-molded case to keep the entire unit and inserts together. Basically the idea here is that you set your fitting in the crimper, insert your hose to the end of the fitting (each one has a sight hole so that you can be sure you have inserted far enough) and then use a wrench or ratchet to cinch the ends together - the inserts crimp the fitting and hose together. 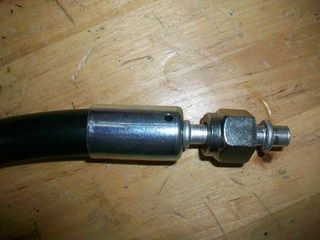 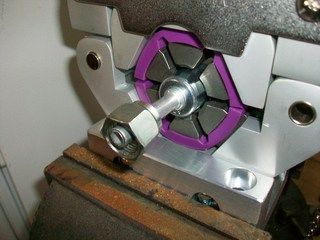 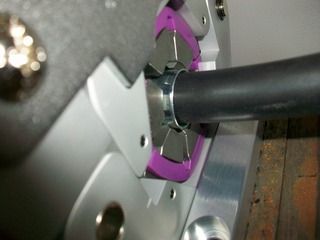 I made sure the fitting and hose were centered in the bore before I hand tightened the press, and then after doublechecking I used a 3/4" wrench to bring it all together. There is a mark located on the boss so that you know how far to go... 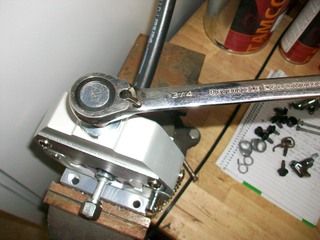 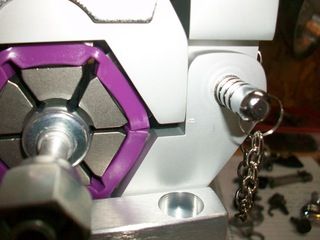 The tool works as advertised and the crimps look to be even and of course that hose is very tight in the fittings! 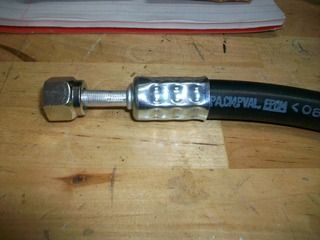 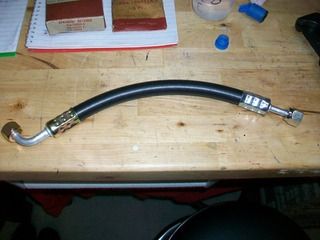 For some hoses you make you will end up with fittings that need to be oriented to a particular "clock" or angle. Of course, if one end is a straight 180 degree fitting then there is no issue. I marked my fittings and hoses by using a sharpie and making sure the fitting and hose were oriented correctly before I cinched them down. 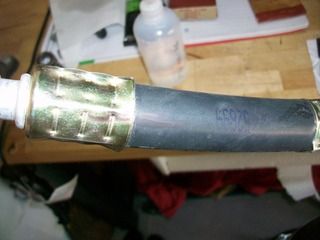 Of course, keep a little mineral oil on hand for those O-rings, and make sure you don't cut them as they go on the fittings/get connected to fittings in the car. 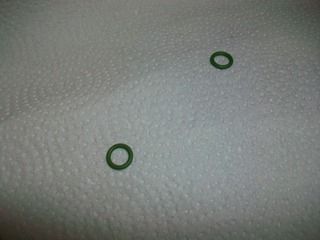 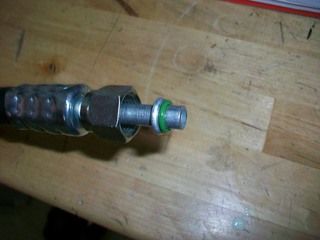 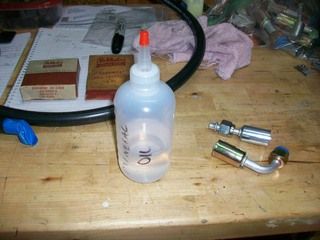 I am pretty happy with the AC kit I purchased - although the price point seemed to make it a "budget kit" the hoses shipped with the kit are obviously name brand "Parker" - a well recognized name in the industry. 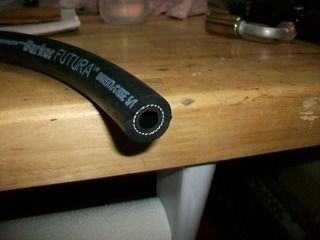
__________________
Lancaster, California Visit hotrodreverend.com to view hundreds of pictures and videos of the build of the 1955 Ford Club Sedan! |
|
|

|
|
|
#347 |
|
Senior Member
Join Date: May 2010
Location: Lancaster, CA
Posts: 917
|
Thought I would post some pictures of what I did to route the lines and how I situated the bulkhead fitting where the lines pass through the firewall. At this point I am not finished with the plumbing since I want to get my heater sheet metal installed first and I am not 100% sure how I want to route in the engine bay itself, I am HAPPY that I bought a number of various fittings ahead of time. This is definitely a custom install and different bends/sizes are needed all over the place - especially with that bulkhead fitting.
First up, the receiver/drier line... used one 180 and one 90 to put this together. This install was pretty straight forward. The size 6 line goes behind the horn on the passenger side. 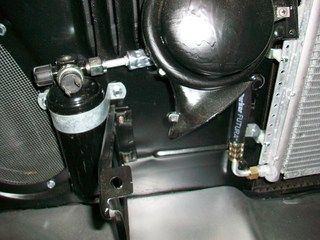 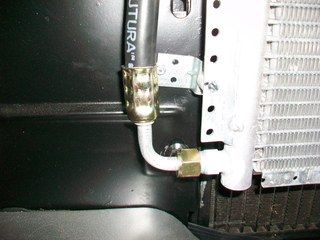 Next up was to determine where the bulkhead fitting was going to go. I decided the best place would be on the same plane with the evaporator and the fortunate thing for me was that this placed the pass through point directly below the heater duct that attaches to the firewall. If you are thinking, "Great, he is burying the fitting where he cannot reach it later on..." Just remember that the sheet metal plenum at the firewall is easily removed with the two levers on the heater core boss and the clamp that attaches the square duct. I placed the fitting plate on the engine side of the firewall and made a mark, then used a punch to give me a locating point. Next up was a step drill to give me the first hole (size 6 fitting). 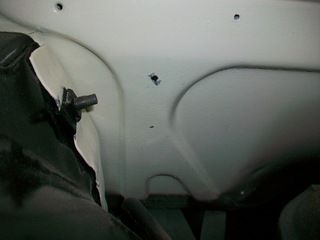 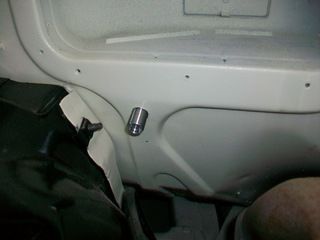 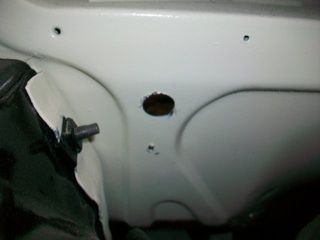 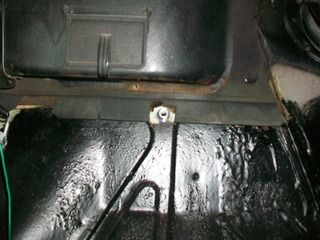 Then I attached the plate/fitting to give me a reference point for the larger hole on the bottom - this one needed a 1 1/4" hole saw.  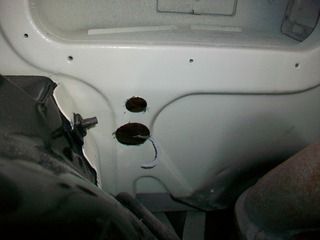 after a little clean up... 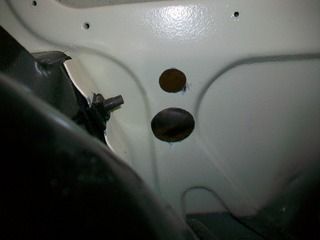 Once I checked the fitment of the bulkhead fitting I used some 3M weatherstrip sealant on the back of the plate so we wouldn't get any leaks later on. 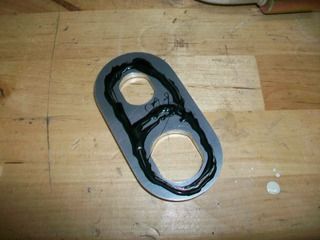 and we attached the two fittings, plate, and the nut and voila! 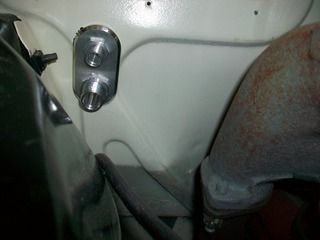 Back to the inside of the car now. I played around with various fittings - 90 degree, 45 degree, and 180 degree - to find out which orientation would work best. 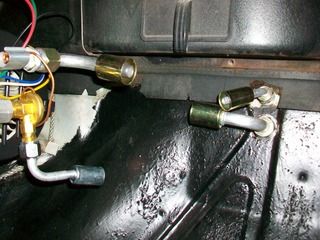 If you are paying attention you can see that the lines will criss cross as they pass through the firewall. This is "by design" - this time I actually thought about this ahead of time since I knew where we were headed with the size 6 line and the size 10 line moving up front. I also had to orient the fitting in "portrait" and not "landscape" on the firewall so this configuration worked best. It really was not a big deal. However, if you look at the photo above you will see that the size 10 fittings are just not lining up. I did have work them a little with some judicious, altered, bends so that they would line up to each other. 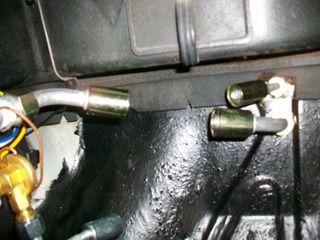 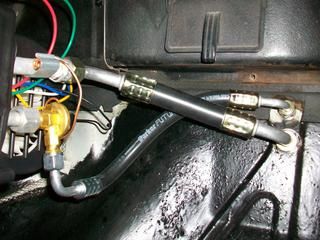  Since I was not dealing with any 180's on this evaporator hook up, the first fitting was crimped to the hose after a general measurement was taken. Then that fitting and the hose was installed. I then took the other fitting that the hose was connecting to and installed that with the hose in the final fitting "uncrimped". This made the jockeying around very easy and I just marked the fitting to the hose, pulled everything out, crimped, and reinstalled. I am not sure if that is the way it is supposed to be done but it worked for me and I am happy with the way it all went together. I am also very PLEASED I bought this Mastercool crimper. I could not imagine the multiple trips to a shop to have the ends crimped without being able to tell what I was doing. Some guys may be good enough to handle that but I am not.  Next up was the size 6 hose for the evaporator and by this time it was getting to be standard operating procedure.  Next up is to install these parts... 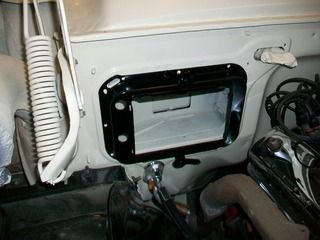 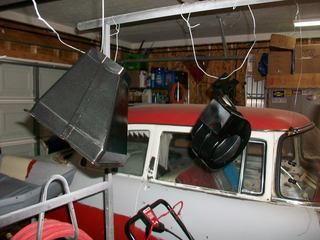 and then get the lines from the bulkhead to the compressor, condenser, and receiver/drier up front. If I can get as much installed as possible it should be easier to figure out where the ports need to go. With a rear exit compressor and the Vintage Air bracket that puts the compressor almost out of reach, I am planning to bring both the Hi and Lo ports over between the starter solenoid and the heater box somewhere. 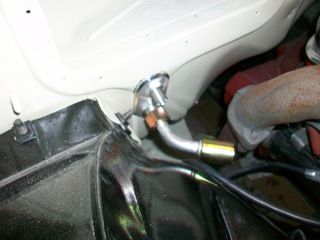
__________________
Lancaster, California Visit hotrodreverend.com to view hundreds of pictures and videos of the build of the 1955 Ford Club Sedan! |
|
|

|
|
|
#348 |
|
Senior Member
Join Date: May 2010
Location: Lancaster, CA
Posts: 917
|
Between projects such as powerwashing the deck, repairing a water hose, hanging a window for the wife, painting hardware for the wife, and other Saturday busyness I did have a chance to get a few things done
 I installed the heater core and box since my new gaskets arrived yesterday. Even though they are Made in the USA, they leave much to be desired and are not the same thickness as the FoMoCo versions. 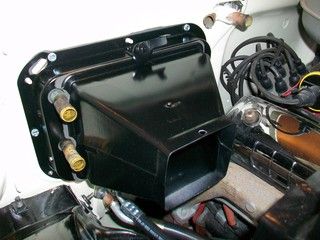 Take these three photos for instance. Notice the gap in each one as it gets a little tighter each time I adjust the levers on the Heater Core boss. 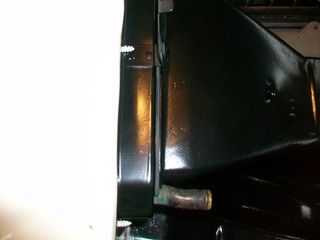 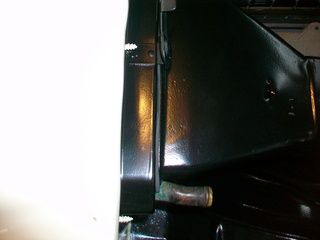 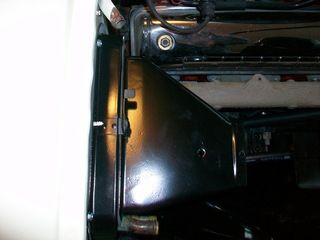 We are sealed up but I don't think these are going to last near as long as Ford's original equipment. I decided to work on the Heater parts because the AC lines I am running are weaving in and around the units and I wanted to get an idea of where to put the Hi and Lo ports for access. I settled on the Lo port (which is a size 10 hose in this setup) to be just forward of where the squirrel cage boss sits. This should be accessible pretty easily and it is tucked out of the way. 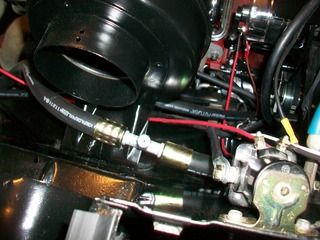 When the special AC grommets I ordered arrive, I will take some photos of how I plan to orient and install the final line from the compressor to the condenser (will also show the ports at the rear of the compressor - it is tight in there!)
__________________
Lancaster, California Visit hotrodreverend.com to view hundreds of pictures and videos of the build of the 1955 Ford Club Sedan! |
|
|

|
|
|
#349 |
|
Senior Member
Join Date: May 2010
Location: Lancaster, CA
Posts: 917
|
Some other things that got accomplished were wiring up the ignition switch so the Ford would fire and run... (nice to get that going)
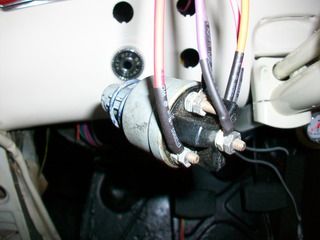 And 3 coats of clear on both of the fenders - the gloss is really looking good on these. It is almost time to purchase the clips I need for the stainless and to buff the stainless (remember how those clips just disintegrated when I pulled the stainless off the fenders last year?  ) )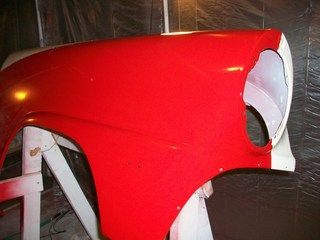 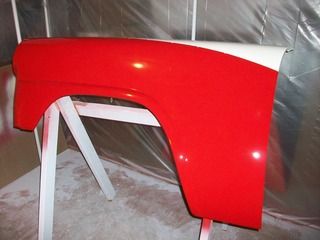 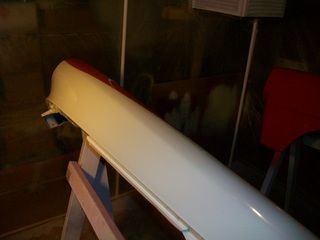 And another satisfying project to get finished was gluing down the trunk seal. I purchased what looked to almost 10 feet of the stuff shown here: 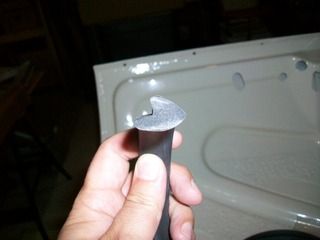 I checked and rechecked on how it should be oriented to the lip of the trunk (I would imagine this is pretty important) and I looked up some good information on the Steele Rubber website. They have pretty good instructions about installation tips and suggestions. I also picked up a tube of this handy 3M weatherstrip sealant: 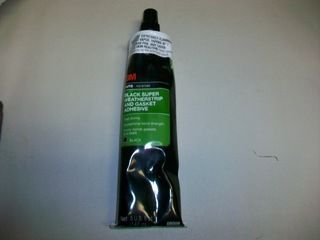 Ok, so first was take the roll out of the bag. Tried as I could, I was never able to the ends to "unroll" - they kept springing back to a "C" position like this. 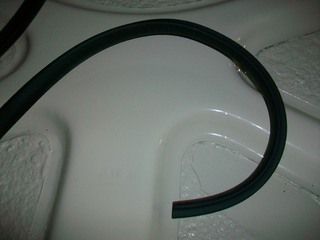 Since I had so much to begin with, I just snipped off the offending end of the seal and began with a fresh, straight end. The plan - place the seal on the lip of the trunk correctly, beginning at the point where the lock mechanism is installed. Then tape the seal to the trunk lip as it should be installed, going all the way back around to meet the beginning at the trunk lock section. The remaining length was snipped off and we grabbed the 3M sealant. You can see the way the seal was oriented to the lip of the trunk: 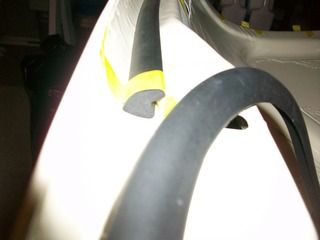 The tape kept the seal in position until I was ready to work on each section at a time. 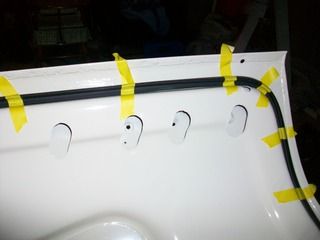 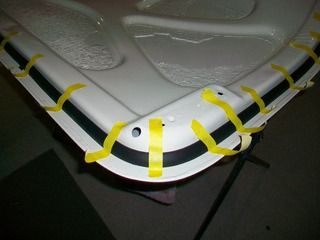 At times I needed a bit more tape... 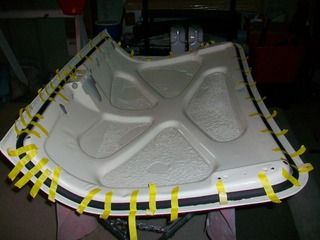 But it was worth it. The seal looks very nice around the edges and the ends met up well. 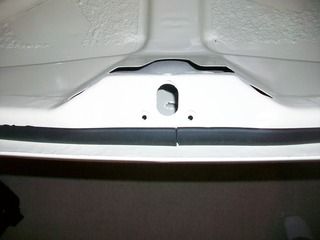 It is going to be down to almost freezing here tomorrow morning. With a day at church and cold weather besides, I am not sure how much more I am going to get done tomorrow night but you never know. There is always some project that needs to be completed on this old Ford! 
__________________
Lancaster, California Visit hotrodreverend.com to view hundreds of pictures and videos of the build of the 1955 Ford Club Sedan! |
|
|

|
|
|
#350 |
|
Senior Member
Join Date: Mar 2011
Location: Overland Park, Ks
Posts: 559
|
Reverend it looks like you're doing it a real bang-up job your car is going to be really nice
Sent from my XT1585 using Tapatalk |
|
|

|
|
|
#351 |
|
Senior Member
Join Date: May 2010
Location: westbury ny
Posts: 854
|
rev if you haven't already found the clips restoration specialties has a good catalog of hard to find hardware
|
|
|

|
|
|
#352 |
|
Senior Member
Join Date: Mar 2015
Location: woodland Ca
Posts: 333
|
Wowzers Rev, that car is gonna be mighty nice when it's complete!! You may have found a second (or even 3rd? 4th?) career in the auto AC business! �� Keep up the great and consistently interesting work! I very much enjoy reading all of your new posts. Been following since the beginning. Thank you for your blog!!
__________________
Alive n kickin n mostly kickin! |
|
|

|
|
|
#353 |
|
Senior Member
Join Date: May 2010
Location: Granite City, Illinois
Posts: 3,008
|
Rev, I dunno if I am right or wrong about this, but I believe you have the trunk rubber seal upside down and I think you might need to keep an eye on how well the seal sticks to the bottom of the trunk lid oriented like that.
I had that exact same rubber seal (but mine came from Metro Moulded Parts). Anyway, I oriented the seal so that the large radius mates against the curved metal. There's still plenty of meat for the short side to catch at that lip around the trunk opening and mine seals very well, while the trunk lid is also not excessively difficult to close. But like I say, I could be wrong. |
|
|

|
|
|
#354 |
|
Senior Member
Join Date: May 2010
Location: Lancaster, CA
Posts: 917
|
Guys you are too kind. After documenting all of this work I can see now why more of us don't post it inline. I probably have well over 1000 photos alone, they are backed up on photobucket so they can be posted easily here, and there is extra thought involved in taking pictures, organizing them, etc. I would like to see what other guys are doing as well...I am sure I could learn a few things. I do know that posting all of this has helped me because many of you have given very good advice for this project that kind of got out of hand.
Fellas, let's hold off on AC work as a second career for now...  when I put a vacuum on those lines and confirm they are sealed up, fill the system with refrigerant, and actually get cold AC then we will think about it! when I put a vacuum on those lines and confirm they are sealed up, fill the system with refrigerant, and actually get cold AC then we will think about it!  I can see now why ready made kits are so popular. Very few options when considering how to keep your original heater parts. But I can also see why even Vintage Air does not sell a kit for a 55/56 Ford. I just about believe if they would have I might have bought one, but the piece meal route was going to be way too much money. I can see now why ready made kits are so popular. Very few options when considering how to keep your original heater parts. But I can also see why even Vintage Air does not sell a kit for a 55/56 Ford. I just about believe if they would have I might have bought one, but the piece meal route was going to be way too much money.On those clips, they were so disintegrated it was hard to measure what was on there originally. I will have to spring for a kit, or a set, I am sure. TeeBird is usually pretty good from what guys tell me. I would not know what all sizes I need but restoration specialties is a good company too. I do think that seal is installed correctly. I checked and rechecked many times concerning orientation and the open "C" was to be facing the interior of the trunk all the way around. If I screwed up and down the road it does not seal I can always pull it and reorient it but I do believe we are on the money here. Maybe some of you other guys with 55/56 can chime in here. One thing I will comment on while I am working on the main harness, the folks at RebelWire are great for customer service. One phone call, two rings, a real life human being on the line, and then a very fast answer to my tech question that solved it immediately. Very courteous staff as well.
__________________
Lancaster, California Visit hotrodreverend.com to view hundreds of pictures and videos of the build of the 1955 Ford Club Sedan! |
|
|

|
|
|
#355 |
|
Senior Member
Join Date: May 2010
Location: westbury ny
Posts: 854
|
rev i'm thinking daves 55 may be correct on the rubber if the "c" section was to the outside it would act as a channel for the water to follow as it enters the jamb area although you have good coverage the way it's set may be tuff to close as it will have to compact on itself just my 2 cents keep up the good work
|
|
|

|
|
|
#356 |
|
Senior Member
Join Date: May 2010
Location: Lancaster, CA
Posts: 917
|
http://www.steelerubber.com/trunk-we...rip-20-1389-84
If you download the PDF from this page, you can see why I installed the weatherstrip the way I did. Who knows, are they wrong?
__________________
Lancaster, California Visit hotrodreverend.com to view hundreds of pictures and videos of the build of the 1955 Ford Club Sedan! |
|
|

|
|
|
#357 |
|
Senior Member
Join Date: May 2010
Location: westbury ny
Posts: 854
|
I stand corrected it looks like it could go either way the way they show it wont collect any water that's for sure
|
|
|

|
|
|
#358 |
|
Senior Member
Join Date: May 2010
Location: Lancaster, CA
Posts: 917
|
We are picking up my oldest daughter from her second year of college today so I thought I would post this morning to show a little progress. After checking my gauges this morning I am pretty happy with the AC install and that Mastercool Crimper Tool (more on that later).
First up was to locate the overdrive cable grommet I had purchased and to punch through the firewall where it is supposed to be located. No big deal here - pretty easy setup. 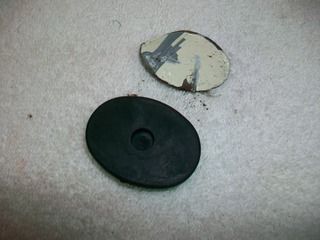 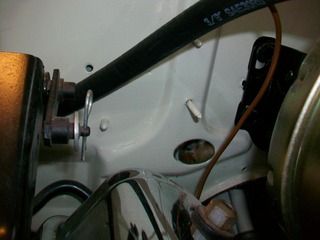 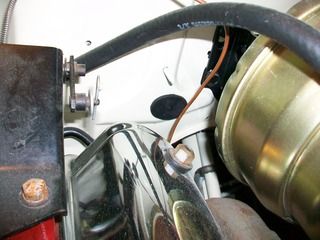 After the install you could hear me say... "Dag Blast It! Where did I place that cable and bracket?" (Update... I found the cable, well, one of the two I own, and the one I located does not have the bracket. Somewhere around here is the cable AND bracket together. Easter Egg hunt coming soon!) Now for some drilling up front - you can see from the following holes made that wiring and plumbing for the AC has to go to the front (AC condenser fan, receiver/drier, number 8 hi pressure line for condenser). We got out the drill and appropriate size grommets. The large grommet is especially made for AC hoses and will fit sizes 6-10 through sheet metal. 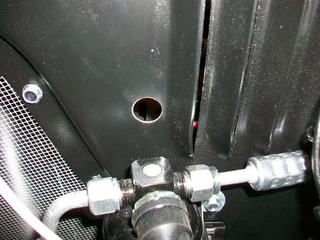 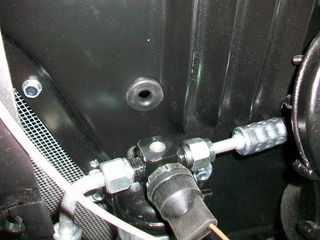 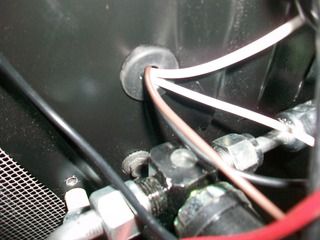 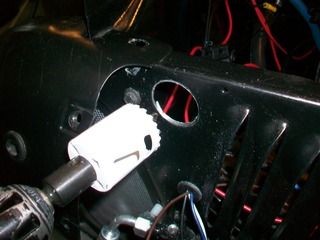 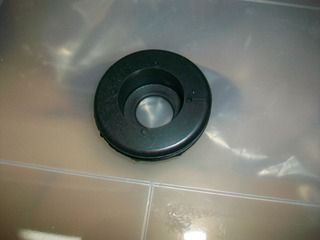 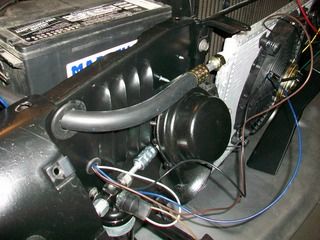 That number 8 hose was connected to the top of the condenser, put through the air deflector, and snaked around the side of the battery. Surprisingly there was plenty of room for this and with the idea of using looped brackets to hold the ported fitting in place I really think this will work. 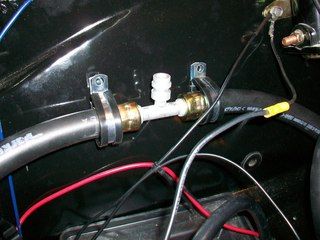 The spacing up front is extra close as you can see: 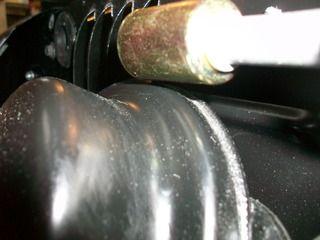 Several weeks ago I tried to get the condenser in a position where we could exit out with a 180 degree fitting and it looks like we hit the jackpot there with no interference. I am happy about that of course. The final fitting being crimped! 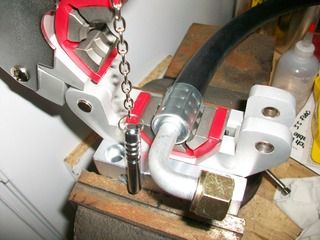 This little tool has been well worth the investment. Again, I cannot imagine having to go back and forth with a shop on trying to get all of this crimped. In a full custom job like this one where you measure 3 or 4 times, take it out, examine it, check the routing of lines so that you have no other interference, sit there and look at it with a tall glass of iced tea, (well you get the idea!) having the crimper on hand made it extremely satisfying. The ports to the rear of the compressor look like this: 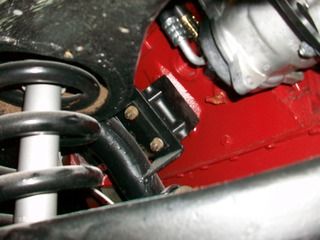 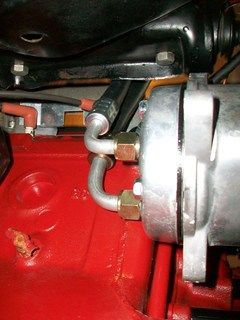 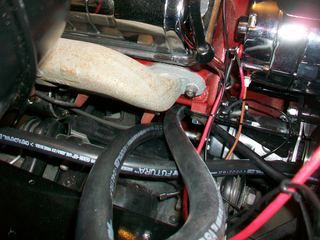 Would you believe I actually considered the 90 degree fittings exiting at the bottom instead of facing up as installed? I was a little off in thinking that would have worked but I guess it was because I had that side of the car jacked up and the lower A arm was completely extended giving so much room. I came to myself for some reason - glad I did. I cannot imagine what it would have been like to crimp it all up, drop the car and see my AC lines riding on the control arm.  You can tell from the photos how tight it all is. The number 10 hose fitting is almost at the very top of the compressor and comes as close as possible to the block but there is just enough room to turn the nut. You can tell from the photos how tight it all is. The number 10 hose fitting is almost at the very top of the compressor and comes as close as possible to the block but there is just enough room to turn the nut.Now for the big reveal - time to put a vacuum on this thing and see how we did on these lines! Everything was pretty straight forward. I have never dealt with AC before in my life and I am a complete novice but here we go. 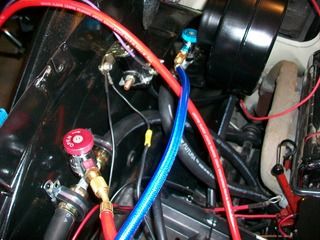 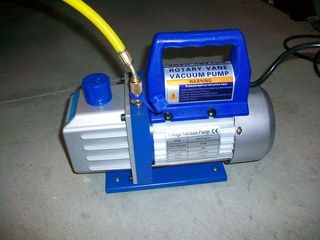 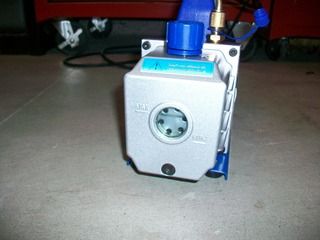 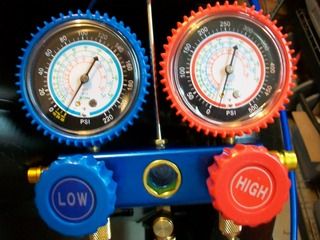 We hooked up the lines correctly, filled the new vacuum pump with oil, turned on the pump, and opened the valves and the lines at the ports. The vacuum held steady and while I did not want to do a full evacuation (30-45 minutes, but that will come later when I am ready to install refrigerant) I did want to check to see if my lines were sealed up well. After all, we have a novice here with a vise mounted crimping tool, with 16 places where we had to make a crimp to the hoses. The pump was run for about 5 minutes and then the valves were closed at the gauges to seal off the pressure from the pump but show the pressure from the AC lines in the car. I checked on the gauge about 30 minutes later - no needle movement! This morning I checked on it again. We had moved a whole 1 psi but since the temperature had dropped dramatically in the garage from last night to this morning I was not alarmed at all. I believe we are sealed up and ready to go.
__________________
Lancaster, California Visit hotrodreverend.com to view hundreds of pictures and videos of the build of the 1955 Ford Club Sedan! |
|
|

|
|
|
#359 |
|
Member
Join Date: May 2016
Location: Moorpark, CA
Posts: 72
|
Hello Rev, I have been following your restoration of the 55 since it began. I cannot believe the level of details that you address. Since I have 56 Club waiting to be restored I find your dealings with the AC to be totally cool (pun intended) since I am SoCal. Fitting the Alt and AC compressor is a true art of packing things not as Henry built. Thank you for all of your pix and stories - Bob
|
|
|

|
|
|
#360 |
|
Senior Member
Join Date: May 2010
Location: Lancaster, CA
Posts: 917
|
FWIW, when I began this project a while back I had found quite a bit on the Y block Ford, build specs, and even quite a few pictures and videos. However, when it came to researching ideas on build ups and restoration "how-to's" for 55/56 Fords I found that information was scarce. Sometimes very scarce. There is quite a bit of information on Mustangs, Ford Trucks, Chevelles, Nova's, Tr-Five Chevies, 60's Mopar, etc. Try googling for information like the one in this thread (or some others on this site) on the internet - it is a needle in a haystack! Even YouTube has videos but 95% of them are about dealers selling a 55/56 Ford. I wish I had the time to video a little more but that would take some extra help and a whole lot more GB of space. Maybe when all is done I can do some voiceover with the stills and add in video of finished product. I would think that would be helpful.
Of course, the pictures are really what counts here. Most guys can relate to what I am posting - it's all real from the success stories to the failures.  Glad to hear from you and glad to see the extra work is a help to someone. Thankfully I am able to learn as I go as well and pick up helpful tips from some of our veterans here on the site.
__________________
Lancaster, California Visit hotrodreverend.com to view hundreds of pictures and videos of the build of the 1955 Ford Club Sedan! |
|
|

|
 |
«
Previous Thread
|
Next Thread
»
|
|
| Sponsored Links (Register now to hide all advertisements) |
|
|
All times are GMT -5. The time now is 10:33 PM.


 Linear Mode

