|
|||||||
| Sponsored Links (Register now to hide all advertisements) |
|
|
 |

|
Thread Tools | Display Modes |
|
|
#1 |
|
Member
Join Date: May 2010
Location: West TN
Posts: 63
|
Got this on the HAMB group also, but figured not all yall in that group.
It may be an alignment issue, but I cant find it. When the trunk is closed its not flush. It is up around the rear windshield, but starting about half way back its raised up. Pictures can explain better than I can. I have loosened the bolts holding the lid to the hinge, its as good as it will get. I have removed the locking mechanism pieces and re-installed, there is no adjustment left in them to allow it to fit better. Wonder if the thing is warped, or am I just missing something here. I can live with it for now, but if its something I overlooked I will correct it. There is enough gap in the curve of the trunk that the seal doesnt seal well enough to keep water out, so its a good size gap in places. The pictures are showing the trunk complete closed and latched, as good as I can get it in its current state. This is pretty flush here 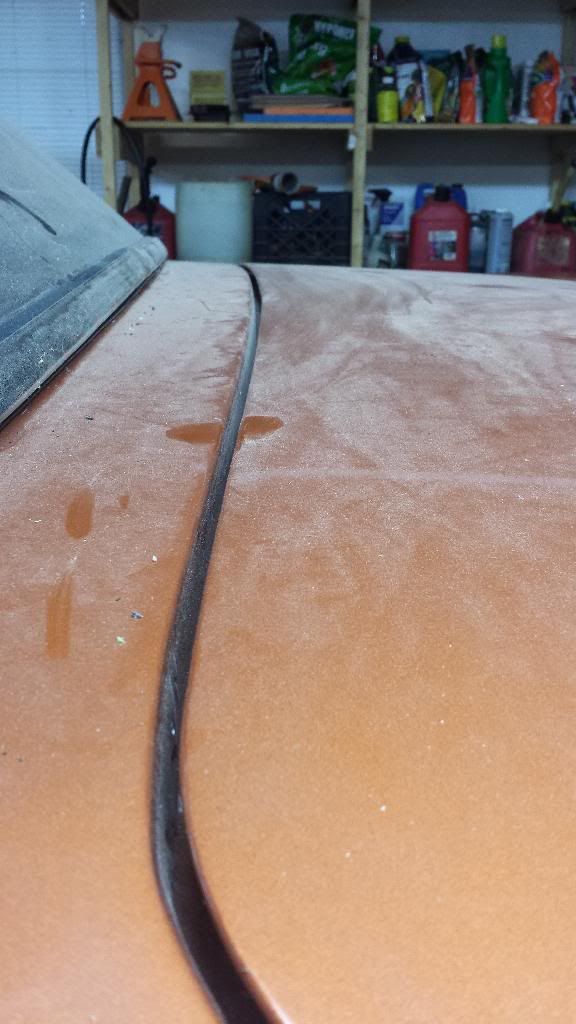 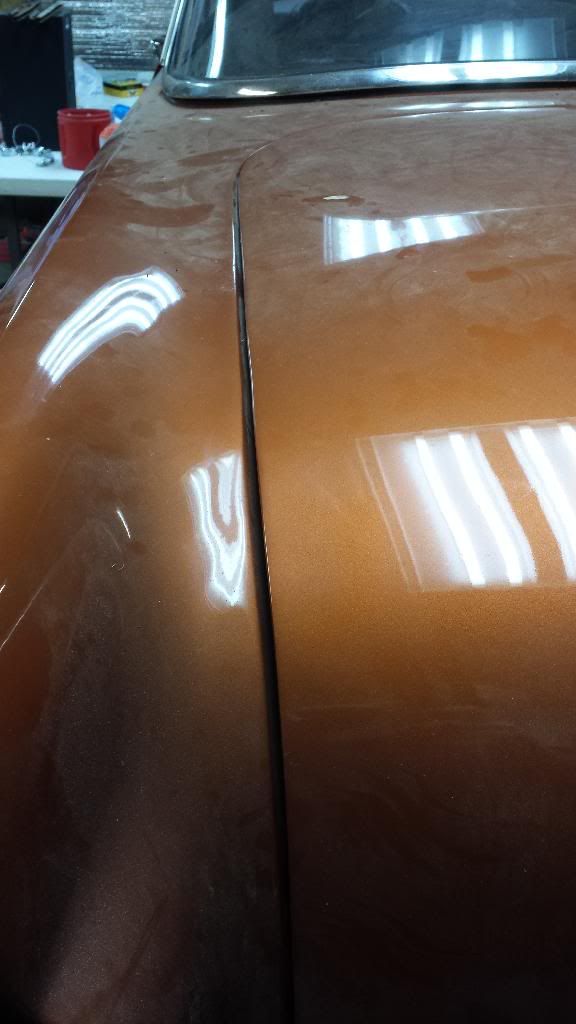 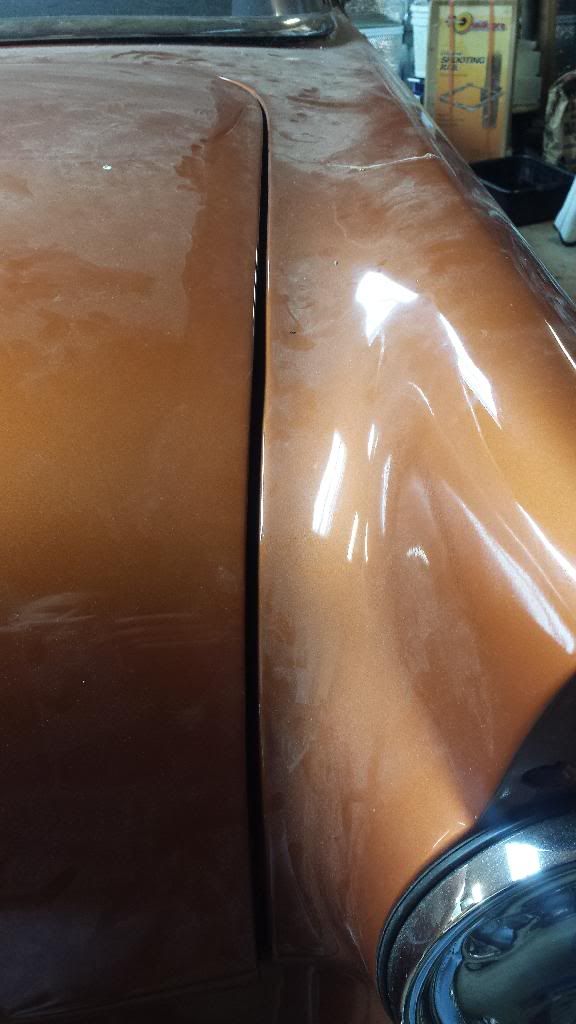 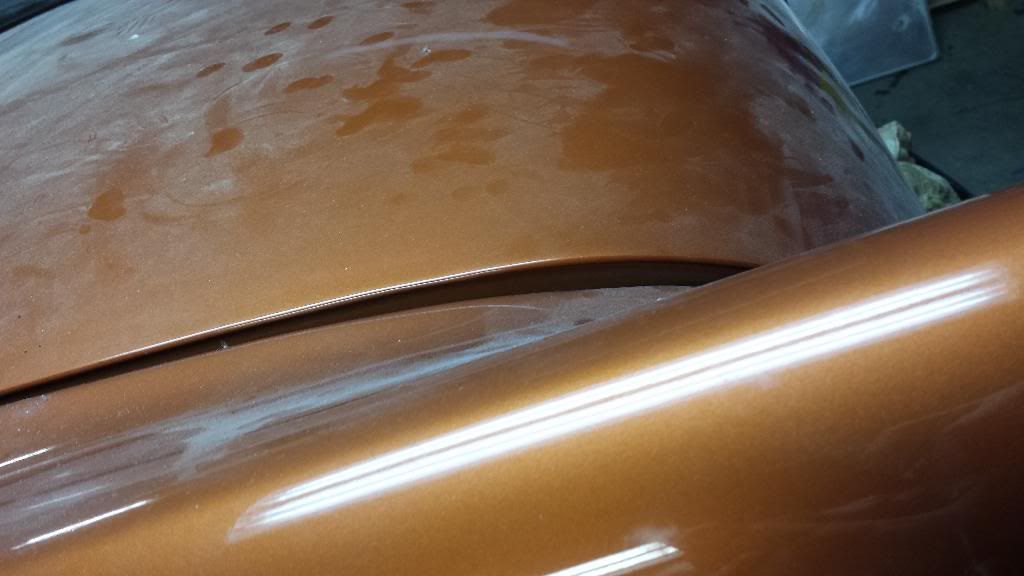 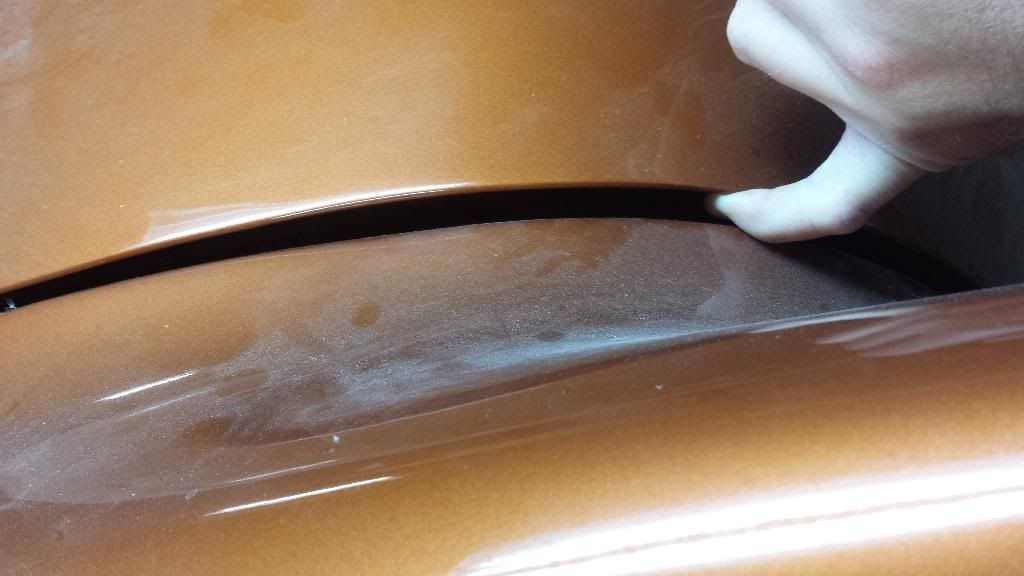 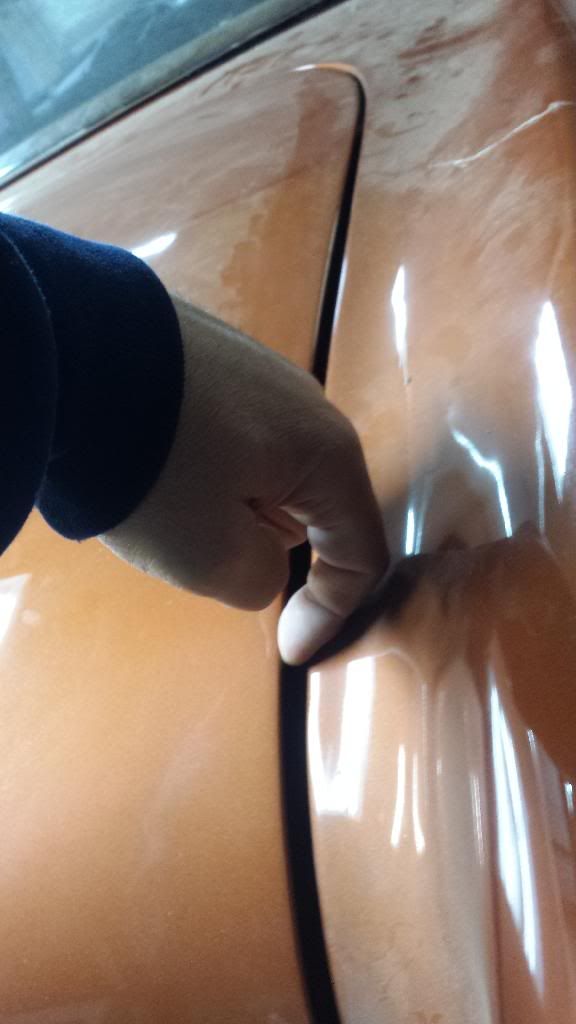 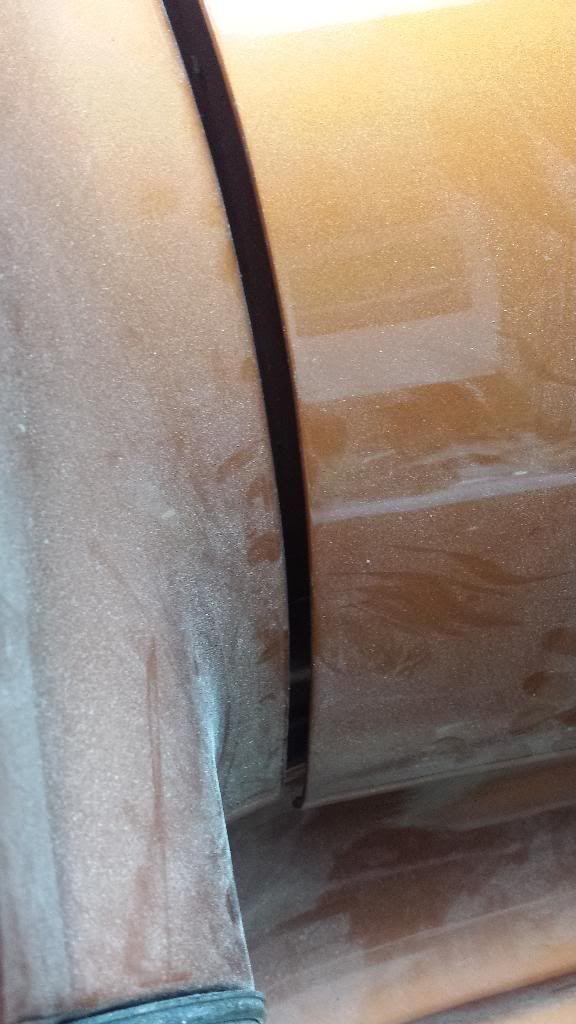 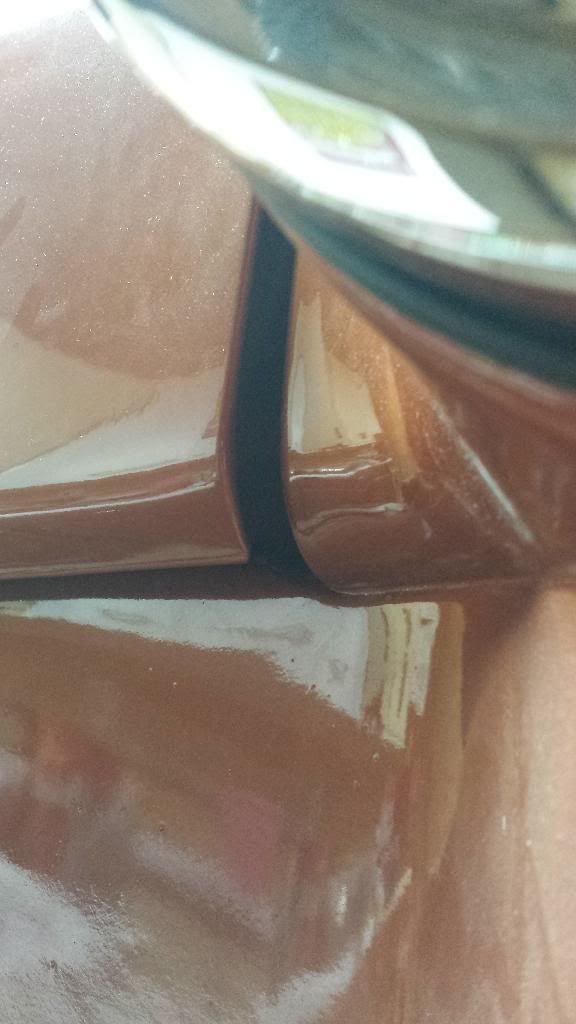 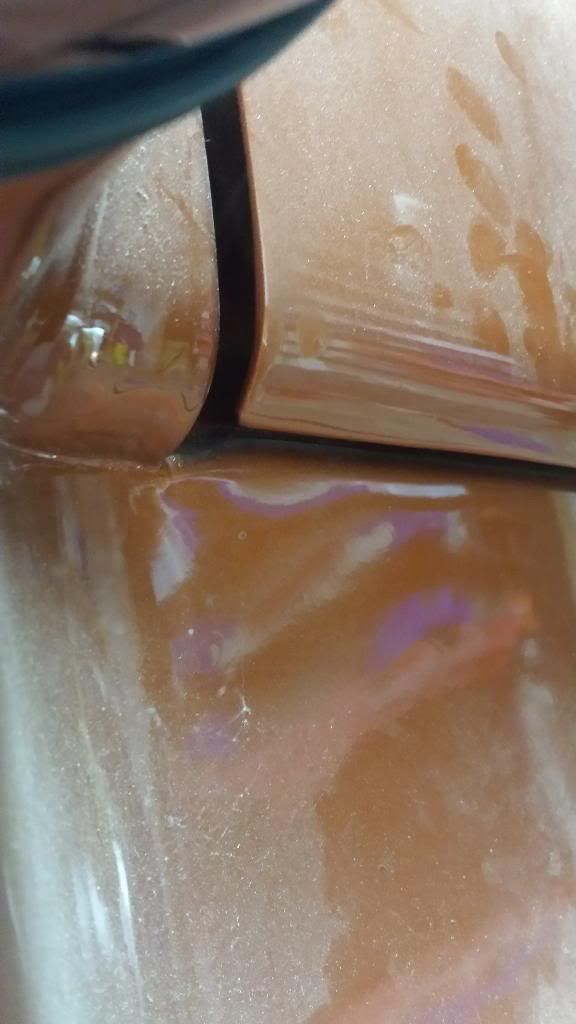 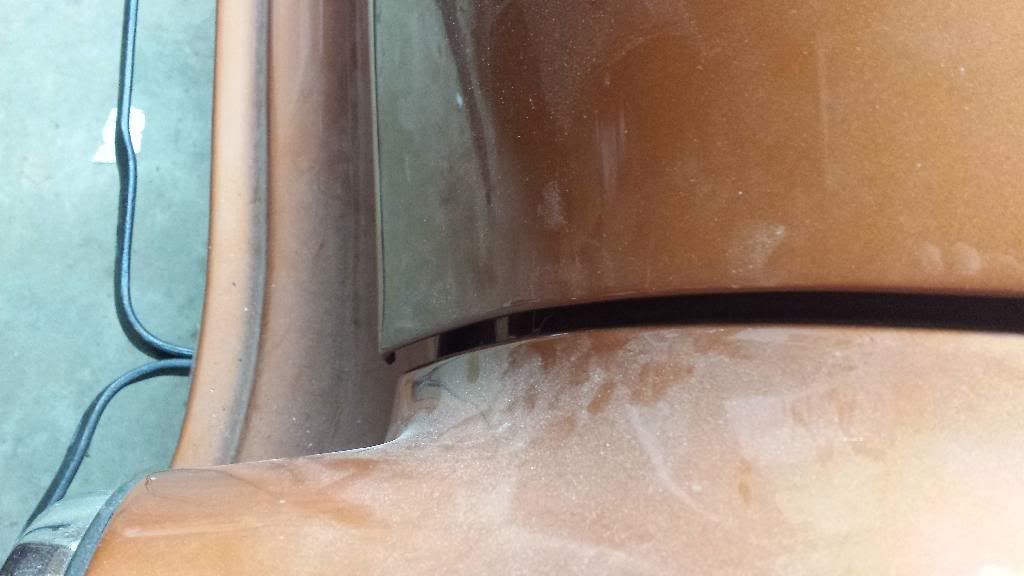 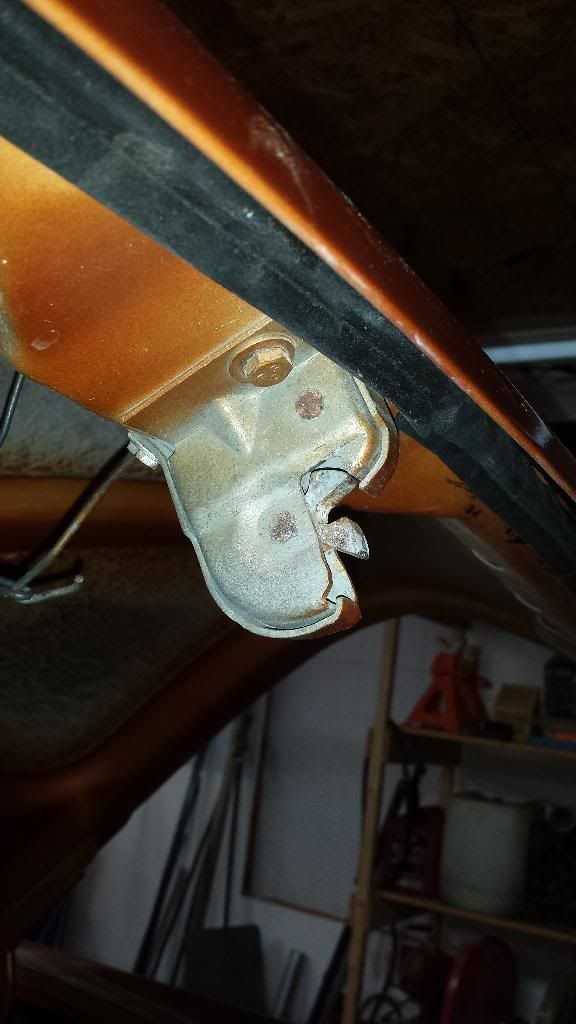 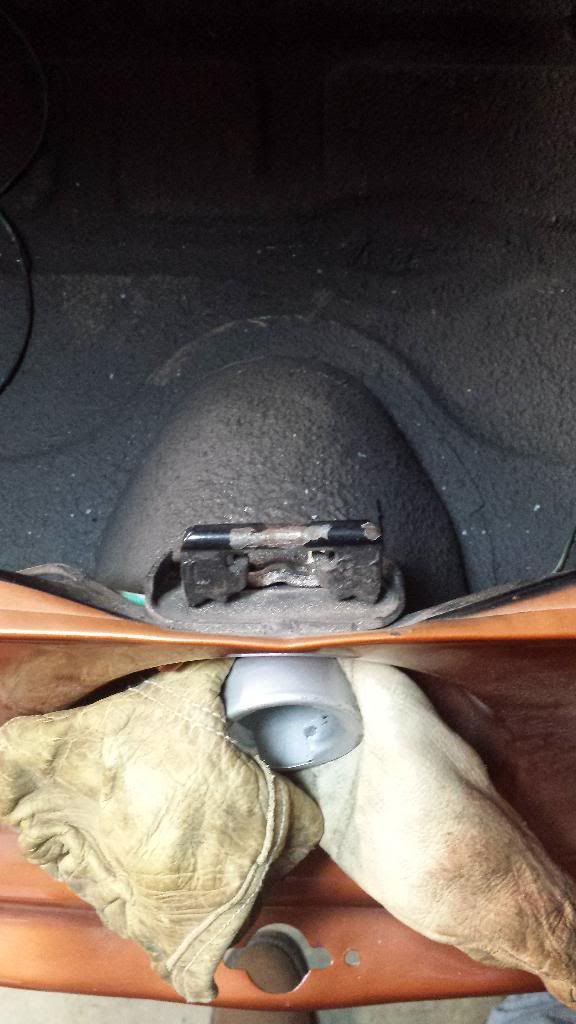
|
|
|

|
|
|
#2 |
|
Senior Member
Join Date: May 2010
Location: Palmer, Alaska
Posts: 1,575
|
have the quarter panels been replaced? if so, may not have been installed correctly.
|
|
|

|
| Sponsored Links (Register now to hide all advertisements) |
|
|
|
|
#3 |
|
Senior Member
Join Date: May 2010
Location: St. Michael, Minnesota
Posts: 1,713
|
Try moving the lid further ahead, even if you have to slot holes or make new holes. It looks like with a smaller gap in front at the top, the others may come closer to good. I commented once before here that my trunk lid doesn't appear to belong to the car its on.
|
|
|

|
|
|
#4 |
|
Senior Member
Join Date: Jul 2011
Location: Redondo Beach, CA
Posts: 5,849
|
It has always amused me while looking through my 1955 Ford Shop Manual seeing Body Alignment pictures of a guy with a board 'tweeking' a fender or something.
Anyway there is a section on "Major Alignment" of the Luggage Compartment Door where you may (or not) get some tips. They actually suggest bending it by placing a rubber mallet in various places. Don't know if that will help you but worth a look see... 
|
|
|

|
|
|
#5 |
|
Member
Join Date: May 2010
Location: West TN
Posts: 63
|
THe thought did cross my mind to slot the holes a little bigger to move it forward a little. The qrts have not been replaced that I know of. My parents owned the car since the 70's and it hasnt been replaced since they owned it. I have the manual and was laughing at the major adjustment last night. I might do that without a paintjob on it, but wont be trying it now

|
|
|

|
|
|
#6 |
|
Senior Member
Join Date: May 2010
Location: St. Michael, Minnesota
Posts: 1,713
|
Sponsored Links (Register now to hide all advertisements)
|
|
|

|
|
|
#7 |
|
Senior Member
Join Date: May 2010
Location: westbury ny
Posts: 854
|
that would be my suggestion place 2x4 at bottom near lock striker and lay on troubled side may need to bounce as the metal used on these cars is heavier then todays cars was the trunk damaged on the side that is problem [accident] also you may be able to slot the lower striker catch this will bring it down on both sides and change the lower lines as mentioned above this with the forward movement might give you an acceptable solution
|
|
|

|
|
|
#8 |
|
Senior Member
Join Date: Feb 2013
Location: SW Wyoming
Posts: 155
|
I will suggest that you also get it to fit as best you can with the striker removed. Then adjust the striker to latch properly. Sometimes the striker will hold panels all out of whack. Some guys will use them to align the panel when it is closed, but that will wear the latch and the striker out in short order.
__________________
Looking for bucket seats and rocker mouldings for full-size 1966 Mercury. |
|
|

|
|
|
#9 | |
|
Senior Member
Join Date: May 2010
Location: SW WI
Posts: 359
|
Quote:
|
|
|
|

|
|
|
#10 |
|
Senior Member
Join Date: May 2010
Location: westbury ny
Posts: 854
|
dumb question did it fit before it looks as though you can go forward towards rear window hinges could be bent also
|
|
|

|
|
|
#11 |
|
Senior Member
Join Date: Mar 2013
Location: Collinsville, OK
Posts: 171
|
Did you do a frame off and if so, was body supported enough to keep the back end from sagging? From the pictures it looks like the back has dropped down. Also, if a frame off was done, the body pads may need to be tweaked to help raise the rear of the body. If trunk weatherstrip isn't new you could remove it and check fit with out the seal in case it is holding up fit in upper half of lid.
I did a frame off on 55 Crown and had to adjust the body pads since the body mounts were replaced. Ben |
|
|

|
|
|
#12 |
|
Member
Join Date: May 2010
Location: West TN
Posts: 63
|
@crownvic55 - This was not a frame off this time, however back in the 90's when my dad and I did a half @ss restore on it we had the frame off. That was many moons ago, so as to the support question, I really dont know. We were both novices so my guess would be it wasnt supported as well as it could have been. The seal is new, however the shop that installed it after paint didnt get it perfectly aligned so with the current gap in there right now you can see daylight with it closed, meaning it would likely leak some. If the weatherstrop was aligned just right, it might have sealed, although not as good as if the trunk shut all the way down like it should. I think the trunk weatherstrip is pretty cheap so it may get pulled and redone while I work on this.
@frank - I dont remember it being that "off" but there were a lot of things that werent perfect before it went to the body shop. I need to dig out my pictures as I took them of everything before shipping it off, it may tell more. @Dave & s55 - I did remove the lower latch which is 2 bolts and I could push it down further. It still wasnt perfect but better. I need to get a helper as it was hard to hold it down and look at the gaps. I will try this first and see. There is no more adjustment available in the latch currently, without modifying something. I want to get it as close as I can with a good seal, but after the situation I went through (2 years of PAIN) with 2 body shops to get the paint job, I wont do anything right now that will affect the paint. The paint is FAR from perfect but I was without my car for 2 years (supposed to be 3 months) and barely got it back, lawyer involved etc, and at this point I want to get it together and drive it a little while |
|
|

|
|
|
#13 |
|
Senior Member
Join Date: Feb 2013
Location: SW Wyoming
Posts: 155
|
Yes, I remember the thread on the HAMB. I had a '56 Mainline painted dang near the same color as yours, back when I was a 17 year old know-it-all (1978). Good to see you are working on it, I really like '55-'56 FoRds. Big cars with round tail lights...yes.
__________________
Looking for bucket seats and rocker mouldings for full-size 1966 Mercury. |
|
|

|
|
|
#14 | |
|
Senior Member
Join Date: May 2010
Location: Willetton, West Australia
Posts: 478
|
I made the mistake of repairing the trunk lid and then painting the inside and not fully fitting it up. Don't know how or why, but my trunk lid looked like it didn't belong. Had to get the hammer out and knock it into shape. The thing to remember is that these old cars were made to be knocked and bent to shape. The metal is soft compared to today's cars and will fit with some gentle persuasion.
__________________
Rick West Australia 1958 Ford Mainline Utility, 1955 Ford Tudor Sedan Quote:
|
|
|
|

|
|
|
#15 |
|
Senior Member
Join Date: May 2010
Location: Granite City, Illinois
Posts: 3,008
|
My '55 doesn't have that much of a gap at the front of the deck lid. If you can loosen the bolts on your hinges and slide the deck lid forward about as much as it is sticking out in the back, that might help quite a bit.
|
|
|

|
|
|
#16 |
|
Senior Member
Join Date: May 2010
Location: Granite City, Illinois
Posts: 3,008
|
It appears that you have excellent height adjustment already, so don't loosen the bolts that mount the hinges vertically. I would try loosening the bolts under the deck lid and then try to slide the lid forward on the hinges. Put a old piece of carpet or something between the lid and body to protect it in case you slide too far then carefully close without the carpet slowly to inspect alignment
|
|
|

|
|
|
#17 |
|
Senior Member
Join Date: May 2010
Location: westbury ny
Posts: 854
|
you could also use masking tape on the edge I prefer the blue painters tape its less sticky and less likely to peel the paint
|
|
|

|
|
|
#18 |
|
Member
Join Date: May 2010
Location: West TN
Posts: 63
|
Out here fiddling with it. I loosened the bolts holding the lid to the hinge, it will actually slide forward some on the drivers side, actually a lot. I can slide it far enough that it would rub paint when closing. Pass side is tapped out, no room to slide forward.
Yall got me thinking about the seal. I removed the trunk latch again and I can push the lid down to be much closer to where it should be, but it has resistance if I dont force it. You cant see the seal good at the edge between the lid and windshield but I was feeling it under there and the seal is all twisted under there. So the seal has a lip that should fit the lip of the car ( as yall know), but its twised in a manner that its just like having a 3/4" hunk of solid rubber in there when you close the lid. So I think the resistance (at least some of it) is the seal in there how it is. I think the next step may be ripping out the seal and see where it is then. I know I can slide one side up to get real close, the other side needs work, maybe just making the hinge holes a hair longer. |
|
|

|
|
|
#19 |
|
Senior Member
Join Date: May 2010
Location: Phoenix,AZ
Posts: 1,417
|
If you used a Dennis Carpenter seal don't order another one,sadly they have been outsourcing get one from Steele Rubber all USA made.
|
|
|

|
|
|
#20 |
|
Senior Member
Join Date: May 2010
Location: westbury ny
Posts: 854
|
how does the front edge line up with the cowl between window and trunk you may be able to raise the hinges from in the trunk to raise the front to clear the strip
|
|
|

|
 |
«
Previous Thread
|
Next Thread
»
|
|
| Sponsored Links (Register now to hide all advertisements) |
|
|
All times are GMT -5. The time now is 11:20 PM.


 Linear Mode

