|
|||||||


| Sponsored Links (Register now to hide all advertisements) |
|
|
 |

|
Thread Tools | Display Modes |
 10-20-2011, 02:57 PM
|
#1 |
|
Senior Member
Join Date: Feb 2011
Location: NNNNNNNNJJJJJJJJJJ
Posts: 6,790
|
Can anyone send me a few photos of their cab being assembled? Particularly from the door stops back? (maybe a web page?)
I am roughing in the body on my frame- installed the cowl last night and doors. Need to know where the frame wood sits and if it is shimmed and where to make it level/even with the doors. my email is [email protected] would like to rough in the rear as soon as I know what to do. Thank you. |

|

|
|
10-20-2011, 04:21 PM
|
#2 |
|
Senior Member

Join Date: May 2010
Posts: 130
|
What year car? New wood or original wood? If new wood, then who made it? Did the car come in pieces or did you disassemble it? Do you have the four triangle pieces for the door posts? Have you looked at the Cabriolet club's Cabrioletter? There are some great articles in there on what exactly to do to adjust/trim your wood to fit along with plenty of measurements.
I am asking all these questions because everything (in my opinion), on a 68B, starts with fitting the door post wood to the correct height, angle, and twist. The cowl and doors are then adjusted to match the door post. Then the rear quarters are also adjusted to the door post. I can help you with a 68B, but I am useless if you have a 68C. |
|
|
|
| Sponsored Links (Register now to hide all advertisements) |
|
|
|
10-20-2011, 11:45 PM
|
#3 |
|
Senior Member
Join Date: Feb 2011
Location: NNNNNNNNJJJJJJJJJJ
Posts: 6,790
|
68B-original wood and no, I didn't pull it apart. Bought the body in pieces. I see 2 triangle pieces for the doorposts, but not 4.
I joined the cabriolet club, but never recd. anything beyond 1 set of papers that mentioned the articles. How do you recv the reg newsletters? my email is [email protected], if you might have a few photos to send? thank you for your help. |
|
|
|
|
10-21-2011, 01:01 AM
|
#4 |
|
Senior Member
Join Date: Aug 2011
Location: Millbrae, CA
Posts: 504
|
I just subscribed to this thread. I am about at this same point on my 68A and looking for guidance, too. The car was purchased new by my father in '29, but he gave it to his mother after only a couple years and I got it in '58. We replaced the rotted back half of the wood rails around '62, and did new top bows then....but the body was never fitted properly after my grandmother's many hard miles of northern CA driving in the '30s and '40s and much time out in the weather. Car and body were fully disassembled about 20 years ago (storage constraints), got a Cubel wood kit about 15 years ago. Finally retired, I am putting it back together. Frame is on a stand with leveling bolts.
Guess I have to start reviewing my Cabrioletter back issues. I just did not remember any particular issues with a lot of guidance on wood assembly. It is feeling like a challenge to not make irretrievable mistakes in cutting or drilling the replacement wood where it is not quite like the original, i.e., stepped cross braces, different widths from my rotted original wood. ...but having some original wood, even heavily rotted partial pieces is a help, and rusty 'swiss cheese' sheetmetal is useful too. ...wish I had more. Getting the B post properly located is my big worry. I foresee a lot of temporary assembly, measuring, fitting, testing, disassembly, etc. before ever cutting the notch for the B post. I hope this thread draws more comments, advice and photos. frame on stand, with rails on top, but not fitted to lay flat 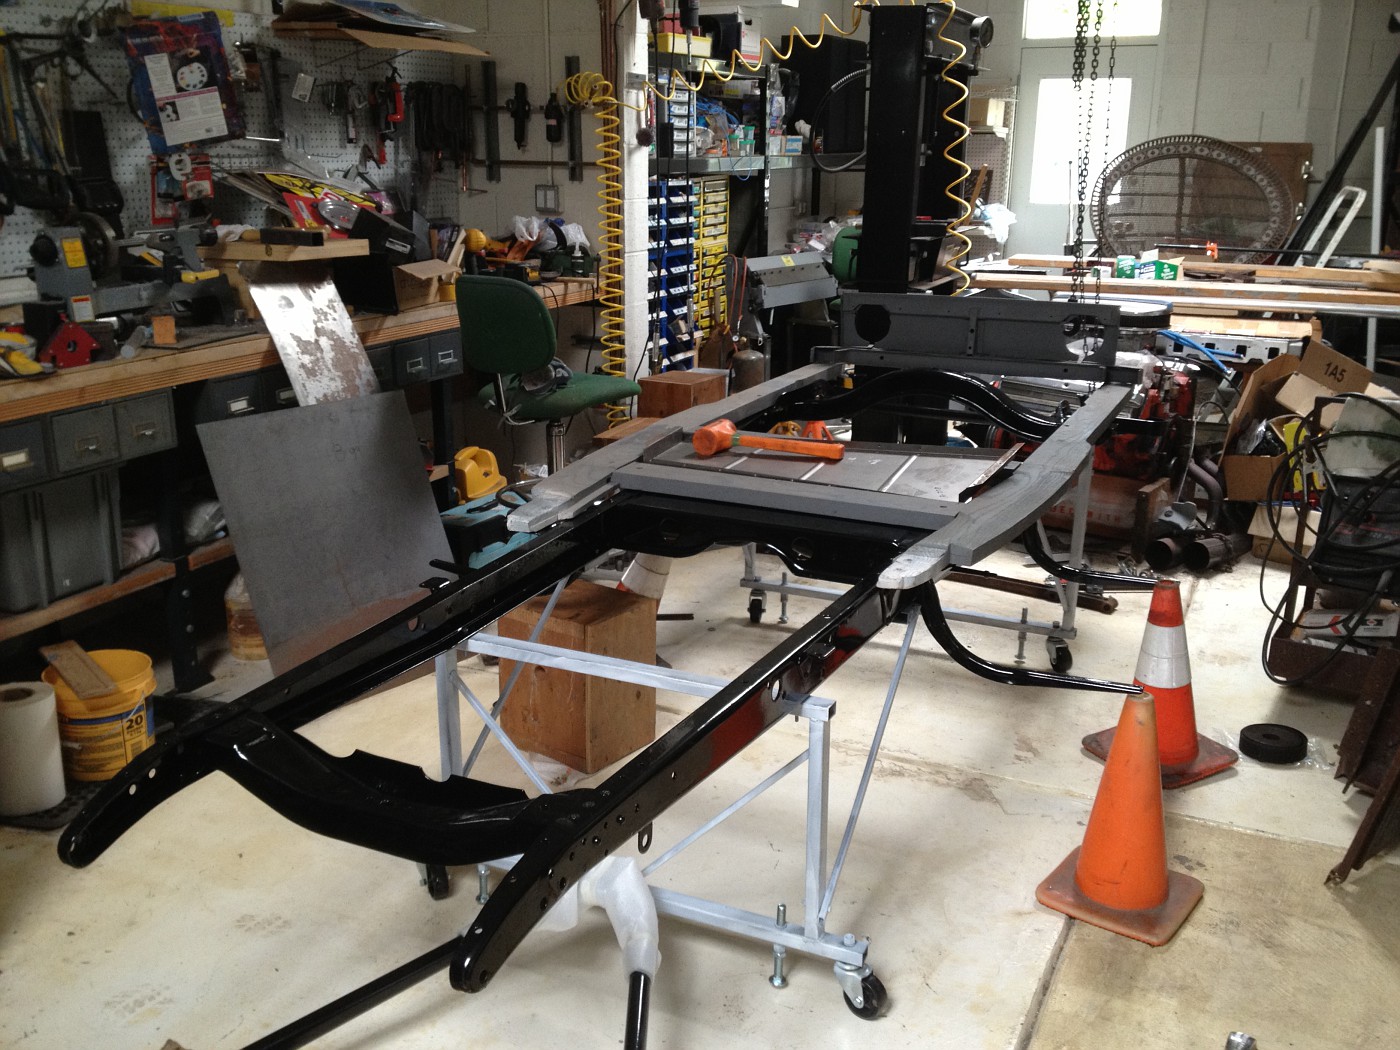
Last edited by Russ B; 10-21-2011 at 01:08 AM. Reason: add photo |
|
|
|
|
10-21-2011, 05:44 AM
|
#5 |
|
Senior Member
Join Date: May 2010
Location: South East NJ
Posts: 3,398
|
Good luck with cubel wood.
Larry, the owner of the cab club, had published a nice article in the newsletter many years ago. It was a multipart article that takes you through assembling a 68b from a pile. Unfortunately Larry refuses to participate online and would prefer to sell you an expensive complete set of back issues. So you might be able to find someone to scan in the article and email it. Calling Larry directly might be informative too. Learning how to search Bob cabriolet website is helpfull since many topics about the cabriolet have been covered already. |
|
|
|
|
10-21-2011, 05:54 AM
|
#6 |
|
Senior Member
Join Date: May 2010
Posts: 130
|
Sponsored Links (Register now to hide all advertisements)
Measure 26" from the back of the cowl to the front of the door post wood. The notch is 1 9/16 wide and 1 15/16 (or just 15/16?) deep, measure in from the bottom of the wood sill. Important, the notch will actually be further back than the 26" due to the shape of the door post. The Cabrioletters have a multi-part series that takes you through all the steps on fitting new wood and assembly. I will look later tonight for which letters you need to buy and the contact information. But, I would suggest buying all the back copies for 1 price. Ronn, if you haven't already looked, try this website: http://www.cabriolet.modelahouse.com/ Click on Cabriolet pictures or Picture Gallery. There are tons of pictures that may get you started. Having original wood is a great start, if it is in good condition and not warped out of shape. Also, there should be 4 triangle pieces with different part numbers for right and left side. Last edited by 30cabriolet; 10-21-2011 at 06:00 AM. |
|
|
|
|
10-21-2011, 07:17 PM
|
#7 |
|
Senior Member
Join Date: Aug 2011
Location: Millbrae, CA
Posts: 504
|
[QUOTE=30cabriolet;292704]"Getting the B post properly located is my big worry. I foresee a lot of temporary assembly, measuring, fitting, testing, disassembly, etc. before ever cutting the notch for the B post."
Measure 26" from the back of the cowl to the front of the door post wood. The notch is 1 9/16 wide and 1 15/16 (or just 15/16?) deep, measure in from the bottom of the wood sill. Important, the notch will actually be further back than the 26" due to the shape of the door post. The Cabrioletters have a multi-part series that takes you through all the steps on fitting new wood and assembly. I will look later tonight for which letters you need to buy and the contact information. But, I would suggest buying all the back copies for 1 Price. " Thanks. I found a reprint on the first article , about #112. I found my newsletters are scattered around. Will look for all. |
|
|
|
|
10-22-2011, 04:44 PM
|
#8 |
|
Senior Member
Join Date: Feb 2011
Location: NNNNNNNNJJJJJJJJJJ
Posts: 6,790
|
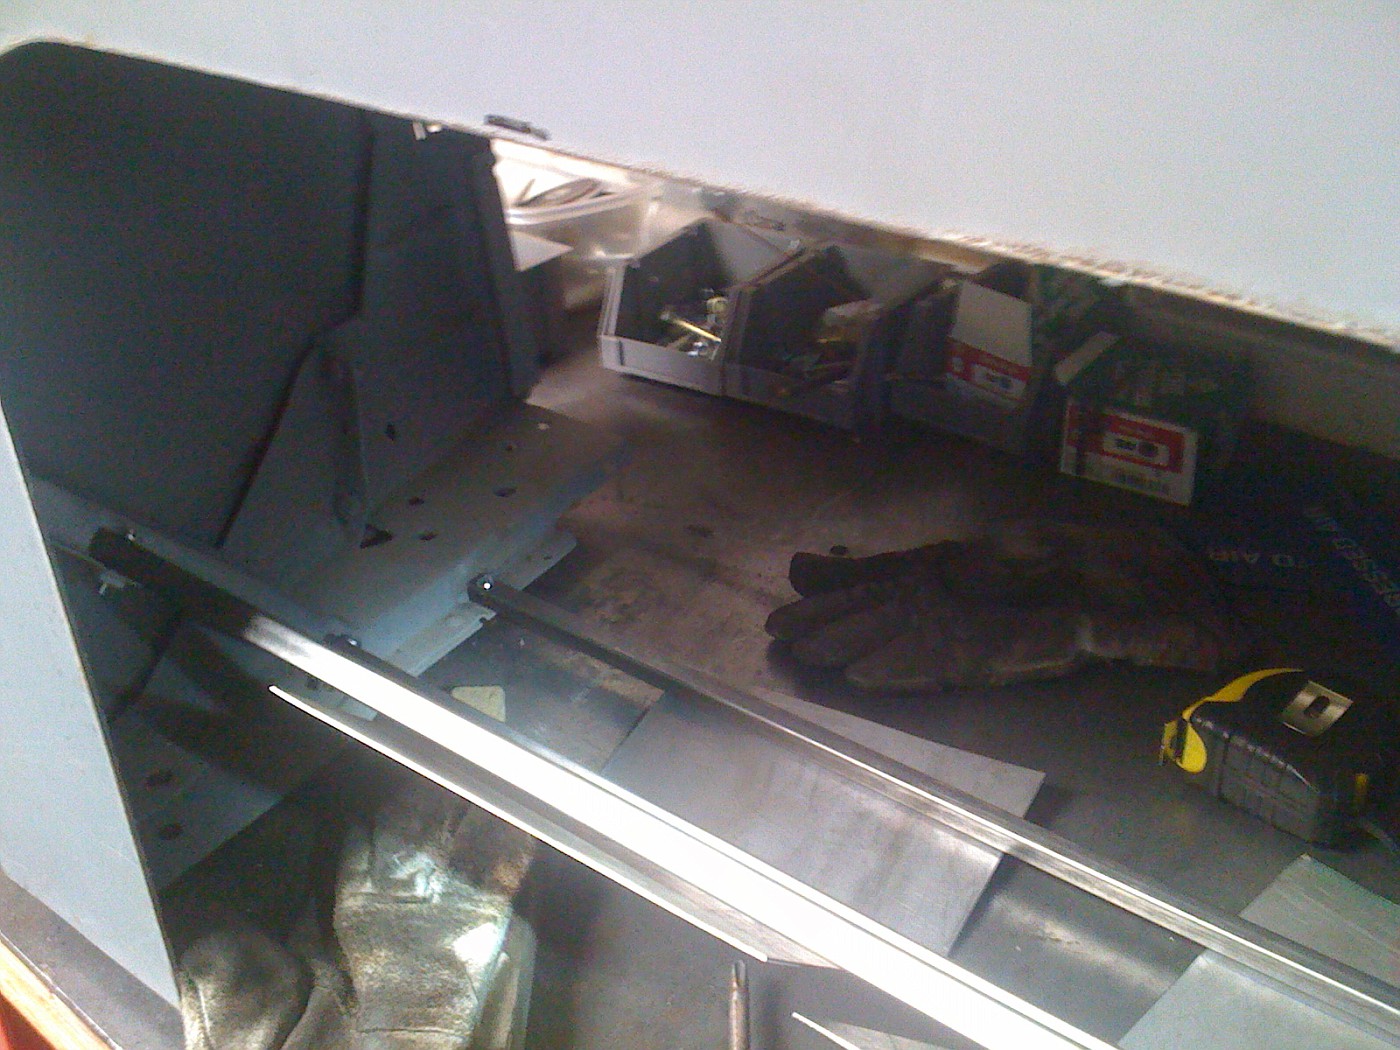
Russ, thank you for that photo. Looks like i am missing some wood. I guess I need some schematics of the basic framiing.
I did join the cabriolet club, but recd basically nothing and only a one time response. Don't even get the point of the club.... |
|
|
|
|
10-25-2011, 12:28 AM
|
#9 |
|
Senior Member
Join Date: Aug 2011
Location: Millbrae, CA
Posts: 504
|
I do not know how typical this is, but my replacement wood does not appear to be at all the same width (front to back) as my original front cross piece.
 For reference, I placed the Briggs Body tag on the old front cross piece over the nail holes from where I removed it. ...however, the new sheet metal seat floor pan, under the seat, and the second cross piece seem to fit together properly with the new front piece. ...and the new floor pan is the same size as my old one. 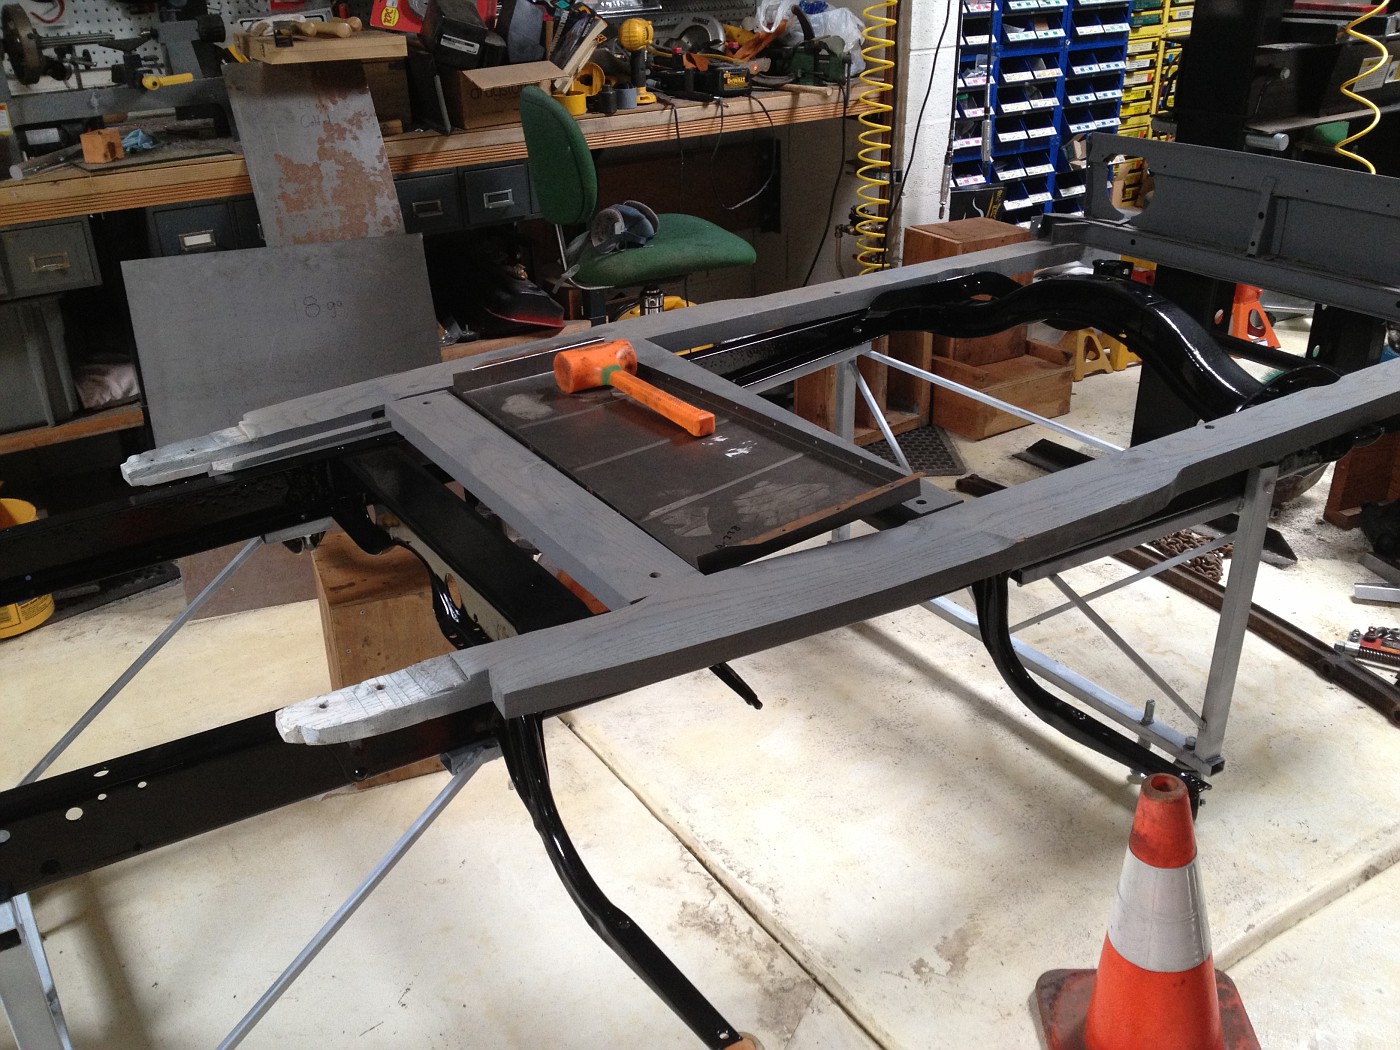 Note that my original piece has an angle iron support for the floorboard. The new piece besides being wider has a lip of wood at the back where the front of the seat floor plan will have to attach. I guess it is possible that my original front cross piece was made of two pieces of wood glued together and the back half fell off. I'll have to look for nail holes to match the floor pan. (in the next photo) The left side of my front cross piece is laid in position on top of the new wood. The bottom edge of the old wood is where the back of the floorboard will sit, and matches the edge of the new wood. 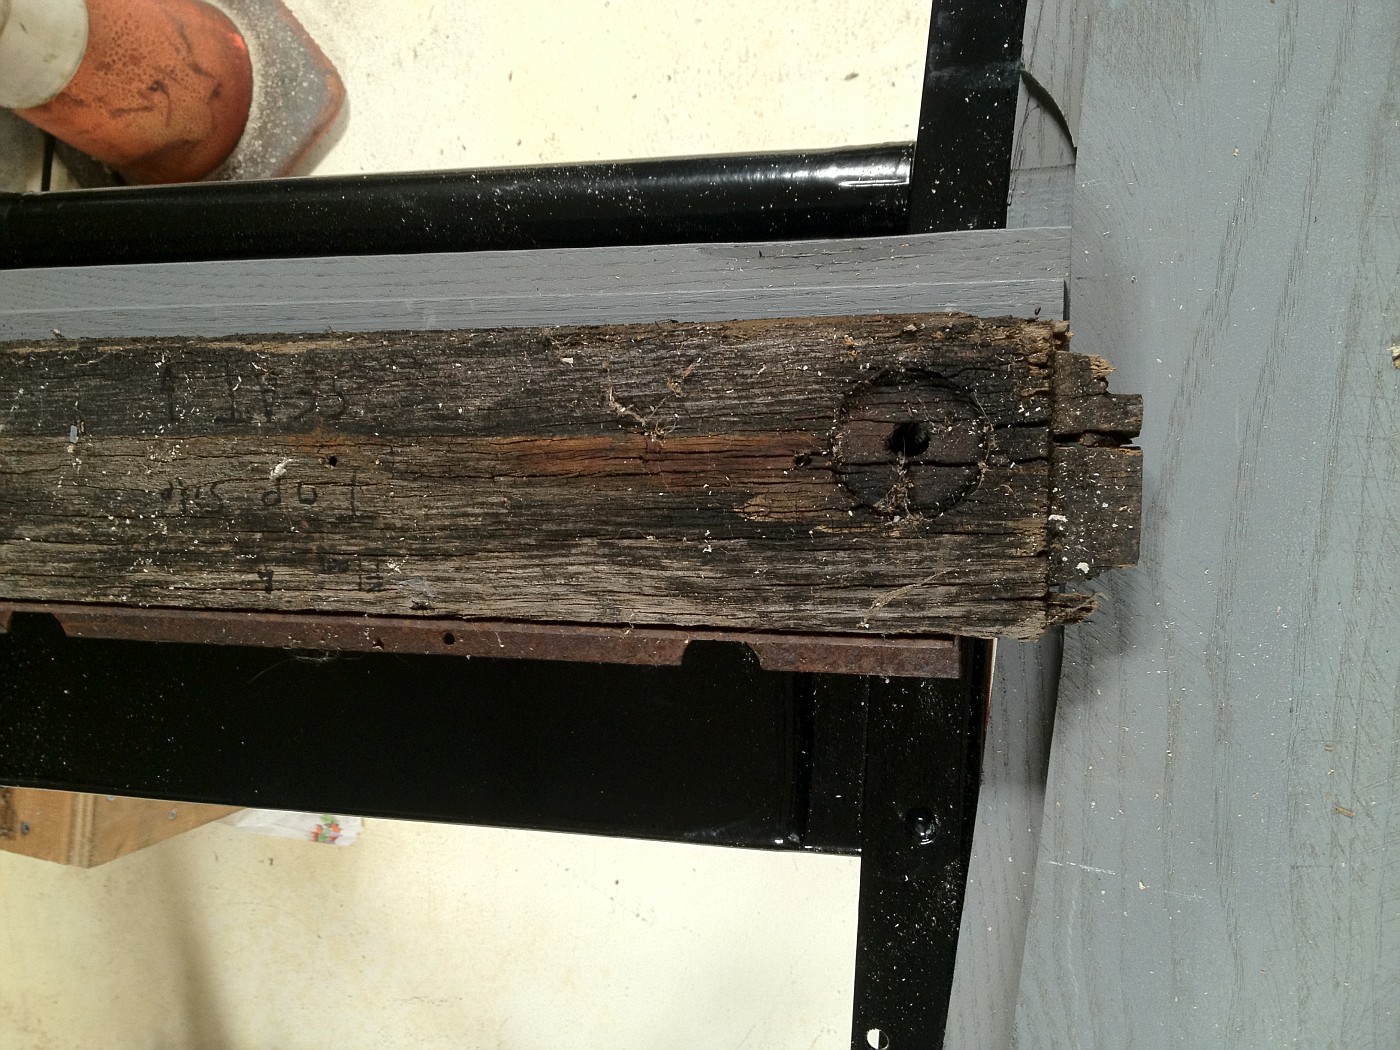 My plan is to move the angle iron from the old to the new piece. Any comments that might shed some light? I do not think the new front piece is placed backwards, is it? As I have the front cross piece now placed, the standard floor board seems like it would fit properly. I am still not cutting any wood yet, until I am absolutely sure of what I am doing. ...and a Ford Barn housekeeping question, as a new person here I am not sure whether i should be posting this on the original poster's thread or if I should be starting a new one. But for now I am posting here as we are both interested in the same topic. Please let me know if I am out of line. |
|
|
|
|
10-25-2011, 01:07 AM
|
#10 | |
|
Senior Member

Join Date: May 2010
Location: South Florida
Posts: 14,054
 |
Quote:
While your answers are not specific to the door stops, he does ask about assembly photos and you do have photos and questions that would be common to the person building the cabby. I don't see any problem.
__________________
What's right about America is that although we have a mess of problems, we have great capacity - intellect and resources - to do some thing about them. - Henry Ford II |
|
|
|
|

|
10-25-2011, 04:55 AM
|
#11 |
|
Senior Member
Join Date: May 2010
Posts: 130
|
Russ,
Looking at the photos above I can see between your wood and the frame rail. Is your wood sill sitting flat on the frame? If it is rocking on the rivets at the rear crossmember, you can countersink the spot where the rivets interfere with the wood allowing the sills to sit flat. If they still do not sit flat, then you need to check your frame for a bend. As for your other questions, I will PM you as this is gonna take some phone time to share info. |
|
|
|
|
10-25-2011, 05:31 AM
|
#12 |
|
Senior Member
Join Date: May 2010
Posts: 130
|
Found some old photos on my computer here at work. The second picture showing the rear of the wood is before I notched the wood as required to fit the quarter panels.
|
|
|
|
|
10-25-2011, 06:35 AM
|
#13 |
|
Senior Member
Join Date: May 2010
Posts: 130
|
And another thought, the wood for a fixed seat Cabriolet may be different than the wood for an adjustable seat car. I think, but I don't know, that the difference is in the #1 cross sill. You may have the wrong wood.
|
|
|
|
|
10-25-2011, 10:22 PM
|
#14 | |
|
Senior Member
Join Date: Aug 2011
Location: Millbrae, CA
Posts: 504
|
Quote:
I made some progress and stated fitting the under seat floor pan. 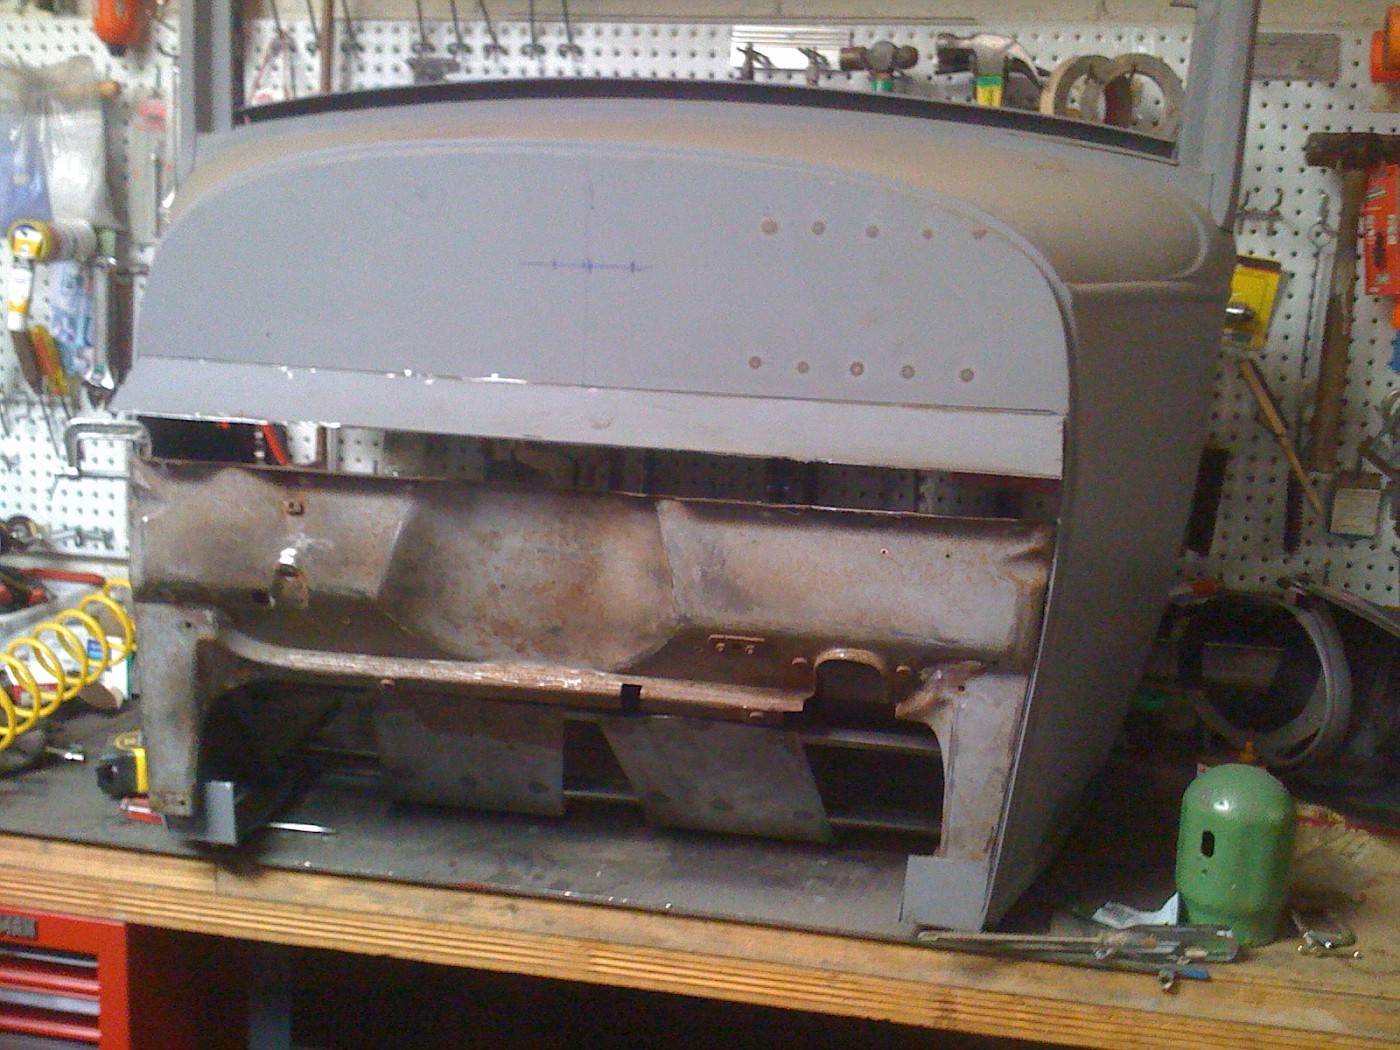 My original sheet metal pan mounted 5/8" further toward the front originally; but with the wood I have it is where it is, and the location does not impair fitting of anything else. I am thinking that perhaps Ford/Briggs made body wood design changes somewhat continuously as they did on many other parts of the car. If correct, that could mean my Cubel body wood kit represents a different point in time from when my car was built. The motor/frame number indicates an Aug 1, 1929 date. |
|
|
|
|
|
11-04-2011, 09:54 PM
|
#15 |
|
Senior Member
Join Date: Aug 2011
Location: Millbrae, CA
Posts: 504
|
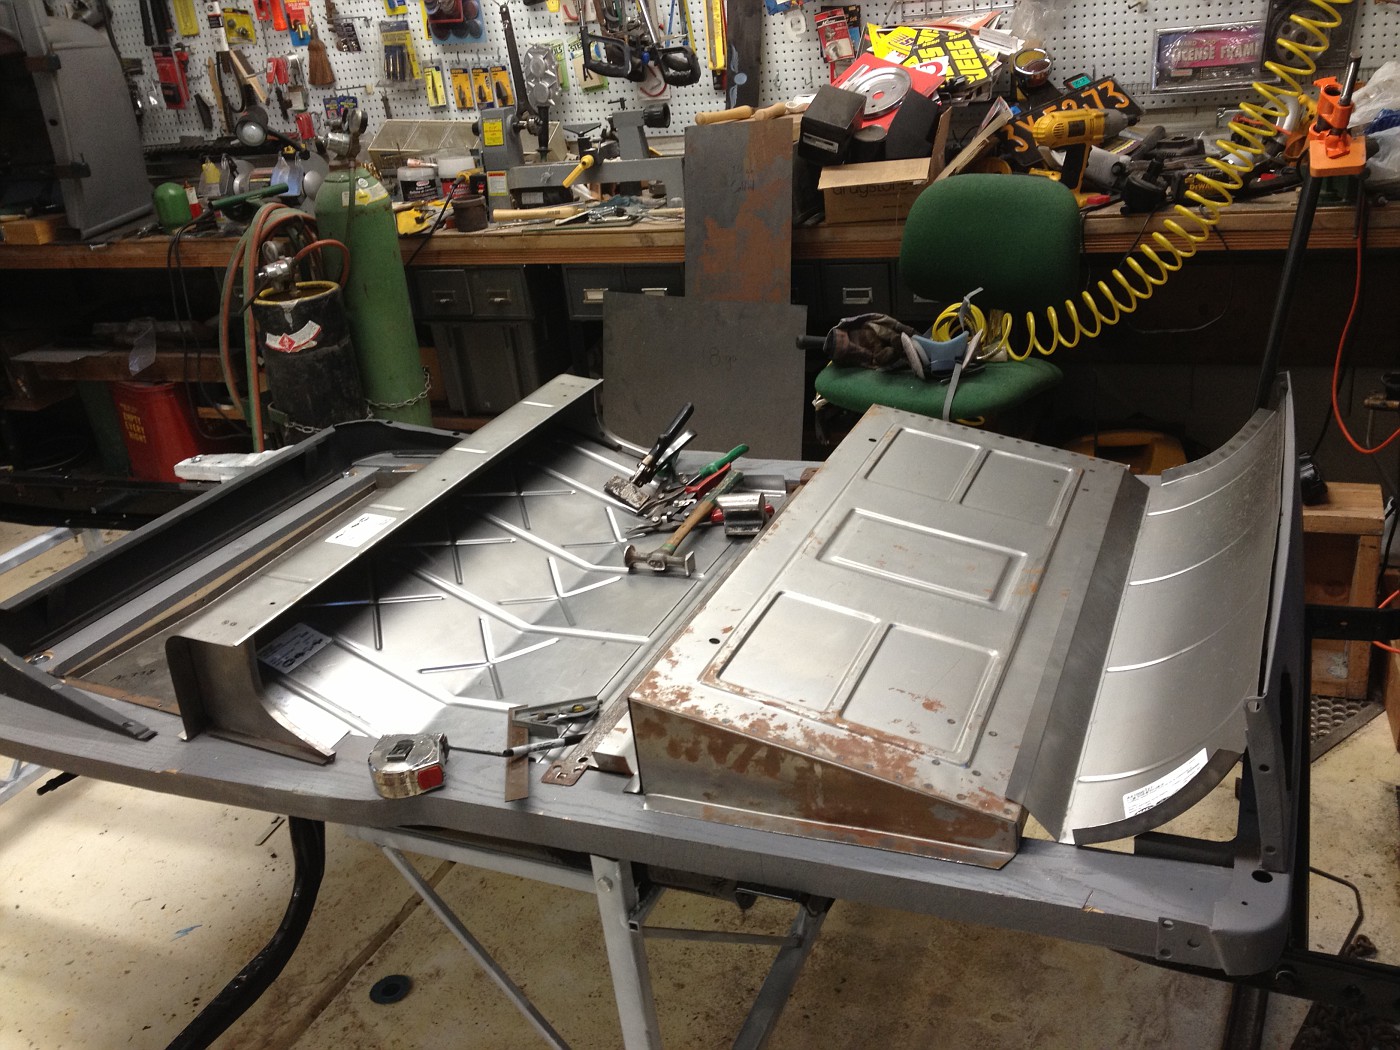
I am adding a photo showing the sheet metal that fits atop the wood sill rails of my '29.
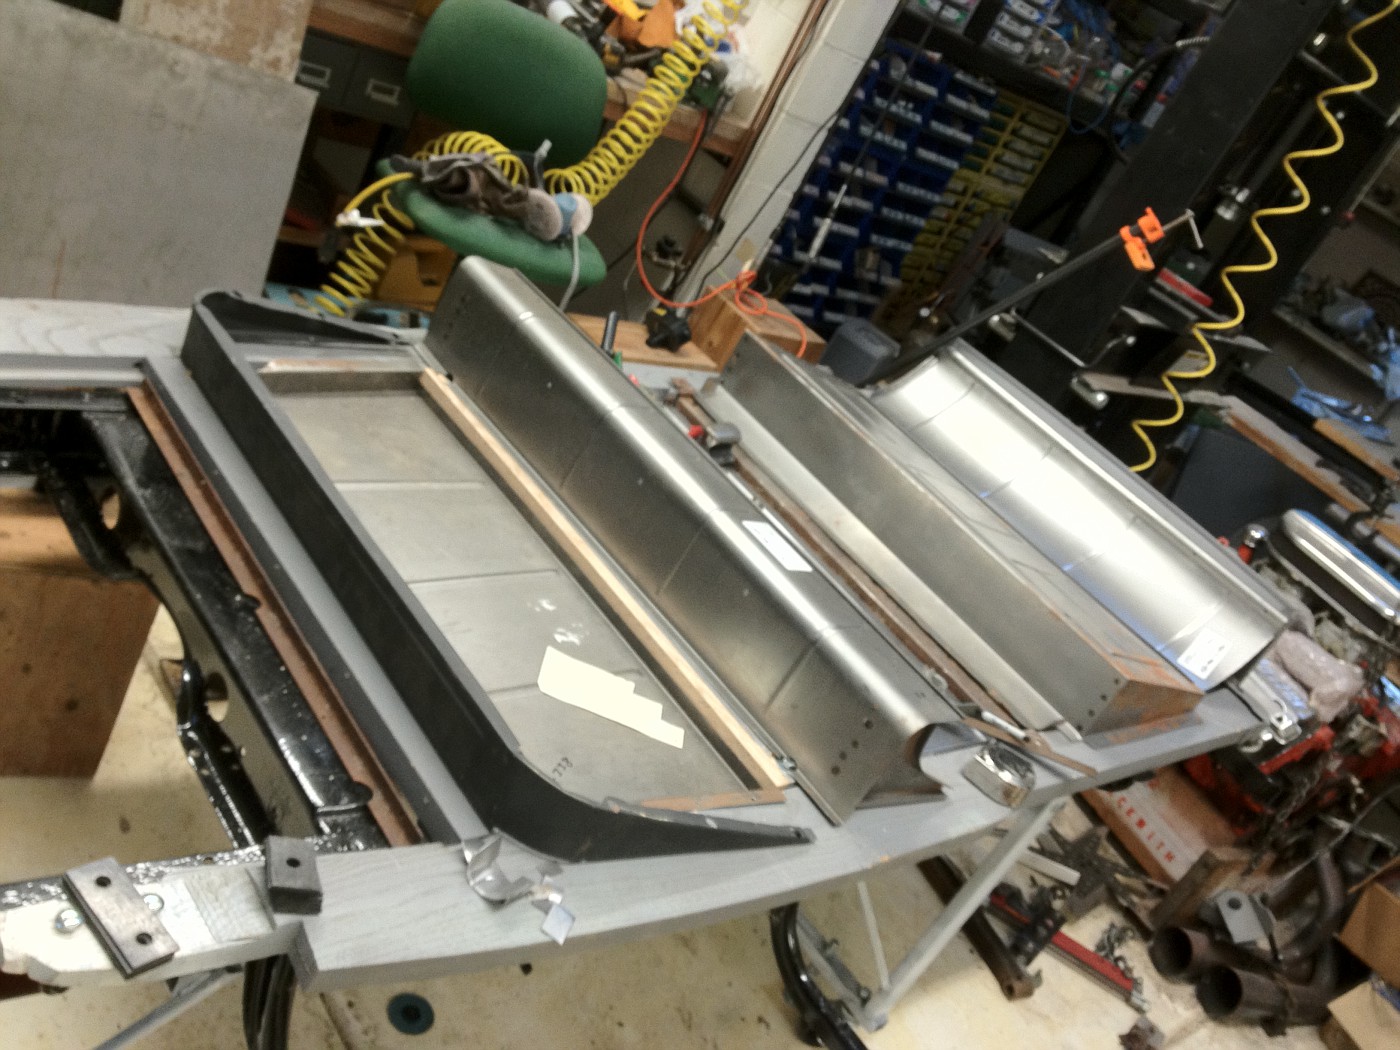 The metal is preliminarily fit only. It is new metal from MACs and as is typical, it needs work. The front seat bottom riser is original as is the metal cross sill. The little pile of sheet metal bits are mostly from the angle pan fitting, using my original swiss cheese piece as a guide. The most work is needed on the front seat back riser at this point. The side pieces need to be pie cut about 3/8" at the back and welded back together so that the angle pan can be fully fitted. My plan is to fully fit the sheet metal (seat back riser, angle pan, metal cross sill, rumble seat pan, and curved back piece), then temporarily pop rivet it together and in place before fitting the B pillar and rear quarters and rumble seat/deck lid. After the body is fitted, I would disassemble the upper sheet metal, remove the pop rivets, install the 3/16" waffle-bucked rivets, fully screw/nail in the floor pan sheet metal to the wood sills and paint that as an assembly. The remaining upper (body) sheet metal can be painted in separate pieces and then assembled, touching up any nuts/bolts scarred during assembly. Is that a reasonable approach? I also have a question about the metal cross sill. I sort of recall reading that it should be marked with assembly plant and possibly body assembly date information. I see no markings on the top side, is it marked on the bottom? I am guessing it should indicate a July 1929, mol, assembly in San Francisco, but so far I have found nothing. Where should I look? |
|
|
|
|
11-04-2011, 11:04 PM
|
#16 |
|
Senior Member

Join Date: May 2010
Location: Connecticut
Posts: 220
|
Great progress on your Cabriolet. I'm putting together an early '30 with a fixed front seat. I have yet to buy the sheet metal for the floor although I do have the under seat panel fitted. The first thing that came to mind was for you to pick up some Clecko fasteners instead of using pop rivets. They fit very tight and can easily be removed with special pliers. No drilling and enlarging the holes. Small screws could be used but don't come apart as fast as Clecko's. I'll have to double check and see if they fit the holes in my cross sill.
I was hoping the seat back riser would have been "fit and play" but it sounds like that may not be the case. A friend of mine with a mid-30 Cabriolet in the next town over has his seats out so I'll have to pick up the riser soon and compare it to his. I was fortunate to find a nice cross sill channel at Hershey this year. A quick check of the channel revealed no date or other markings. Cheers Rich
__________________
E30 68-B Cabriolet
|
|
|
|
|
11-05-2011, 12:39 PM
|
#17 | |
|
Senior Member
Join Date: Aug 2011
Location: Millbrae, CA
Posts: 504
|
Quote:
|
|
|
|
|
|
11-07-2011, 10:07 PM
|
#18 |
|
Senior Member
Join Date: Aug 2011
Location: Millbrae, CA
Posts: 504
|
The unmodified reproduction sheet metal front seat back riser, front straight up, tails too long:
 The reproduction metal is just sort-of close to start with. The riser is still 1/4" short after the modifications and 21 ga, but the overall shape is much closer to original, looks a lot more like the original does, and fits much better to the angle pan and sills. It would not be usable if a serious restoration were being attempted. after modification, angled back a bit and tails cut to proper length:  markup of piece showing changes needed: 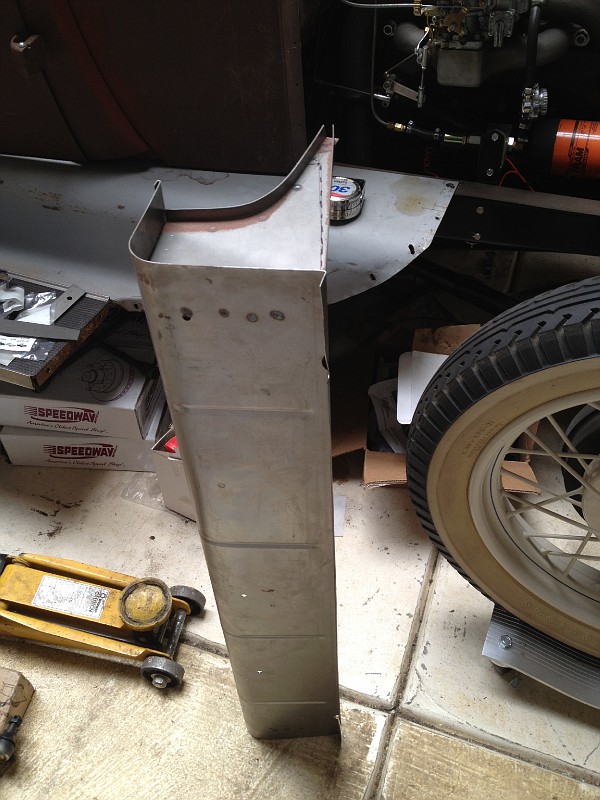 The lower flange was flattened, the excess metal was cut, and the lower flange was bent up on the dotted line. corrected side piece 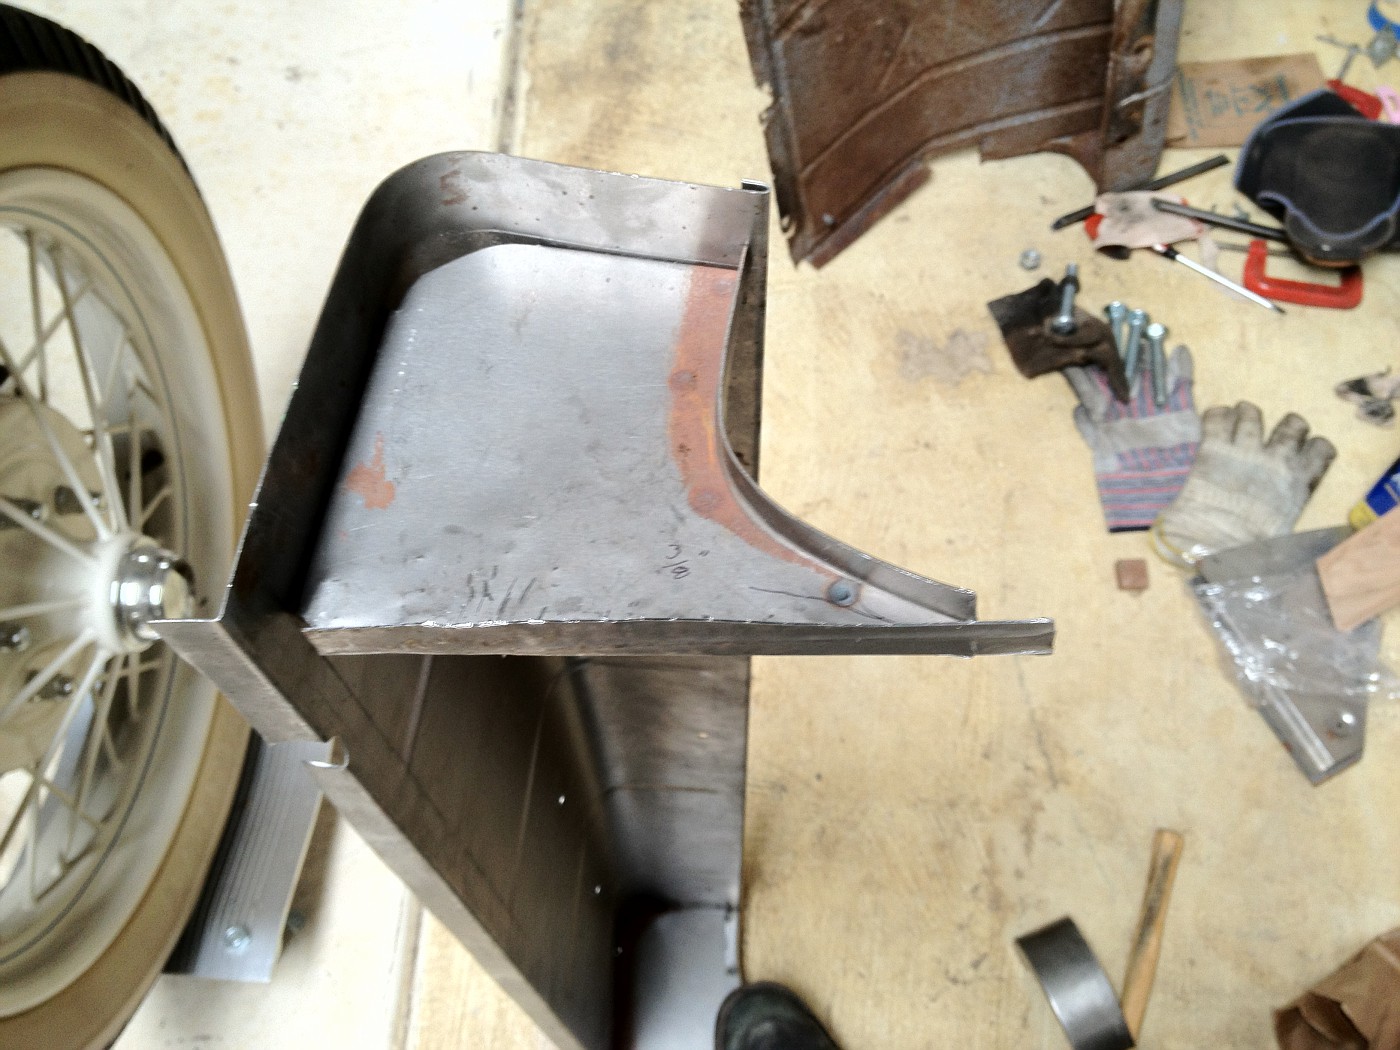
|
|
|
|
|
11-07-2011, 10:29 PM
|
#19 |
|
Senior Member
Join Date: Feb 2011
Location: NNNNNNNNJJJJJJJJJJ
Posts: 6,790
|
Russ, thank you for the photos!
A real big help. I didn't know there was a fixed seat and adjustable seat. Am thinking mine is adjustable. Looks like I am missing a piece or two also. |
|
|
|
|
11-08-2011, 12:42 AM
|
#20 | |
|
Senior Member
Join Date: Aug 2011
Location: Millbrae, CA
Posts: 504
|
Quote:
I guess the 68B had the adjustable seat option. I would think that would affect the package tray area as well. ...and maybe the triangle top pieces (turnbuckle brace), too?? You might take a few pics and post some to show all the parts that you have, and someone will likely be able to say what is missing. I am just slowly progressing on mine, and if you don't mind, I would plan to keep posting pics here on your thread of the body as it goes together. Getting the feedback from the folks who have already done it does help on getting it right. Russ |
|
|
|
|
|
«
Previous Thread
|
Next Thread
»
 Linear Mode

|
|

| Sponsored Links (Register now to hide all advertisements) |
|
|
All times are GMT -5. The time now is 02:22 PM.