|
|||||||


| Sponsored Links (Register now to hide all advertisements) |
|
|
 |

|
Thread Tools | Display Modes |
 09-16-2011, 06:44 AM
|
#21 |
|
Senior Member

Join Date: May 2010
Location: Direct Enclosed Transport Since 2006
Posts: 4,160
|
Nice Thread
 Glad to see there are still folks doing New Old School  Jim |

|

|
|
09-16-2011, 06:59 AM
|
#22 |
|
Senior Member

Join Date: May 2010
Location: Gwynn's Island Va
Posts: 1,389
|
Very good Find! I enjoyed seeing the progress your making and hope to see more as it comes along.
Wick |
|
|
|
| Sponsored Links (Register now to hide all advertisements) |
|
|
|
09-28-2011, 02:52 AM
|
#23 |
|
Senior Member

Join Date: May 2010
Location: Bellingham, Washington
Posts: 362
|
OKAY, so today/this evening, my roommate and I got much of the chassis assembled.
Started around 6PM and finished around 10PM with what we did. All we accomplished tonight was: 1. Mount axles and the springs to the frame 2. Mount engine to the Float-a-Motor (WORST INSTRUCTIONS EVER!) 3. Lose tools in the driveway 4. Clean the garage enough to get the whole shebang into the garage Tomorrow will be mount radiator, install new water pump, mount radiator shroud and all of the hosery and brake shafts...  It turns (pushed it to the road to spin it around and nose it in to mount engine. I am very tired as I had a Chinese test at 10AM this morning and then found this frustrating. I will post photos once I find my battery charger. I would have taken photos of it in progress, but my battery was dead. Hopefully you like what you (will eventually) see!
|
|
|
|
|
09-29-2011, 06:09 AM
|
#24 |
|
Senior Member

Join Date: Oct 2010
Location: Grafton, MA
Posts: 1,226
|
Way to go! We are all waiting to see some pictures once you've had some sleep and recharged your batteries (yours and the camera's).
|
|
|
|
|
10-21-2011, 12:14 AM
|
#25 |
|
Senior Member
Join Date: May 2010
Location: Bellingham, Washington
Posts: 362
|
So, I got the engine, axles, and torque tube mounted. I have been fiddling around with the gas "pedal" but the spring is not very springy, so I am going to have to replace that. I have to hook up the carb controls, and then still put gaskets into the U-joint housing, and then grease it up. I've ordered some parts that are coming soon, so when I get a break from school and work, maybe I'll be able to put it together!
Hope you enjoy the pics! 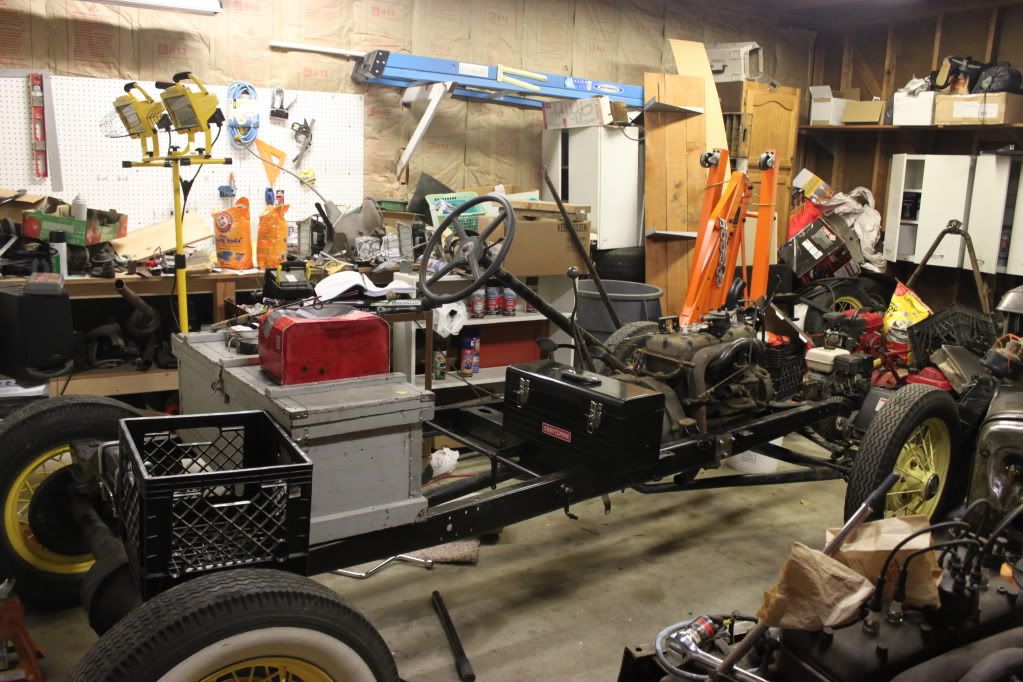 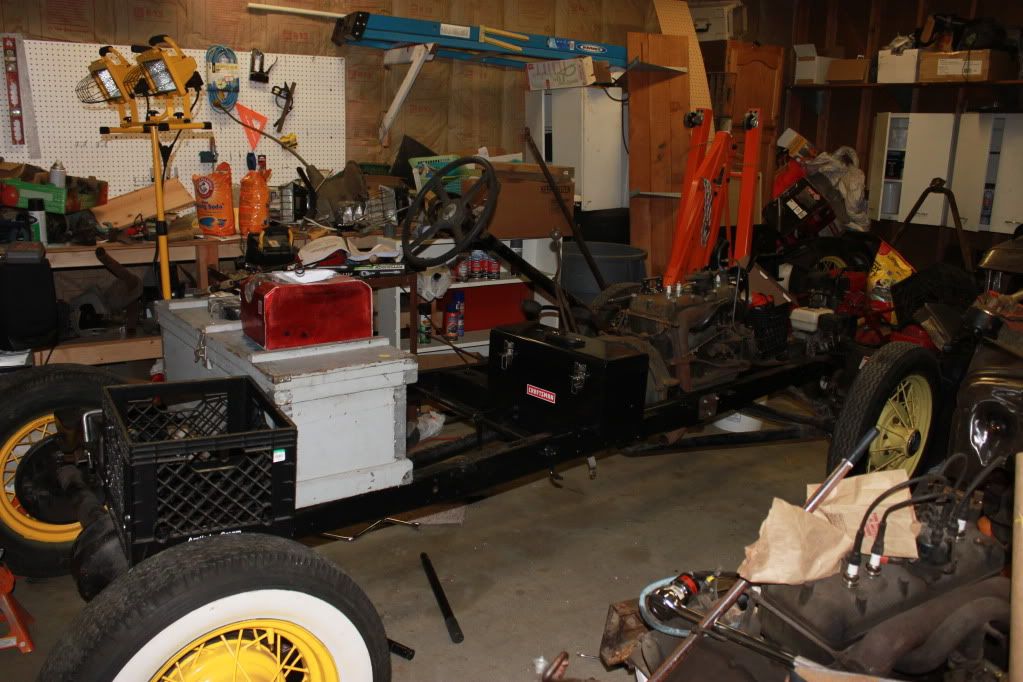 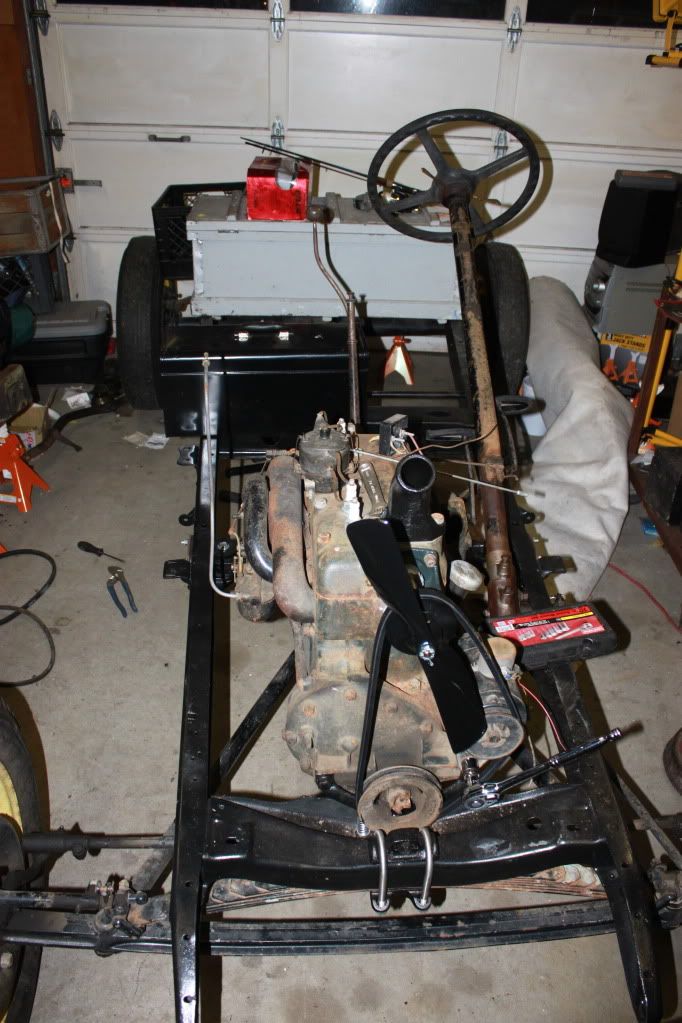     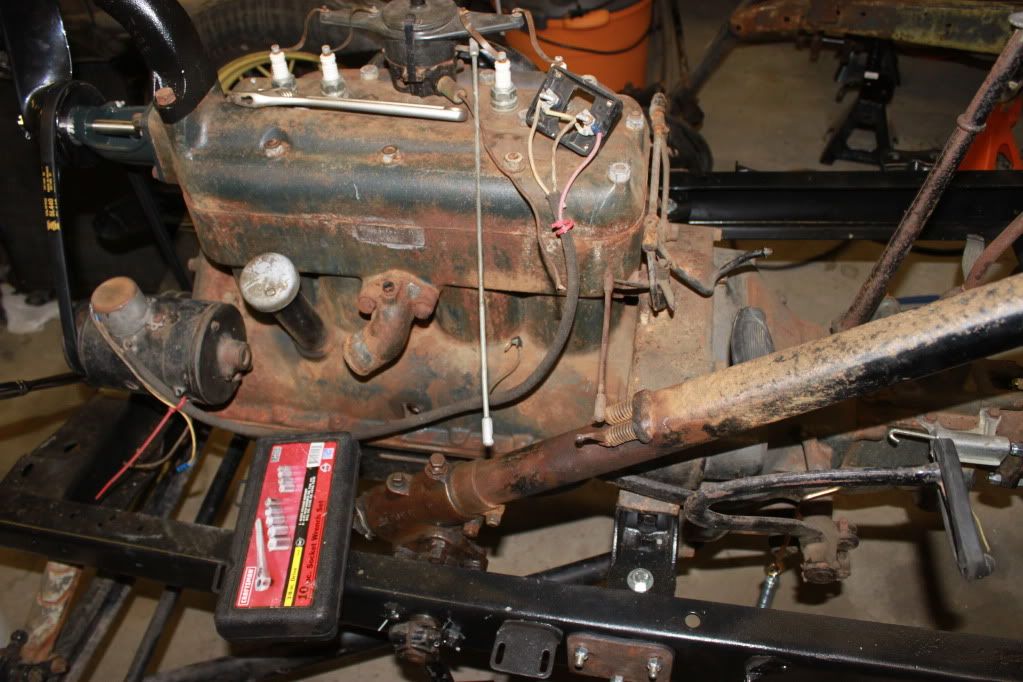 
|
|
|
|
|
10-21-2011, 08:13 AM
|
#26 |
|
Senior Member

Join Date: May 2010
Location: new britain,ct 06052
Posts: 9,390
|
Sponsored Links (Register now to hide all advertisements)
Paul in CT |
|
|
|
|
10-21-2011, 09:32 AM
|
#27 |
|
Senior Member

Join Date: May 2010
Location: OKC / Tonkawa, Ok.
Posts: 1,977
|
There is actually a rear mount for the float a motor kit. There will never be an easier time to replace that accelerator spring. If you try doing it once you have the car together you will know what I mean. Thanks for posting your project and good luck with those lost tools
__________________
Oklahoma City Model A Restorers Group. |
|
|
|
|
10-21-2011, 09:35 AM
|
#28 |
|
Senior Member

Join Date: May 2010
Location: ASTON, PA.
Posts: 725
|
Nice job so far but if I can say SLOW DOWN PAINT THAT ENGINE, TRANS, REAR AND FRONT END
|
|
|
|
|
10-21-2011, 11:18 AM
|
#29 |
|
Senior Member

Join Date: May 2010
Location: Pitt Meadows BC
Posts: 1,003
|
Before you start this engine.............remove the grease nipple acting as a plug in the intake. I'd bet you'll create enough vaccum to lift the ball off its seat and create a leak. Try a nice brass plug instead.
Good work and carry on but don't forget your other "studies" Cheers! |
|
|
|
|
10-21-2011, 12:29 PM
|
#30 | |
|
Senior Member

Join Date: May 2010
Location: Stayton, Oregon
Posts: 3,806
|
Quote:
Thanks for posting the pictures.
__________________
Fred Kroon 1929 Std Coupe 1929 Huckster |
|
|
|
|

|
10-21-2011, 01:31 PM
|
#31 | |||||
|
Senior Member
Join Date: May 2010
Location: Bellingham, Washington
Posts: 362
|
Quote:
Quote:
 Quote:
As for the axles and whatnot, I like the patina.Quote:
 Quote:
 Thanks for the words of encouragement everyone! |
|||||
|
|
|
|
10-21-2011, 01:45 PM
|
#32 |
|
Senior Member
Join Date: Jul 2010
Location: Pottersville, NJ
Posts: 238
|
Make a Speedster!!!! Nice work so far!!!
Consider doing a high compression head while you are doing all of this work. |
|
|
|
|
10-21-2011, 03:11 PM
|
#33 | |
|
Senior Member
Join Date: May 2010
Location: Bellingham, Washington
Posts: 362
|
Quote:
 As for the high compression head, I just can't afford it, the basic parts and to save for my teaching abroad (if that still pans out). If I end up not going abroad, I guess I will have plenty of Model A funding...    I have ordered a new gasket set so I may be pulling this thing apart more than I anticipated/wanted... How does one usually paint an engine without dismantling it completely? I don't really have the shop space to do that right now...you can probably see the clutter in my garage, and on top of that, one of my roommates moved in and brought a bunch of stuff for the garage.
|
|
|
|
|
|
10-21-2011, 04:53 PM
|
#34 |
|
Senior Member
Join Date: May 2010
Location: Stayton, Oregon
Posts: 3,806
|
"Yeah, I was looking at that last night and wondering why there was a grease fitting there. What would the proper plug look like? If I want to run a vacuum line I assume this would be where it goes? A vacuum line for what though? As for the other studies...yeah, they are taking all of my time it seems. I am trying to maintain my sanity by doing something other than Chinese and English grammar.."
I am not sure but I think the plug is just a 1/4 plug you can buy from any hardware store. If I am wrong, please someone else get me squared away. The hole is for a vacuum line that would go to your windshield wiper or could be used for other things-like a horn, etc.
__________________
Fred Kroon 1929 Std Coupe 1929 Huckster |
|
|
|
|
10-21-2011, 08:38 PM
|
#35 | |
|
Senior Member
Join Date: Jul 2010
Location: Pottersville, NJ
Posts: 238
|
Quote:
|
|
|
|
|
|
10-21-2011, 08:42 PM
|
#36 |
|
Senior Member
Join Date: Jul 2010
Location: Pottersville, NJ
Posts: 238
|
Link to the thread on what I did..... pics of engine painting also.
https://fordbarn.com/forum/showthread.php?t=8958 |
|
|
|
|
10-22-2011, 04:39 AM
|
#37 | |
|
Senior Member
Join Date: May 2010
Location: Bellingham, Washington
Posts: 362
|
Quote:
It looks really nice! I also have to change the oil and put a new seal in it. I have 5 new quarts of 10w30 oil and ZDDP for the oil. If I pour Mystery Marvel Oil into the spark plug holes, where does it end up going? Anything else I should do before I try to start it up? I'll be ordering the bits for the starter soon. What are the silver spring loaded arms connecting the little arms on the steering column called? Any diagrams of how the engine should be configured? I can't seem to find them anywhere. Is it a pain to remove the distributor? Thanks everyone! I'll keep the progress reports coming now that I found my charger.
|
|
|
|
|
|
10-22-2011, 11:53 AM
|
#38 |
|
Senior Member
Join Date: May 2010
Location: Stayton, Oregon
Posts: 3,806
|
If you can remove the distributor, it would be good to pour some oil (regular oil) down the hole before you start the engine. If after taking out the bolt thing (on the right side of the motor) right below the distributor, you should be able to pull the distributor out. If not, I see there is a tool you can buy that is suppose to take it out.
It looks like Bill had a good way to paint the engine. Where you are now in your assembly process, it would seem like his method should work so you would not have to pull the engine again. I just used a rattle can of hi-temp paint on the exhaust manifold and the engine paint on the intake. Don't know if this is the "official" thing to do but I liked the results. "What are the silver spring loaded arms connecting the little arms on the steering column called? Any diagrams of how the engine should be configured? I can't seem to find them anywhere" Do you mean the "control rods" that connect the spark lever to the distributor and the one for the gas? If so, based on what you show in one of your pictures above, it looks like you only need the one going from the steering column to the distributor (the long one) and to the gas. If you happend to have Sacramento Ford Cat, it is on page 139. MAC's, page 89.
__________________
Fred Kroon 1929 Std Coupe 1929 Huckster Last edited by Fred K-OR; 10-22-2011 at 02:32 PM. |
|
|
|
|
10-22-2011, 12:58 PM
|
#39 |
|
Senior Member
Join Date: Jul 2010
Location: Pottersville, NJ
Posts: 238
|
High temp primer and the Ford paint from Snyders. I would remove anything you can. The final product will look that much nicer!! Definitely remove the intake and exhaust manifolds. I had my exhaust maniful Jet Hot coated. Quite expensive at $300 but it will last for decades.
You can use a wire brush if you have scaley paint and rust. The foam sanding blocks work quite well for the final sanding. The distributor is SIMPLE to remove. Be sure before you reinstall it to throughly clean the small 'locator' hole to prevent any issues. |
|
|
|
|
10-25-2011, 01:51 PM
|
#40 |
|
Senior Member
Join Date: May 2010
Location: Bellingham, Washington
Posts: 362
|
Just placed my final orders today and all parts should be here in a week or so! I have another batch coming within a day or two...
I'm excited and once I get to work on it, I will post more photos of the progress! |
|
|
|
|
«
Previous Thread
|
Next Thread
»
 Linear Mode

|
|

| Sponsored Links (Register now to hide all advertisements) |
|
|
All times are GMT -5. The time now is 07:40 PM.