|
|||||||


| Sponsored Links (Register now to hide all advertisements) |
|
|
 |

|
Thread Tools | Display Modes |
 11-14-2016, 07:28 PM
|
#1 |
|
Senior Member

Join Date: Apr 2016
Location: Bellingham, WA
Posts: 1,163
|
Is it possible...if so are there any tricks...to installing the engine and transmission as a unit?
__________________
All steel from pedal to wheel |

|

|
|
11-14-2016, 07:34 PM
|
#2 |
|
BANNED
Join Date: May 2012
Location: inside your RAM
Posts: 3,134
|
yep
done it several times old timer showed me. at least with a stock head, it was strong enough to put your lifting eye in hole #3, gives perfect balance. there have been some on here that said they tried that with a repop head and the head broke apart
__________________
'31 180A |
|
|
|
| Sponsored Links (Register now to hide all advertisements) |
|
|
|
11-14-2016, 07:40 PM
|
#3 |
|
Senior Member
Join Date: May 2010
Location: Central, IL
Posts: 3,968
|
I dont like the idea of $2000 hanging by a single spark plug hole, I used several straps (4 i think)the first time, 2nd time I used #1 and 4 holes and lifted above the 3, I also had to use a chain around the lower water neck up to my lifting hook to keep it level side to side.
Its OK if it tilts back a little - your gonna want that to line up the U joint. Should slip right on. You may have to lower it till the front motor mount is just about ready to touch the oil pan to get it to slip on. DO NOT stick your fingers in there to help align the U joint - it will slip on and crush your fingers faster than you think. Use tools or wood sticks.
__________________
1929 Model AA - Need long splash aprons! |
|
|
|
|
11-14-2016, 07:41 PM
|
#4 |
|
Senior Member

Join Date: Jun 2014
Location: Melbourne, Australia
Posts: 7,496
|
I've done it with a repo head but I don't use the hook arrangement in #3. I use a couple of ropes tied off separately. One goes behind the crank pulley, the other between the back of the sump and the flywheel housing.
Now for a word of warning: When you align the spline in the universal with the drive shaft, DON'T put your fingers in there. When they line up, they can slide together very quickly and with enough force that the ends of your fingers will be left in there.  It might take a little fiddling but I use a screw driver and pointy nosed pliers - what ever works. I want to keep my fingers coz I like to scratch when it itches. It might take a little fiddling but I use a screw driver and pointy nosed pliers - what ever works. I want to keep my fingers coz I like to scratch when it itches.
__________________
I'm part of the only ever generation with an analogue childhood and a digital adulthood. |
|
|
|
|
11-14-2016, 09:32 PM
|
#5 |
|
Senior Member

Join Date: May 2010
Location: Mpls, MN
Posts: 27,582
|
With the body off I install them together, but with the body on I've always installed them separately.
|
|
|
|
|
11-15-2016, 07:12 PM
|
#6 |
|
Senior Member

Join Date: May 2010
Location: new britain,ct 06052
Posts: 9,389
|
Sponsored Links (Register now to hide all advertisements)
Are you sure. I used a 1/2 ton chainfall when I put the olds in my deuce coupe............. Paul in CT |
|
|
|
|
11-15-2016, 07:15 PM
|
#7 | |
|
Senior Member
Join Date: Apr 2016
Location: Bellingham, WA
Posts: 1,163
|
Quote:

__________________
All steel from pedal to wheel |
|
|
|
|

|
11-15-2016, 07:16 PM
|
#8 |
|
Senior Member

Join Date: May 2010
Location: Stayton, Oregon
Posts: 3,806
|
There was a $ on that 2000. Think the engine and tranny is only 500 to 600 lbs. So your 1/2 ton will work.
__________________
Fred Kroon 1929 Std Coupe 1929 Huckster |
|
|
|
|
11-15-2016, 07:22 PM
|
#9 |
|
Senior Member
Join Date: May 2010
Location: Maryville, TN
Posts: 491
|
I have used the #1 & #3 spark plug holes with a Chinese leveler that I bought years ago. It really makes the job easier. I think that H-F still sells them. I used a 1 ton cherry picker.
Vic |
|
|
|
|
11-15-2016, 08:37 PM
|
#10 |
|
BANNED
Join Date: Feb 2013
Location: Coatesville, Pa
Posts: 719
|
I have used a leveler but had ropes going around the engine. Got it over the light bar then in on a steep angle. Get the transmission just below the fire wall then level it out and push it on in. Having a helper helps.
|
|
|
|
|
11-15-2016, 08:49 PM
|
#11 | |
|
Senior Member
Join Date: Apr 2016
Location: Bellingham, WA
Posts: 1,163
|
Quote:
__________________
All steel from pedal to wheel |
|
|
|
|
|
11-15-2016, 10:08 PM
|
#12 |
|
BANNED
Join Date: May 2012
Location: inside your RAM
Posts: 3,134
|
Dick, that s/b a cake walk
might even want to remove the front yoke for now, too
__________________
'31 180A |
|
|
|
|
11-15-2016, 10:55 PM
|
#13 |
|
Senior Member

Join Date: Jul 2012
Location: Venice, FL
Posts: 648
|
Our club installed an engine this year complete with clutch, housings and tranny all assembled. Body on. The frame had to be spread a little in the process. Make sure the throttle linkage is removed from the flywheel housing and the screw type lifting bracket is a dream for this job.
Al |
|
|
|
|
11-15-2016, 11:07 PM
|
#14 |
|
Senior Member
Join Date: May 2010
Location: Central, IL
Posts: 3,968
|
the pedals and steering column can be a bear to work around FYI. once again keep your fingers away from anything that can pinch.
__________________
1929 Model AA - Need long splash aprons! |
|
|
|
|
11-15-2016, 11:42 PM
|
#15 | |
|
Senior Member
Join Date: Apr 2016
Location: Bellingham, WA
Posts: 1,163
|
Quote:
Thanks for the tip!
__________________
All steel from pedal to wheel |
|
|
|
|
|
11-15-2016, 11:43 PM
|
#16 | |
|
Senior Member
Join Date: Apr 2016
Location: Bellingham, WA
Posts: 1,163
|
Quote:
Throttle linkage is off. I have an adjustable lifting bracket but I've always had better luck NOT using them. I might give it another try.
__________________
All steel from pedal to wheel |
|
|
|
|
|
11-15-2016, 11:44 PM
|
#17 | |
|
Senior Member
Join Date: Apr 2016
Location: Bellingham, WA
Posts: 1,163
|
Quote:
__________________
All steel from pedal to wheel |
|
|
|
|
|
11-16-2016, 07:48 AM
|
#18 |
|
Senior Member
Join Date: May 2010
Location: Central, IL
Posts: 3,968
|
ahh good, yea should be a cakewalk then. Just don't forget the turtle that covers the u joint before you slip it together. And the gaskets...
__________________
1929 Model AA - Need long splash aprons! |
|
|
|
|
11-16-2016, 10:45 AM
|
#19 |
|
Senior Member

Join Date: Mar 2016
Location: Lynden, WA
Posts: 1,564
|
I like cake! I'll be there!
 I'll bring my BIG hammer. I'll bring my BIG hammer.
|
|
|
|
|
11-16-2016, 10:49 AM
|
#20 |
|
Senior Member
Join Date: Apr 2016
Location: Bellingham, WA
Posts: 1,163
|
Does cake go OK with beer?
__________________
All steel from pedal to wheel |
|
|
|
|
11-16-2016, 10:50 AM
|
#21 | |
|
Senior Member
Join Date: Mar 2016
Location: Lynden, WA
Posts: 1,564
|
Quote:
Beer goes good with everything! win win.
|
|
|
|
|
|
11-20-2016, 05:03 PM
|
#22 |
|
Senior Member
Join Date: Mar 2016
Location: Lynden, WA
Posts: 1,564
|
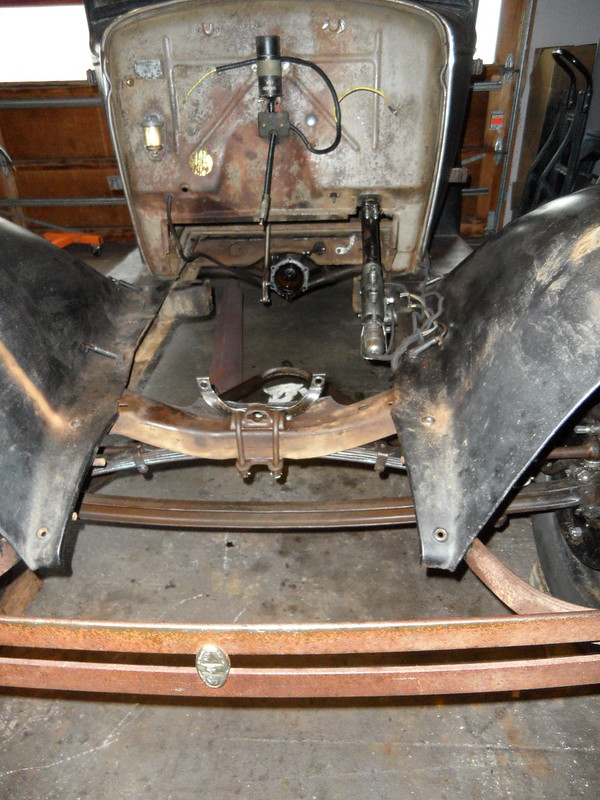
I helped Dick install his engine/trans combo the other day. Just some quick thoughts... with the pedals and throttle linkage off it wasn't bad at all. Two man job however, getting the flywheel housing/frame mounts started and aligning the u-joint is tricky. There isn't much room to grab the u-joint once the mounts start to engage. We lubed up the mounts with a little grease, Dick pushed from the front and I pulled from inside the car until the flywheel housing started into the mount (wasn't that hard, no frame spreader), then I grabbed the end of the u-joint with pump pliers. Dick pushed the engine slowly back with a crowbar while I aligned the u-joint with the drive-line. We had to pick up the torque tube just slightly and it slid right together. He continued to push the engine back until the bolt-holes aligned with frame mounts then we bolted it all up securely. It took us (two old slow guys) two hours to have it back together. It still needed manifolds and carb, generator, water pump, and radiator which Dick completed the next day.
|
|
|
|
| Sponsored Links (Register now to hide all advertisements) |
|
|
|
11-20-2016, 07:59 PM
|
#23 |
|
Senior Member
Join Date: Apr 2016
Location: Bellingham, WA
Posts: 1,163
|
Thanks, Art, for all your help!
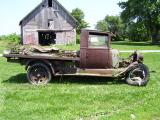
It really helps to have another knowledgeable partner on projects like this. What one doesn't think of...the other does. Plus we can tease each other a little and make it a fun time rather than actual work.The engine in the car when I bought it this Spring was the original with about 86,000 miles on it. Standard bore. Pistons moved around quite a bit. A few valves had been replaced. I was able to get the rod and main bearings back into spec, but no shims are left in any of them (maybe the rear main has one set left). Other than the piston slap and 50 pounds of compression, the motor ran fine and made acceptable power. I want to tour this car to California next year (2,000+ miles round trip) to duplicate the trip I made in my first Model A in 1965. I had doubts that the original motor was up to it. I bought a used motor from a club member. When I tore it down I found the babbitt to be near new...with the exception of the #1 rod which had lost a few chunks. I replaced that rod and removed only a few shims from original shim packs to get all bearings in spec. Pistons were 60 over and tight in the bores. I lapped in the valves and set clearances. While things were apart, I replaced the clutch, TOB, pilot bearing. It seems to be a good for a somewhat "refreshed" motor. I drove to Art's today (15 miles round trip) with no problems. It is smoother than the old motor, idles better, makes a little more power, no smoke. https://www.youtube.com/watch?v=NE9z...ature=youtu.be
__________________
All steel from pedal to wheel |
|
|
|
|
11-20-2016, 09:05 PM
|
#24 |
|
Senior Member
Join Date: Mar 2016
Location: Lynden, WA
Posts: 1,564
|
|
|
|
|
|
«
Previous Thread
|
Next Thread
»
 Linear Mode

|
|

| Sponsored Links (Register now to hide all advertisements) |
|
|
All times are GMT -5. The time now is 08:13 AM.