|
|||||||


| Sponsored Links (Register now to hide all advertisements) |
|
|
 |

|
Thread Tools | Display Modes |
 11-22-2023, 05:08 PM
|
#1 |
|
Senior Member
Join Date: May 2010
Location: Wakarusa, IN
Posts: 928
|
Here is a rough cut video of my first attempt to restore a condenser. Has anyone ever used an electrically conductive epoxy? I would like to come up with a method to ground the original cylinder to the new condenser internally. A second idea would be a spring, like used with the battery in a flashlight. Any thoughts or suggestions on other methods to connect the ground would be appreciated. Once everything is figured out, I will add text and sound to the video.
https://youtu.be/rWUbOc6cch8?feature=shared Thanks Paul
__________________
http://MODELABASICS.com/ How Things Work on a Model "A" Ford Fordbarners, Feel free to use the pictures on my site to answer questions and create tutorials/tech articles. |

|

|
|
11-22-2023, 07:29 PM
|
#2 |
|
Senior Member
Join Date: May 2010
Location: So Cal
Posts: 8,755
|
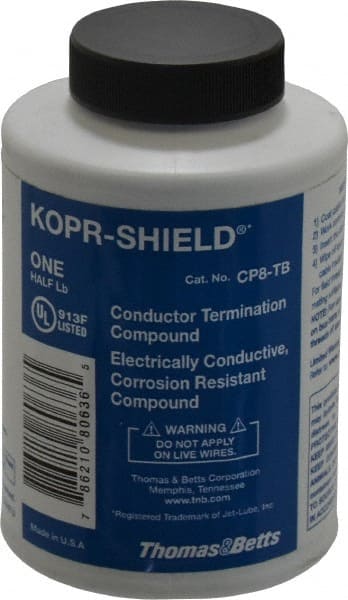
Maybe something conductive like Kopr-Shield but not so expensive. https://www.amazon.com/Thomas-Betts-...0699177&sr=8-1
|
|
|
|
| Sponsored Links (Register now to hide all advertisements) |
|
|
|
11-22-2023, 08:11 PM
|
#3 | |
|
Senior Member

Join Date: May 2015
Posts: 8,156
|
Quote:
__________________
The only thing nice about being imperfect is the joy it brings to others.... "Silver rings, your butt! Them's washers!" "We shot our way out of that town for a dollar's worth of steel holes!" - from 'The Wild Bunch' - 1969 https://www.youtube.com/watch?v=7NReUd2_0u0 |
|
|
|
|

|
11-23-2023, 07:34 AM
|
#4 |
|
Senior Member
Join Date: May 2010
Location: Wakarusa, IN
Posts: 928
|
Thanks for Kopr-Sheild lead. I never thought of a paste type material. I can always seal it in with an epoxy.
Further note: During assembly, it is possible to adjust the screw to place pressure between the back of the capacitor and the inside bottom of the original housing. Along with a coat of Dielectric grease, will it be sufficient enough to maintain a ground?
__________________
http://MODELABASICS.com/ How Things Work on a Model "A" Ford Fordbarners, Feel free to use the pictures on my site to answer questions and create tutorials/tech articles. Last edited by 30ccpickup; 11-23-2023 at 07:40 AM. |
|
|
|
|
11-23-2023, 07:58 AM
|
#5 |
|
Senior Member
Join Date: Oct 2016
Location: harpursville ny
Posts: 1,040
|
i dont think you want to use dielectric grease to improve a connection.
|
|
|
|
|
11-23-2023, 08:21 AM
|
#6 |
|
Senior Member
Join Date: May 2010
Location: Wakarusa, IN
Posts: 928
|
Sponsored Links (Register now to hide all advertisements)
Thoughts: What do you think, if I pre-tinned the outside bottom of the condenser and inside the bottom of the original housing, assembled it and once again applied heat to the bottom to join them? Am I pushing my luck or is it worth a try? Note: If there was an unlimited budget and parts were plentiful, I would make several and report back the findings. At this point, I can make two. It would be nice if they both worked. Any other comments for improvement on the entire process would be appreciated.
__________________
http://MODELABASICS.com/ How Things Work on a Model "A" Ford Fordbarners, Feel free to use the pictures on my site to answer questions and create tutorials/tech articles. Last edited by 30ccpickup; 11-23-2023 at 08:28 AM. |
|
|
|
|
11-23-2023, 09:05 AM
|
#7 |
|
Senior Member

Join Date: Dec 2013
Location: Minnesota, Florida Keys
Posts: 10,320
|
From my experience, I think you are on the right track being concerned with maintaining a good contact between the new condenser and the shell. Any deficiencies here will lead to intermittent problems and flakey performance. Since mine are brass, I can solder all of the connections, which is 100% foolproof if done properly.
As to the "heat problem", a lot would depend on the type and quality of the donor you are using. Mine are rated at 550 degrees Fahrenheit so they can take a little momentary heat. I think all you can do is try it and see if there are any ill effects. My main concern would be the quality of the donor condenser you are using. They may be fine, or possibly prone to the problems plaguing most new condensers these days; I can't tell from here. In any event, kudos to you for taking this on. I had considered doing something like this, but the amount of labor involved made it impractical. If you can solve the contact problem, this looks like something most hobbyists could reasonably take on and would yield a good looking and reliable unit. |
|
|
|
|
11-23-2023, 09:11 AM
|
#8 | |
|
Senior Member

Join Date: Apr 2019
Location: Kansas
Posts: 922
|
Quote:
This is correct. Dielectric grease is an insulator, not a conductor. It helps resist corrosion and repels moisture but that's all. Conductive past is what's needed to improve a connection.
__________________
"It don't take but country smarts to solve the problem" (Smokey Yunick) '41 Merc Town Sedan / 260" 8CM engine '66 Fairlane four door / "warmed up"  302 302
|
|
|
|
|
|
11-23-2023, 09:23 AM
|
#9 |
|
Senior Member

Join Date: May 2010
Location: on the Littlefield
Posts: 6,159
|
drill a hole in the unseen bottom to solder through pre tinned area
take some stranded wire and use it to take up space between the shells to give some mechanical electrical connection |

|
|
|
11-23-2023, 10:27 AM
|
#10 | |
|
Senior Member
Join Date: May 2010
Location: Wakarusa, IN
Posts: 928
|
Quote:
Although the condenser shown is for a 1935-1936, I plan to use it in my 38. The modern condenser I purchased is NAPA FA49. Hopefully it is not on the list of being ify.
__________________
http://MODELABASICS.com/ How Things Work on a Model "A" Ford Fordbarners, Feel free to use the pictures on my site to answer questions and create tutorials/tech articles. |
|
|
|
|
|
11-23-2023, 10:30 AM
|
#11 | |
|
Senior Member
Join Date: May 2010
Location: Wakarusa, IN
Posts: 928
|
Quote:
1. De-solder bottom of the original to uncover existing hole. 2. Tin the bottom of the new condenser and the wire. Solder the two together. 3. Run wire through the existing hole of the original casing. 4. Re-solder wire to casing.
__________________
http://MODELABASICS.com/ How Things Work on a Model "A" Ford Fordbarners, Feel free to use the pictures on my site to answer questions and create tutorials/tech articles. Last edited by 30ccpickup; 11-23-2023 at 10:44 AM. |
|
|
|
|
|
11-23-2023, 12:51 PM
|
#12 |
|
Senior Member
Join Date: May 2010
Location: on the Littlefield
Posts: 6,159
|
The original A&L condenser in my model A was early production with a soldered tab, I melted the solder driving,just bent the tab to touch, have had the manifold red before, condenser still good
|
|
|
|
|
«
Previous Thread
|
Next Thread
»
 Linear Mode

|
|

| Sponsored Links (Register now to hide all advertisements) |
|
|
All times are GMT -5. The time now is 01:53 PM.