|
|||||||


| Sponsored Links (Register now to hide all advertisements) |
|
|
 |

|
Thread Tools | Display Modes |
 06-08-2014, 03:05 AM
|
#1 |
|
Senior Member

Join Date: May 2010
Location: Roseville, CA
Posts: 172
|
I know a bunch of you have been down this road. The rear fenders that I got with my car had lots of dents and tears and someone did a really poor job patching the rot where they meet the running boards. Since nice rear fenders are hard to come by (and big $$), I decided to fix what I had. Here are a few pics I took as I went along...
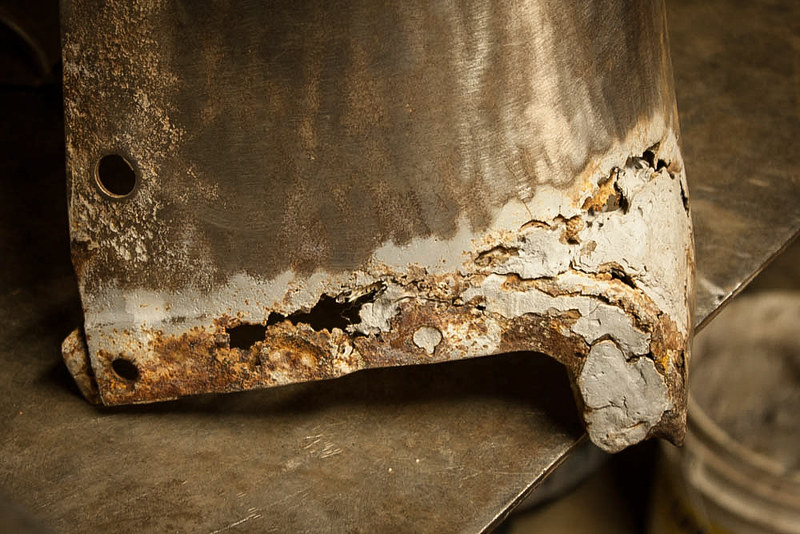 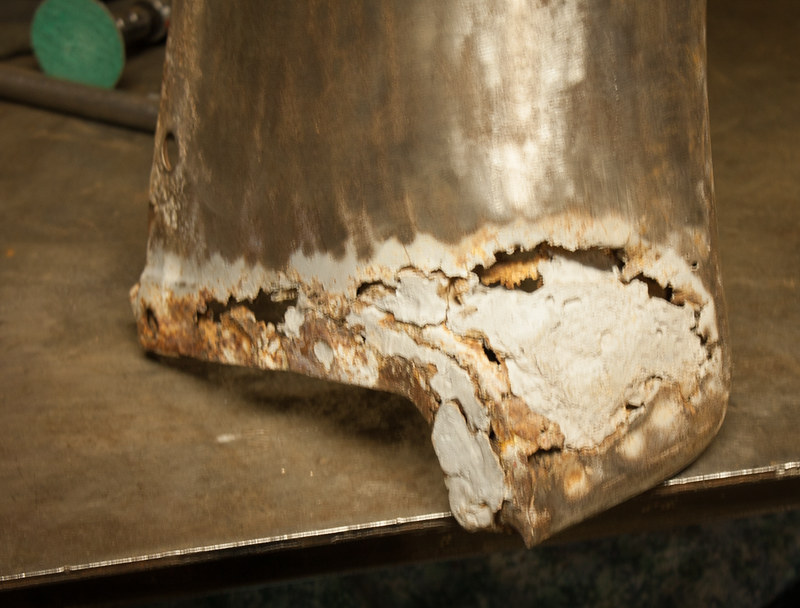 I removed all the bondo and fiberglass and cut out the rot. Then I made a new patch and welded it in... 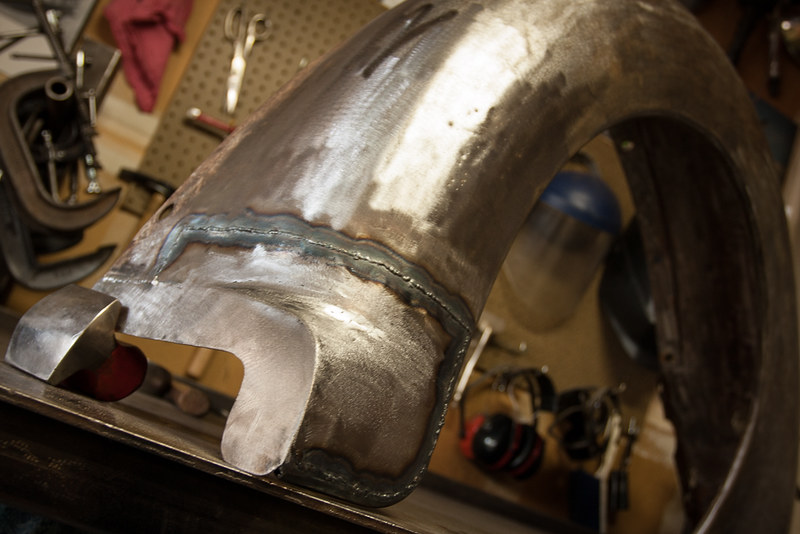 Welds cleaned up... 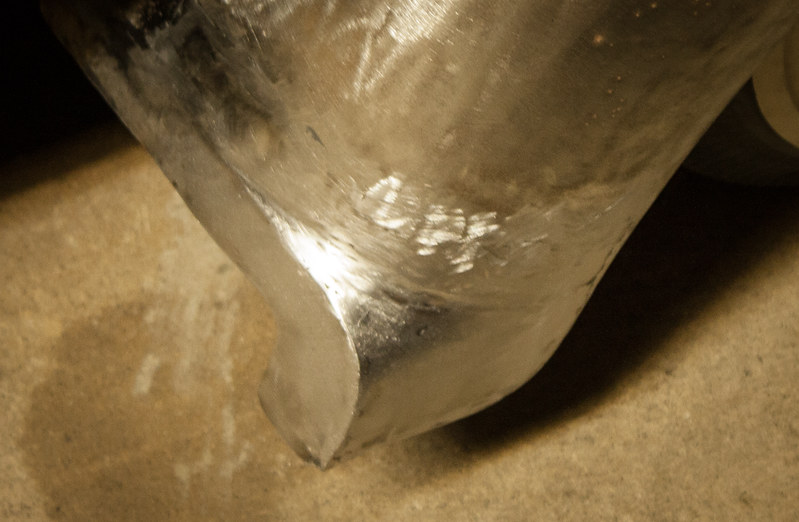 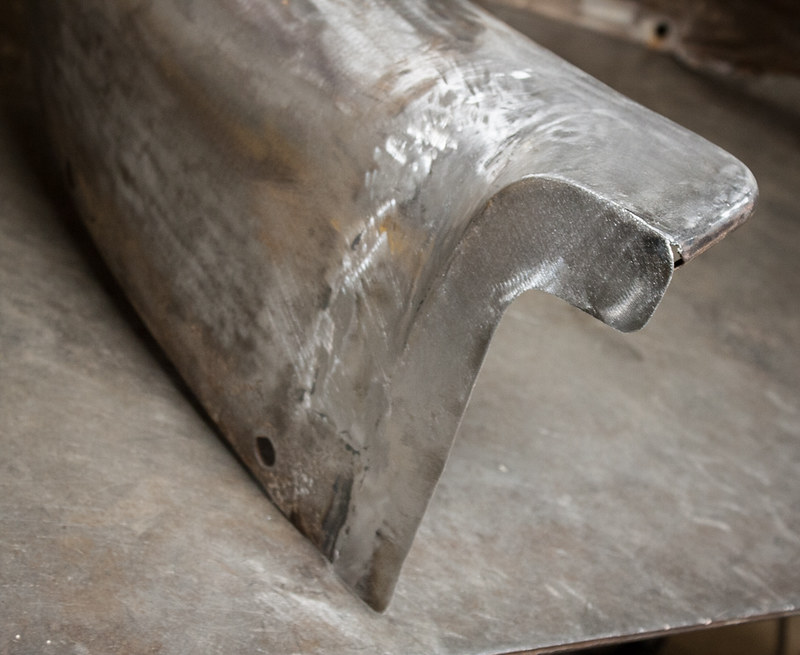 Here's the other fender. It got the same patch and some other repairs. I spent many hours with a hammer and dolly and some time with a shrinking disc to get it to this point...still needs a little more before it'll be ready for primer.  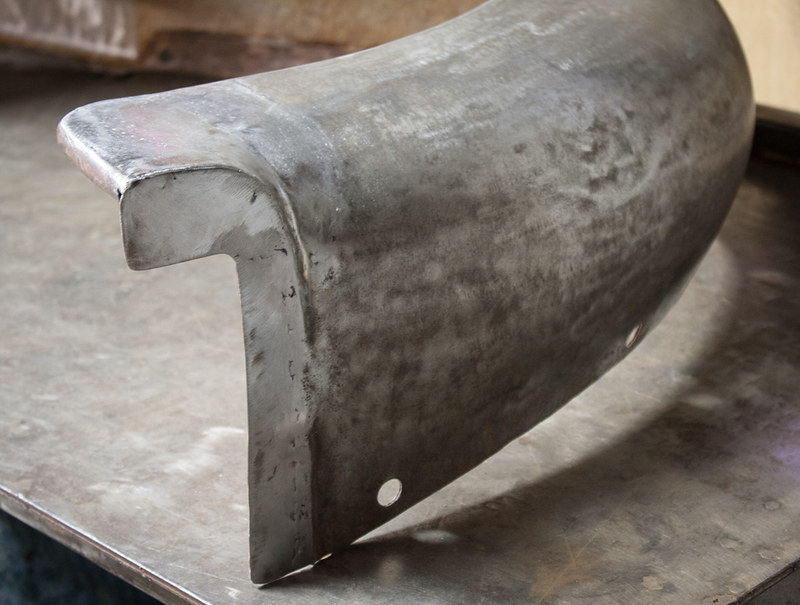 I still need to drill the holes for the running boards and make the reinforcements for the inside. I also had my buddy make a patch for my firewall on his Pullmax (I only have hand tools). We intentionally matched the passenger side X, but we could have made it like the original with the square if we'd wanted. 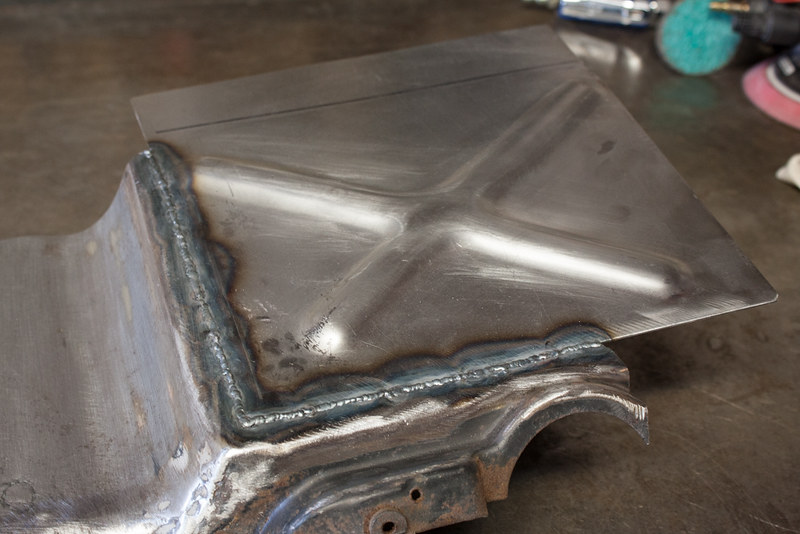 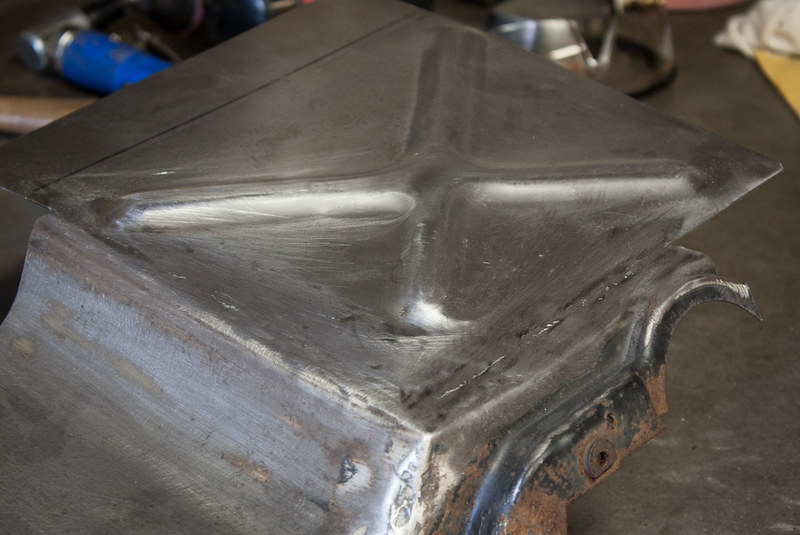 That's it. I just wanted to share the way I tackled some common problems my car. |

|

|
|
06-08-2014, 04:20 AM
|
#2 |
|
Senior Member

Join Date: May 2010
Location: Masterton, New Zealand
Posts: 3,834
|
Good work Rusk, it is real rewarding when you undertake the repairs yourself, Well done.
__________________
Unfortunately, two half wits don't make a whole wit! |
|
|
|
| Sponsored Links (Register now to hide all advertisements) |
|
|
|
06-08-2014, 05:39 AM
|
#3 |
|
Senior Member

Join Date: May 2010
Location: Delta, PA
Posts: 525
|
Great job of making patches and welding in, what type of welder, again you get great satisfaction to know you did it yourself. Zeke
__________________
Only problem with retirement is never a day off 
|
|
|
|
|
06-08-2014, 05:54 AM
|
#4 |
|
BANNED
Join Date: May 2010
Posts: 3,019
|
Rusk,
Outstanding ! Charlie ny |
|
|
|
|
06-08-2014, 06:46 AM
|
#5 |
|
Senior Member

Join Date: May 2010
Location: Near Rising Sun, Maryland
Posts: 10,858
|
To be able to afford the new repros or find nice nos and afford those is one thing but doing a nice job at saving originals is something special. Good job Rusk! I need to learn how to weld sheetmetal myself. Wondering if you used a mig or tig to do those welds?
__________________
John "Never give up on what you really want to do. The person with big dreams is more powerful than one with all the facts". Albert Einstein |
|
|
|
|
06-08-2014, 07:01 AM
|
#6 |
|
Member

Join Date: Sep 2012
Location: Boulder, Colorado
Posts: 97
|
Sponsored Links (Register now to hide all advertisements)
How many hours into just one fender?
|
|
|
|
|
06-08-2014, 07:05 AM
|
#7 |
|
Senior Member

Join Date: May 2010
Location: Highland,MI
Posts: 1,196
|
That looks a lot better.. Nice job
|
|
|
|
|
06-08-2014, 07:25 AM
|
#8 |
|
Senior Member

Join Date: May 2010
Location: Above the gnat line in Georgia
Posts: 7,009
|
Nice work. Having done a few like that myself, I know the man hours and beers involved getting results like that.
__________________
Life is like a roll of toilet paper. The closer to the end, the faster it goes. It is better to be seen, than viewed. "We sleep safe in our beds because rough men stand ready in the night to visit violence on those who would do us harm". |
|
|
|
|
06-08-2014, 10:52 AM
|
#9 |
|
Senior Member

Join Date: Feb 2013
Location: Eureka Calif.
Posts: 969
|
WOW! That looks great Rusk.May I make a suggestion? It looks as though you are using a sanding disc for stripping.If you have a Harbor Freight nearby,they sell a 4-1/2" polycarbide abrasive wheel that fits an angle grinder (#60571).They leave very fine scratches in the metal and last a long time as long as you don't hit a sharp edge.They remove light surface rust and paint(after chemical stripper) like crazy and will not gouge the steel.Pretty cheap,6-8 bucks. I did a little experiment with one of the inside window trim pieces on my car.I stripped it with the wheel,etch primed,sealed then painted with base/clear.No swirls or scratches showed. Have fun!
|
|
|
|
|
06-08-2014, 11:09 AM
|
#10 |
|
Senior Member

Join Date: May 2010
Location: Wildwood, MO. (near St. Louis)
Posts: 1,792
|
Very nice work. I wish I could do that myself!!! I was lucky and found a good body guy to rescue my 35 panel delivery fenders. Here's his repair of the rear section of my front fender............
|
|
|
|
|
06-08-2014, 12:09 PM
|
#11 | |||
|
Senior Member
Join Date: May 2010
Location: Roseville, CA
Posts: 172
|
Thanks guys. I used a Miller TIG welder for these repairs. I used to MIG everything, but I never liked the way the seams on sheetmetal turned out. The welds are just too hard and brittle to planish flat, although I have seen some guys prove me wrong. The heat control on the TIG works better on thin stuff like these old fenders.
Quote:
 I found a couple more pics of the driver's side... 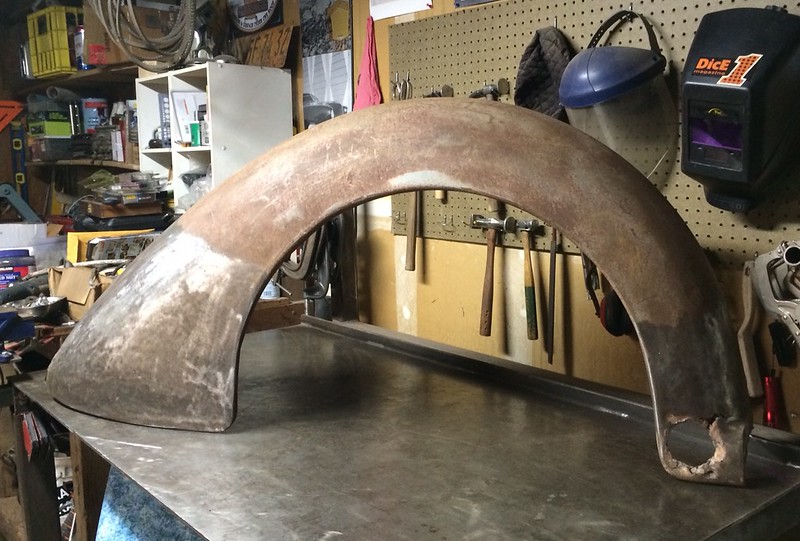 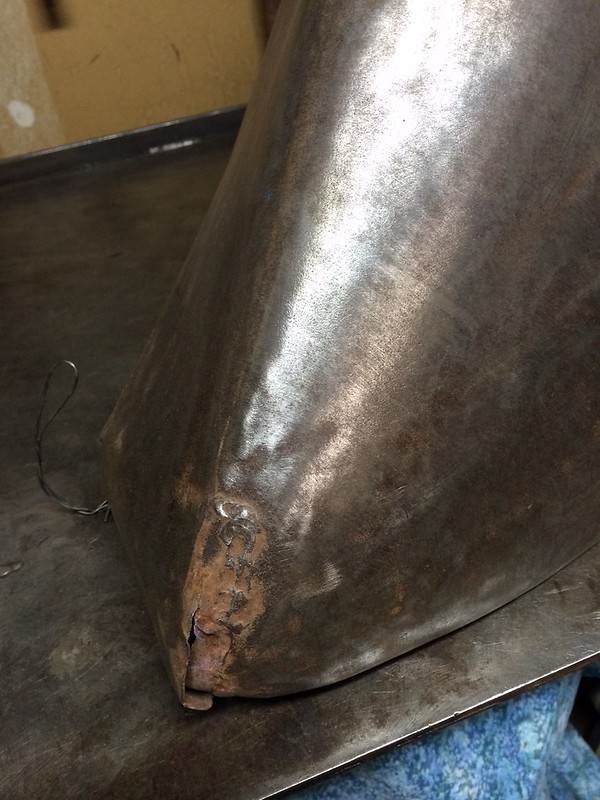 Quote:
|
|||
|
|
|

|
06-08-2014, 01:52 PM
|
#12 |
|
Senior Member

Join Date: May 2010
Location: Auckland
Posts: 4,705
 |
Nice work .
|
|
|
|
|
06-08-2014, 03:03 PM
|
#13 |
|
Member
Join Date: Sep 2012
Location: Boulder, Colorado
Posts: 97
|
Ahhh the TIG welder. Thanks! Wow, 50 hours each is gonna show when your car is done. You ARE paying yourself, in future compliments! Nice work, again. -Chris
|
|
|
|
|
06-08-2014, 03:10 PM
|
#14 |
|
Senior Member
Join Date: May 2010
Location: nw SanAntonio, TX
Posts: 939
|
Looks great. I got a front one that I am going to cut and piece as you did in order to have a spare front clip.
|
|
|
|
|
06-08-2014, 09:32 PM
|
#15 |
|
Member
Join Date: May 2014
Posts: 32
|
WOW nice work
|
|
|
|
|
06-08-2014, 10:40 PM
|
#16 |
|
Senior Member

Join Date: Dec 2010
Location: North of sandy ago, CA.
Posts: 2,064
|
Very nice work
Bruce
__________________
Works good Lasts long time |
|
|
|
|
06-09-2014, 08:39 AM
|
#17 |
|
Senior Member

Join Date: May 2010
Location: Colfax, CA
Posts: 387
|
That boy has some skills! Keep up the good work and I love to see the progress pictures.
|
|
|
|
|
06-09-2014, 09:10 AM
|
#18 |
|
Senior Member

Join Date: Jun 2011
Location: central Iowa
Posts: 484
|
Nice work.
__________________
Louvering, bias ply tire-truing, metal shaping and forming, lathe and mill work, member shop HAGERTY Ins. expert repair network. High quality paint work in Iowa. |
|
|
|
|
06-09-2014, 11:27 AM
|
#19 | |
|
Senior Member
Join Date: May 2010
Location: Roseville, CA
Posts: 172
|
Thanks guys. I really enjoy breathing new life into this old tin.
Quote:
|
|
|
|
|
|
06-09-2014, 07:29 PM
|
#20 |
|
Senior Member
Join Date: May 2010
Location: Colorado
Posts: 553
|
I'm just starting this process on all four fenders on my 36. First, I tackled a running board. So far, it has been frustrating and humbling. Your work show that it can be done and I'll keep after it, hoping to end up as well as you did.
|
|
|
|
|
«
Previous Thread
|
Next Thread
»
 Linear Mode

|
|

| Sponsored Links (Register now to hide all advertisements) |
|
|
All times are GMT -5. The time now is 08:31 PM.