|
|
#321 |
|
Senior Member
Join Date: May 2010
Location: Lancaster, CA
Posts: 916
|
surprisingly, PS is not an option considered for this car but the AC certainly was...
The double sheave on the compressor just puts another groove out further to run off of the added crank pulley. Theoretically, one belt could drive all four, but I think it wise to run it separately from the WP, Crank, and Alt pulley. My alternator should be here soon.
__________________
Lancaster, California Visit hotrodreverend.com to view hundreds of pictures and videos of the build of the 1955 Ford Club Sedan! |
|
|

|
|
|
#322 |
|
Senior Member
Join Date: May 2010
Location: MN
Posts: 7,053
|
Nice work!!! How did I not see this thread earlier. Oh I haven't visited the yblock side for a while. But at least I have 17 pages of fun to look at.
I used the HF for primer also. Large tip and at $5 a gun you can almost just throw it away. |
|
|

|
| Sponsored Links (Register now to hide all advertisements) |
|
|
|
|
#323 |
|
Senior Member
Join Date: May 2010
Location: Jackson N.J
Posts: 206
|
THANKS For the info,Rev it will come in handy when I start my 56 resto in summer'18 when I RETIRE.
|
|
|

|
|
|
#324 |
|
Senior Member
Join Date: May 2010
Location: Lancaster, CA
Posts: 916
|
@mikhett, congratulations! Let me know what it's like, it is hard to find time some months to get anything done.
 @Tinker, those HF disposable cups aren't bad either....
__________________
Lancaster, California Visit hotrodreverend.com to view hundreds of pictures and videos of the build of the 1955 Ford Club Sedan! |
|
|

|
|
|
#325 |
|
Senior Member
Join Date: May 2010
Location: NorCal
Posts: 2,617
|
Rev
Sent you some pics today Jim |
|
|

|
|
|
#326 |
|
Senior Member
Join Date: May 2010
Location: Lancaster, CA
Posts: 916
|
Sponsored Links (Register now to hide all advertisements)
__________________
Lancaster, California Visit hotrodreverend.com to view hundreds of pictures and videos of the build of the 1955 Ford Club Sedan! |
|
|

|
|
|
#327 |
|
Senior Member
Join Date: May 2010
Location: Lancaster, CA
Posts: 916
|
Well, well, well... another story to tell about the new alternator and AC compressor mount that involves a lot of receipts, conversations at a parts counter, and chasing a scrap of part-numbered scrap of paper through a parking lot! Buckle up, time for the Ford Follies...
Where do we start? Let's start with the front porch - after being out of town for a few days working with scores of people at a church hundreds of miles away I was looking forward to getting back into the garage to unwind and "rest" as it were. Thankfully, the new alternator had arrived, along with some other goodies, so in the afternoon we were all set to get a few things done. If you are working through a restoration for a car that will be as about as original as possible, usually things fit - FoMoCo saw to that years ago. For those types of cars and trucks it is just a matter of finding the right parts, or even period pieces, getting a hold of a good shop manual or Ford parts book with diagrams and away you go. If you are doing a restomod that will be a daily driver, then well, good luck.  You guys that are experts know full well you have to plan, measure, research, plan some more, use some of your own sketches, think things through, etc. You guys that are experts know full well you have to plan, measure, research, plan some more, use some of your own sketches, think things through, etc.Ok, after thinking, "Yeh - it's a Vintage Air bracket, it cost quite a bit of money, they are bound to think through how this all fits together..." I went ahead and pulled the 10SI alternator out of the box. It looked pretty good since I went the chromed route and 120 amps no less. A 10SI or a 12SI is what the bracket calls for... so down we go. "Wait, what's this?" 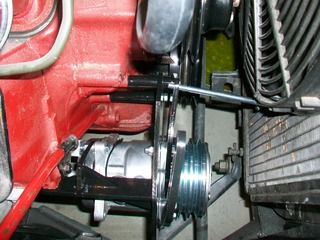 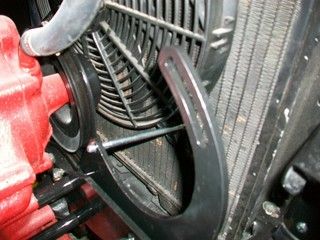 Yep - that long bolt cannot go into that hole in the bracket because it cannot clear the electric fan/radiator (that Vintage Air recommends...  ). Ok so now what? Time to loosen up the bracket and slide that bolt ever so gingerly into the hole, twist the alternator just so, get that rinky dink 1/2" spacer into position and... and... wait a sec... there! she's in! ). Ok so now what? Time to loosen up the bracket and slide that bolt ever so gingerly into the hole, twist the alternator just so, get that rinky dink 1/2" spacer into position and... and... wait a sec... there! she's in!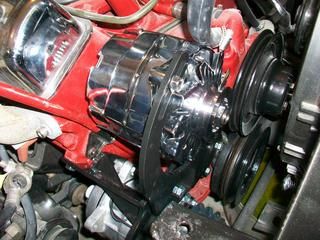 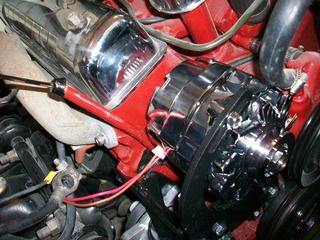 Looks good. Never knew there would be so much drama over getting an alternator into position. I purchased one that had the 2 wire socket at the 3 o'clock position, thinking that we would be ok on that side and thankfully it fits like it should - the position of that main battery hook up is close though! 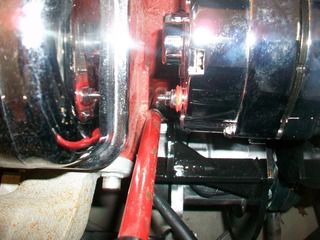 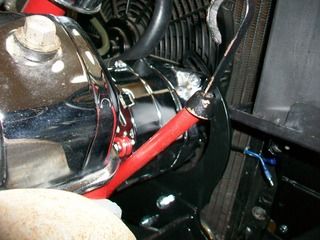 If you know Y blocks, by now you can probably tell that the dipstick tube is backwards. In other words, the main bend is oriented towards the passenger side when it should be towards the driver's side. I am glad I did this. I really don't know how the alternator could have fit into position if the dipstick tube was in the stock position. Maybe a 12SI is smaller? Back to our story..... Now it was time to get some belts! Vintage Air had some suggested measurements in there instructions, but they did not seem to match what I was coming up with on the Y block. The instructions did say something about variances with pulleys and all of that so I decided it was time to take things into my own hands. I took some wire, placed it around the pulleys, twisted it together, and then cut it so I could measure it on the bench, adding a little bit of length to make up any difference in pulley groove depth. 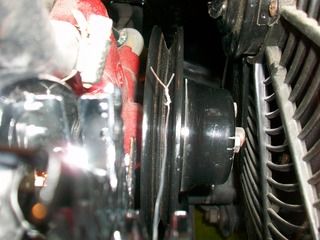 What happens next is an exercise in futility. I ended up going through these pictured belts lol... 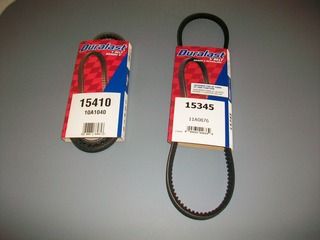 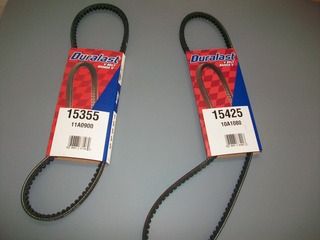 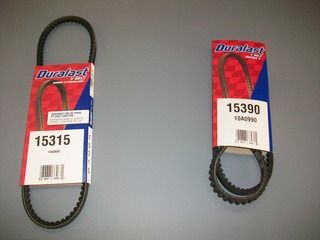 Let's just say I am glad that Autozone is literally 1.5 miles away from my house! What a fun time all of that was. You should have heard the wife when she found out I was going for the third time...  "Are you kidding me? You gotta go back again? That don't sound like you at all, you usually nail this stuff..." Oh my, if she only knew! "Are you kidding me? You gotta go back again? That don't sound like you at all, you usually nail this stuff..." Oh my, if she only knew!  One of the best parts was on my second trip the piece of paper with measurements and part numbers went flying out of my grip and across the entire parking lot. I waddled around trying to step on it, chasing it down. That was completely hysterical. I probably looked like I was chasing a $100 bill! Ok so, third time's a charm - these grooves look to be lined up really good, and the belts fit very nicely with good tension. 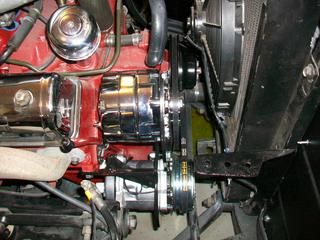 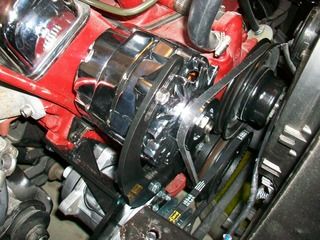 After assessing this alternator install a little bit however, I realized that the heater hose from the water pump is going to rest right smack dab on top of that alternator as it swings back to the heater core. Nope, can't have that. 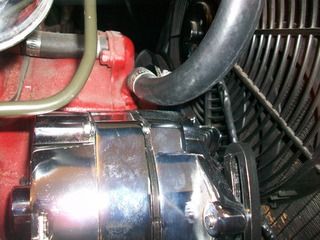 What I plan to do is make a sheet metal bracket that will come off of the alternator, placing both the hose from the water pump and the hose from the intake manifold above the alternator a bit more as they travel back to this spot on the passenger side fender - 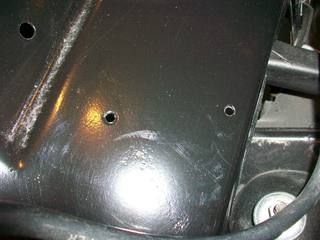 And, after reinstalling the aftermarket battery tray what have we here? 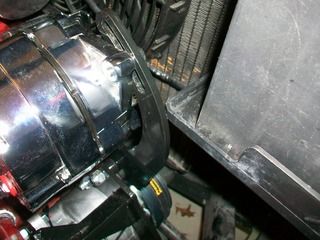 Looks like this tray barely rests against the Vintage Air bracket. It is a plastic tray, not a big deal, but I do wonder if I should not notch it or find something else. I would imagine that over time with any engine movement it will wear into the tray. If you want more Ford Follies, stay tuned. I happened to start looking at the RebelWire wiring harness tonight. Oh boy, we are in for some fun! 
__________________
Lancaster, California Visit hotrodreverend.com to view hundreds of pictures and videos of the build of the 1955 Ford Club Sedan! Last edited by Hot Rod Reverend; 04-11-2017 at 10:04 PM. |
|
|

|
|
|
#328 |
|
Senior Member
Join Date: May 2010
Location: westbury ny
Posts: 854
|
this is the fun of updating these older cars the battery tray is no big deal you seem to have a handle on the hoses the wiring should be a breeze at this point just don't cut anything until your sure of your run I've replaced the harness in both the wagon and ranchero takes some time but well worth it I also moved the fuse block to behind the seat in the ranchero both times using an e-z wire kit also the blade fuses are easier to find keep up the good work the end is near then you can enjoy the fruits of your labor
|
|
|

|
|
|
#329 |
|
Senior Member
Join Date: May 2010
Location: Lancaster, CA
Posts: 916
|
On with the Ford Follies!
 Last night it was time to get the wiring harness going. If the weather is nice I try to get body work and paint completed. If it's raining then on with the things we can get done in the garage. What we have here is a RebelWire brand aftermarket harness. 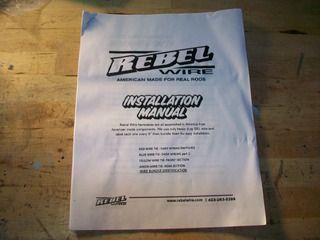 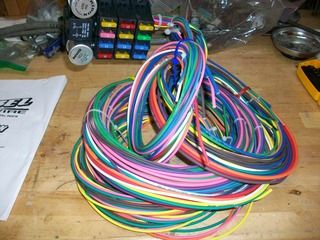 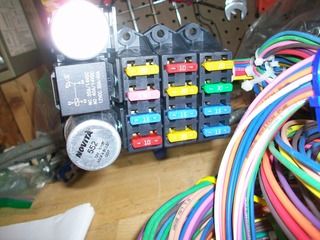 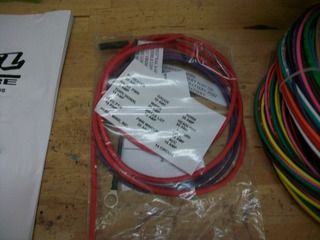 I chose RebelWire after looking at reviews, reading other forums, and checking out what they had available. I did not want to go with an original harness - too expensive and there would not be fuse panel, not enough circuits for what we are adding here, etc. RebelWire is made in the USA from what I am told, and from what I have read the customers who write on forums like this one appreciate the customer service with RebelWire in case there are any problems. Each wire is laid out with its intended use/circuit labeled every 6" along the insulation. The kit comes with the main loom and panel, is zip tied (color coordinated in that regard) per bundled use, a separate bag for the alternator and other accessories, and of course instructions. There are no terminals with the kit. Ok so first up was to choose a location for that fuse panel. You can see in the photo below where I chose to place the panel. It seemed reasonable enough and will not be too hard to read/replace fuses when needed. The only hitch was that ALL wires exited to the right of the loom - headed straight for the main pedal bracket! (more on that later). 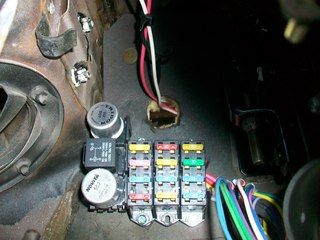 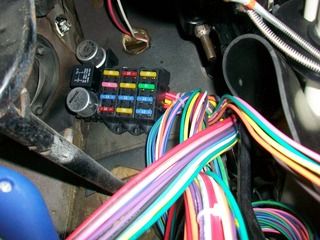 What a mess of wires coming out of that small panel! Time to take a break and get a Ford Follies story. Take a look at this photo and guess what happened... 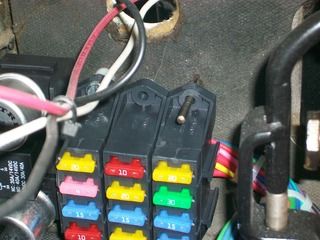 Yep, dufus me - while drilling the third hole to mount the panel to the firewall my drill bit came loose from the keyless chuck in my cordless drill!  Nice. I will have to say that while I like the location of the fuse panel it was a joke with all of the contortions and octopus-like positions I had to be in to secure everything under there. A real show. Me and the 55 playing a round of "Twister" Nice. I will have to say that while I like the location of the fuse panel it was a joke with all of the contortions and octopus-like positions I had to be in to secure everything under there. A real show. Me and the 55 playing a round of "Twister"  Thankfully this is not a reality TV show but I would bet people would pay money to see the unplanned goofs and what have you! Thankfully this is not a reality TV show but I would bet people would pay money to see the unplanned goofs and what have you!Take a look at the following photo to see how I solved the issue of the wires exiting to the right... 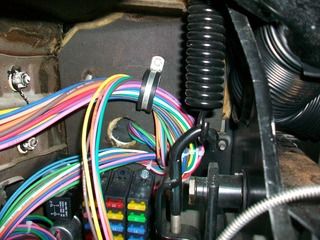 With that small piece of hardware, the wires were brought up and back to the left - especially those wires going to the ignition and headlight switches. Trust me, there was plenty of wire in there to reach to the steering wheel if needed, and the loom that ran to the steering wheel could reach the front seat easily. So what was it like at the firewall in the engine bay? Could we use the original rubber grommet and keep things pretty clean looking? 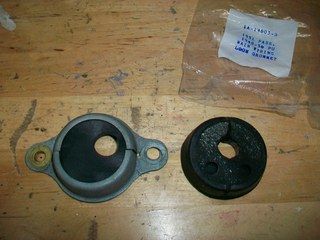 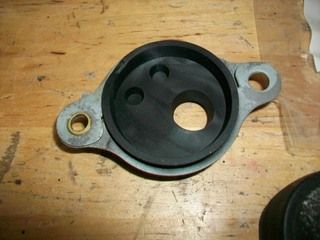 I had my doubts - there were a lot of wires coming out of there! 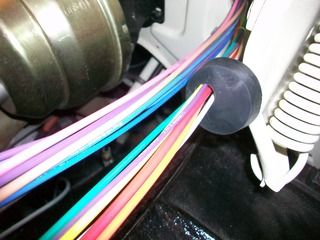 So, I started with one run of the loom and that fit pretty well. I looked at the other and noticed that there were splices to run through where the end of the run had two wires but that same line had one wire at the firewall. This.just.might.work. 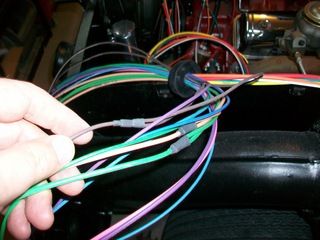 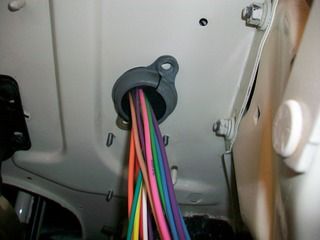 And so it did! Nice and tight too so that it held pretty easily at the firewall. But now look at this mess! 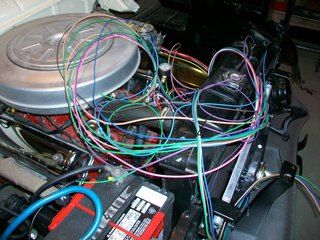 Although it looks bad I really don't think there is going to be too much problem here. The instructions read pretty well and the lines are all marked every 6". 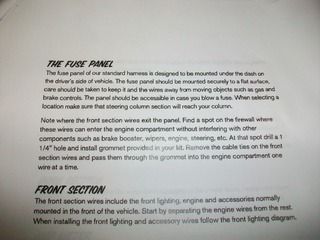 This afternoon was very nice outside so I finished removing all of the paint (and a little rust) from the hood outside, and I cleaned up the shop for some friends coming over later on this week. (Needed to put new gloves in the blast cabinet and a new lens as well) More Ford Follies coming soon...
__________________
Lancaster, California Visit hotrodreverend.com to view hundreds of pictures and videos of the build of the 1955 Ford Club Sedan! |
|
|

|
|
|
#330 |
|
Senior Member
Join Date: May 2010
Location: NorCal
Posts: 2,617
|
Coming along nicely Dan.
I used a reproduction wire harness and added some inline fuses to those additional items I installed. I also added some circuit breakers for the Power Seat assy & Windows. Who knows if it'll all work? Jim |
|
|

|
|
|
#331 |
|
Senior Member
Join Date: May 2010
Location: Lancaster, CA
Posts: 916
|
Wise move on those fuses - and especially those circuit breakers!
__________________
Lancaster, California Visit hotrodreverend.com to view hundreds of pictures and videos of the build of the 1955 Ford Club Sedan! |
|
|

|
|
|
#332 |
|
Senior Member
Join Date: May 2010
Location: Lancaster, CA
Posts: 916
|
As promised, the saga continues:
With the good weather yesterday I spent some time outside removing all of the paint (and a little rust) from the hood. I have been waiting on the trunk lid for it's next coat of primer/surfacer just so I can get the guns out and paint at the same time since prep and cleanup takes a little bit to do. I did some sandblasting where needed, used some paint stripper, and then a plastic wheel that is made for removing paint. 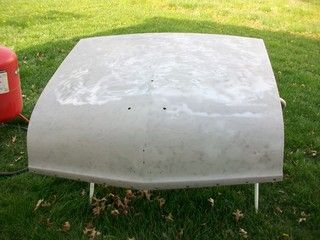 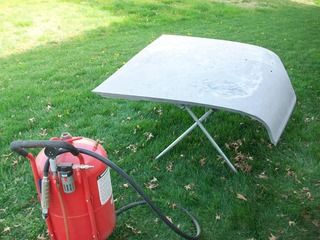 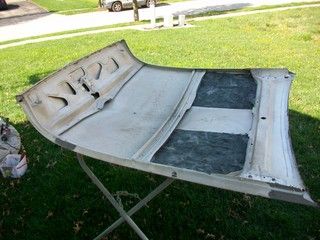 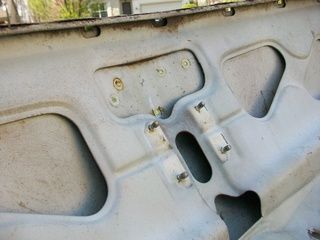 The pictures above show the underside before it was cleaned up. There were some small holes up under the lip, but there was not enough a problem to warrant breaking out a patch panel or what have you. The hood does has a few small dings here and there that I will have to smooth out. Some of the work I have already done with hammer and dolly - I didn't see much now but I am sure that once a guide coat goes down things will "pop up"!  Towards evening I decided to stay in the garage. I don't know about you fellas, but the garage is like a place of peace and satisfaction to me. Nice to get in there, turn some wrenches, get a few things done, organize parts and plans, etc. My attention turned to the blast cabinet again...it was already time to replace the lens. I guess I use that thing quite regularly to blast small parts and what have you. Hardware is especially easy to save and very quick to turn around. Would you believe I have owned this thing for 10 years and have never replaced the gloves? Check out these photos though: 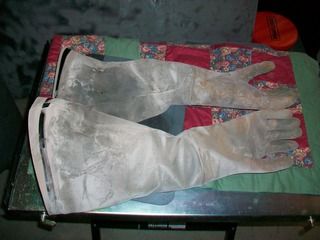 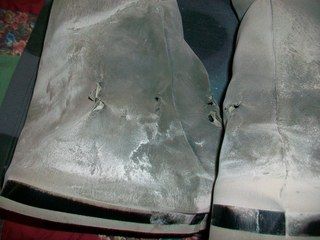 I had bought new gloves at the Carlisle, PA, swap meet a couple years ago actually (man, has it been that long since I have been out there?  ) So, I quickly remembered where I had put them and replaced them without much fanfare. The SkatBlast cabinet I have is made pretty well and the accessories I got with the cabinet itself have held up well. Of course I use quite a bit, and I have gone through a lot of media and several of the replacement lens. Nothing beats tearing off the old foggy lens, removing all of the old goo from the plexiglass, giving it all a good cleaning, and then installing a new lens! ) So, I quickly remembered where I had put them and replaced them without much fanfare. The SkatBlast cabinet I have is made pretty well and the accessories I got with the cabinet itself have held up well. Of course I use quite a bit, and I have gone through a lot of media and several of the replacement lens. Nothing beats tearing off the old foggy lens, removing all of the old goo from the plexiglass, giving it all a good cleaning, and then installing a new lens!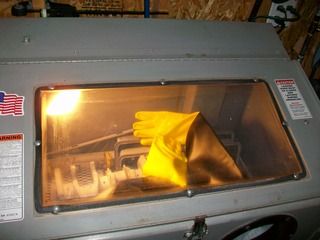 After the move from a 40x24 shop I have a new appreciation for many of us that do not have much room. I am in a 19x18 garage that holds everything - tools, the car, parts, refrigerator, kids stuff, lawn equipment, etc. That may be larger than what some of you guys on the forum may have, I don't know. But man, trying to navigate the garage with body parts, stands, tools, other parts, benches, cabinets, and the like - just trying to keep a car door open can be chore! If any of you have space-saving tips or photos that show what you've got, let me know by all means. 
__________________
Lancaster, California Visit hotrodreverend.com to view hundreds of pictures and videos of the build of the 1955 Ford Club Sedan! |
|
|

|
|
|
#333 | |
|
Senior Member
Join Date: May 2010
Location: Granite City, Illinois
Posts: 3,008
|
Quote:
HRR, my garage is 24' x 18', but there is a 10' x 18' work/storage space attached. Still it is too small with all the tools in there; lawnmower, rototiller, workbench, two worktables, sawmill, two engines on the floor, two standard storage shelving units and a large wooden storage shelving bay for parts, grinder stand, air compressor and various worktables. I'm sure you've got your space as well organized as you can get it to save space. |
|
|
|

|
|
|
#334 |
|
Senior Member
Join Date: May 2010
Location: Lancaster, CA
Posts: 916
|
Didn't get too much done today, tomorrow is Easter and I spent most of the day running around with the wife and kids - including the "Crepe Cafe", antique stores, TJ Maxx, etc. How we missed Walmart I don't know!
 Looking forward to church tomorrow with all the kiddos and the wife. We are supposed to have some staff members over for Easter dinner - one of them quipped, "Will we get to see the car?" So I did a little cleanup today too. The hood was primed, and what will probably be the final two coats of primer surfacer were shot onto the trunk. It gets better with each session. I had to hang the hood in an interesting way on my panel cart so that I could paint both sides in one session. 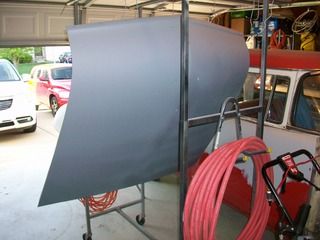 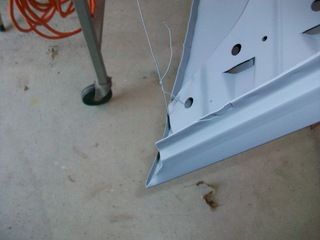 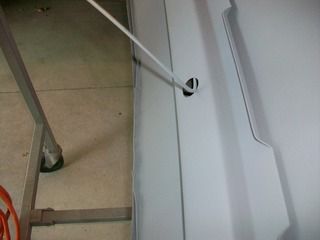 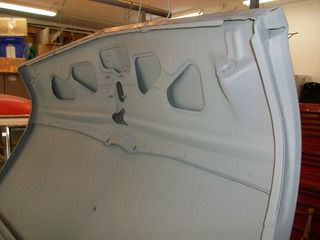 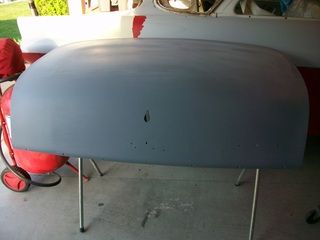 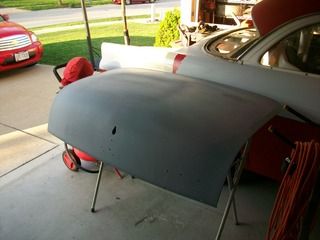 When I checked the mail today, what was this in the mailbox?  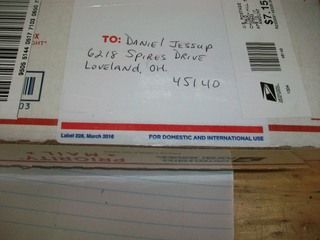 Now what can this be? 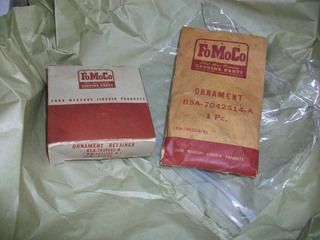 Oh yes, an NOS find! A beautiful hood crown bezel with plastic insert... very nice - check it out. 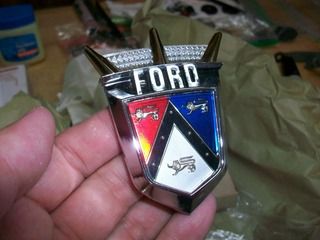 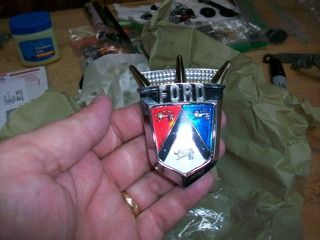 After looking at those pictures it seems like the color is off, but I assure you it is not. I guess the flash on the camera changes the color hue at different angles. At any rate, have a Happy Easter tomorrow!
__________________
Lancaster, California Visit hotrodreverend.com to view hundreds of pictures and videos of the build of the 1955 Ford Club Sedan! |
|
|

|
|
|
#335 |
|
Senior Member
Join Date: May 2010
Location: Lancaster, CA
Posts: 916
|
Why I get involved in little projects like this, I don't know. Maybe it is the satisfaction of fabricating something small that will be entirely functional and serve a purpose, maybe it's the OCD part of me that just can't let things rest, who knows?
Take tonight's overkill for instance. Not wanting to have the heater hoses touch the alternator as they run back from both the intake manifold and the water pump caused me to come up with a simple way to make a bracket from pieces of scrap I had lying around. 1/8" flat stock and some 18 gauge sheet scrap and way we go! 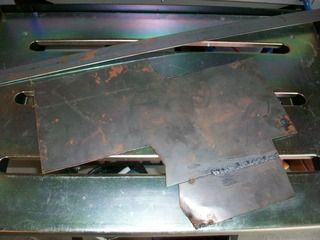 First up was to trim the flat stock: 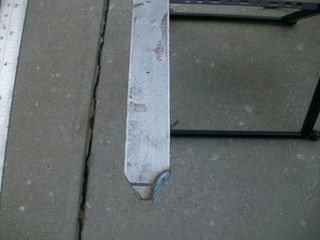 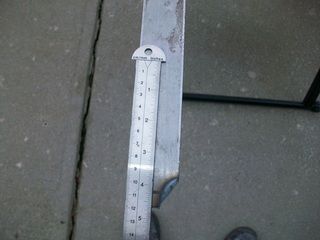 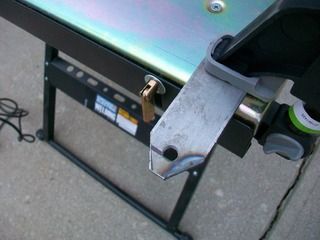 I drilled a 15/32" hole with the press, planning to make a slot that the bolt that tightens the alternator could use to keep the bracket in place. I also found a stainless bowl about the circumference of the alternator to give me the arc I wanted. 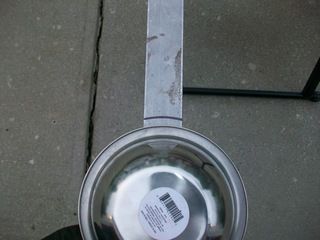 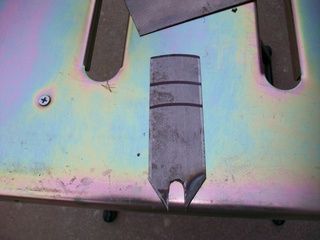 (you can tell I measured this a few times to see what angle/distance on the arc I liked best off the alternator - crazy how much changing the attachment point of the upright to the sheet metal changed the angle of attack for the heater hose bracket I was fabbing up.) Next was to get a good rectangular shape out of that sheet metal piece that would essentially be rail for the hoses to ride on. About 6.5 by 4 or so... 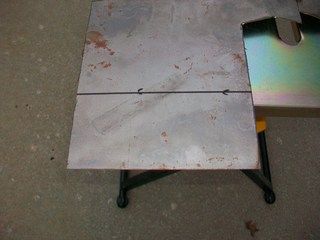 Then we judiciously fitted the sheet metal to the arc at the top of the upright (1/8" flat stock). 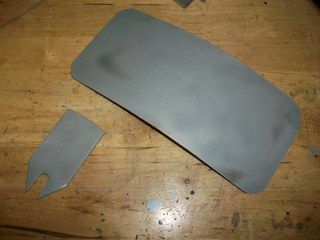 and got them both cleaned up and ready for welding by using a magnet to give us a 90 degree angle. 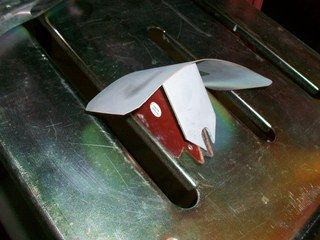 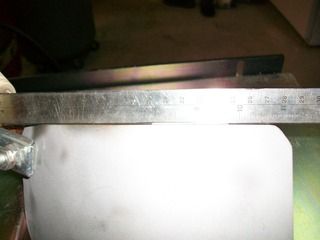 (the straight edge was used to check our distance on either side of the bracket, we didn't want to weld anything up without the two pieces being as square as we could get them.) 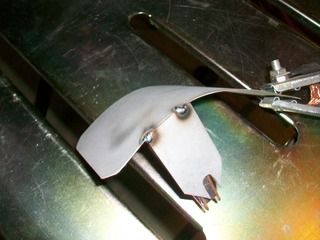 A couple of tacks and then on the backside. 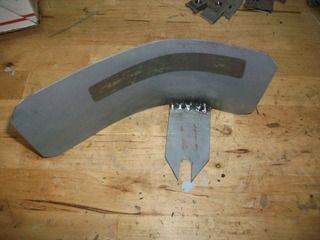 We checked our welds and we had good penetration. I decided not to go too crazy since this was sheet metal and very easy to blow through. 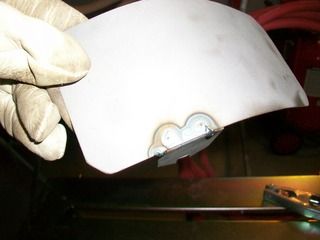 cleaned up the welds... 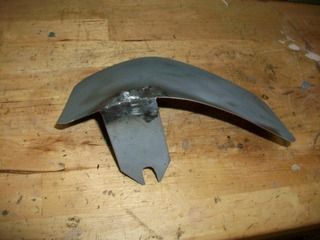 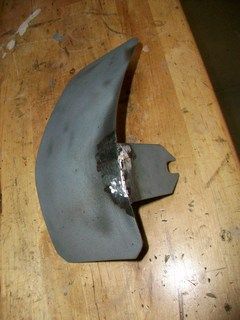 and then into the blast cabinet... 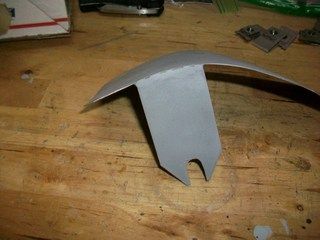 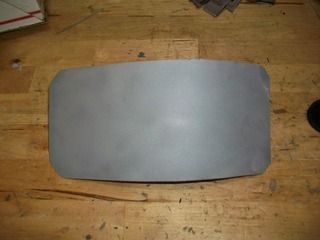 What welds? lol  Not quite perfect but good enough for what we are doing here. Not quite perfect but good enough for what we are doing here. And here is the fitment before painting the bracket - 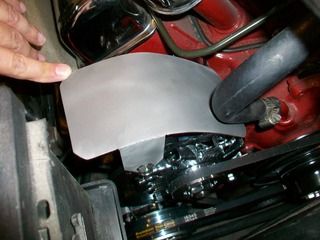 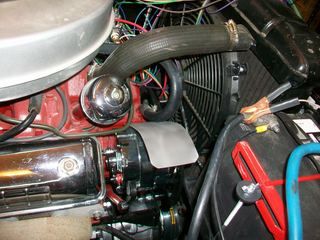 If you know the way that the stock heater hoses run, they take this exact path as they head to the inner fender on the passenger side just aft of the battery. There is a special FoMoCo bracket that keeps the hoses resting on the fender - I can only assume that this is to keep them from flopping around. I have more photos of the trunk and the hood but it is pretty boring stuff, just block sanding, more block sanding, and a little more block sanding! Although, the trunk is about ready for color!
__________________
Lancaster, California Visit hotrodreverend.com to view hundreds of pictures and videos of the build of the 1955 Ford Club Sedan! |
|
|

|
|
|
#336 |
|
Senior Member
Join Date: May 2010
Location: Lancaster, CA
Posts: 916
|
Got a little more done today - we will take some time to talk about a product I really like so far: TAMCO HC 2100 Clear Coat.
Times have changed since the early 90s when I worked at a shop out in Manassas Park, Virginia. The helpful advice on this site, and others, has been invaluable. From some of you retired body men to the guys that make only an occasional post, I would have to say that this forum is one of my go to places for all things FoMoCo and autobody. My pieces don't look like professional panels but that's ok - I am satisfied with my build and getting oo's and ah's from the fellas that take a look at the work when they come by the house - they can tell I have put some quality time and effort into it. The car is going to be a daily driver and not a show car, but when I get ready to build a 60s Mustang for the wife on our 25th anniversary i will be light years ahead of the game. A while back I was introduced to clear coat. One of the old men at our church is a retired body man, having worked in the industry for over 40 years and built over 10 cars of his own. He recommended I go that route. On another site I learned about a Euro clear labeled HC 2100. Now remember when I say all of this I am a novice - if you look up the definition of the word there is a picture of me standing there grinning ear to ear with a paint gun in my hand lol. There are probably other clears that are better than this product at $130 a gallon. Today I shot three coats of this clear on the exterior of the trunk lid. While the pictures at this point cannot do it justice, when the Tamco HC 2100 clear says it is "self-leveling" it ain't kidding. Take this first example... 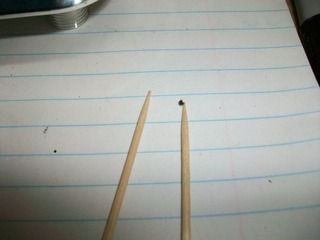 Yes, that is a bug, and yes, that is picture of the two toothpicks I used as a set of tweezers to pull said bug from my freshly clearcoated trunk! 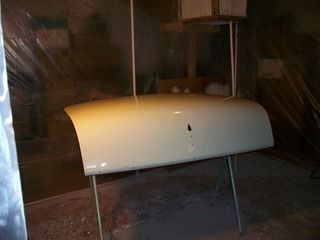 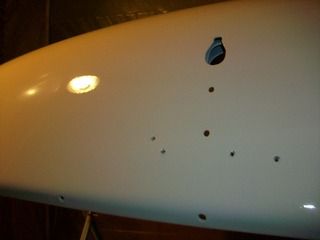 It is difficult to see in the second photo but when that bug was removed the clear coat "leveled" out. 5 minutes later and I could not tell where the bug had been. Add to that my small mistake of having a one inch run during my 3rd coat (yes, I waited 30 minutes for the previous coat to flash, just got too close on my pass). I don't know if anyone would believe it unless I had a video but THAT RUN LEVELED OUT TOO.  Needless to say I am very happy with this clear - it almost seems like it was made for guys like me that are not that experienced, do not have a professional paint booth, and need a little "magic" from their products to get the job done. Just want to say again I am very grateful for the advice from you fellas out there who contribute your autobody knowledge. As we know, much of the work that goes into restoration includes body and paint!
__________________
Lancaster, California Visit hotrodreverend.com to view hundreds of pictures and videos of the build of the 1955 Ford Club Sedan! |
|
|

|
|
|
#337 |
|
Senior Member
Join Date: May 2010
Location: westbury ny
Posts: 854
|
looking good! coming down to the finish line wont be long now
|
|
|

|
|
|
#338 |
|
Senior Member
Join Date: May 2010
Location: Granite City, Illinois
Posts: 3,008
|
HRR, help me with some confusion here! I noticed that one night you will spray the white part of the two fenders, then a few days later a hood and a trunk lid.
The enamels I am familiar with lately have a very short shelf life after mixing with the reducer. You can't just mix a big batch and do pieces over a period of a couple days. the paint needs to be used up over a period of hours at the most. Are you mixing a couple ounces at a time (example; just to do the top of two front fenders)??? Same thing goes for the clearcoat, they have a time limit also. |
|
|

|
|
|
#339 |
|
Senior Member
Join Date: May 2010
Location: westbury ny
Posts: 854
|
its not so much the reducers its the catalyst although some of the newer products are affected by moisture unless your using a product that uses a reactive reducer which I do not know if they still make the first bc/cc products I used were this system I belive he is using a urethane system
|
|
|

|
|
|
#340 |
|
Senior Member
Join Date: May 2010
Location: Lancaster, CA
Posts: 916
|
Fellas, I am using Eastwood's 2K system - yes it is a Urethane. I am actually spraying just 10-15 oz or less at a time, usually 3 coats. Then going back after full cure and color sanding (yes it is Single Stage Urethane), and then after final block I am spraying the clear coat. No it is not a base coat/clear coat system per se but all chemicals are 100% compatible and things are turning out super nice.
It is a two part system and the paint is not "active" until the activator has been mixed. (no reducer needed as of yet)
__________________
Lancaster, California Visit hotrodreverend.com to view hundreds of pictures and videos of the build of the 1955 Ford Club Sedan! |
|
|

|
 |
«
Previous Thread
|
Next Thread
»
|
|
| Sponsored Links (Register now to hide all advertisements) |
|
|
All times are GMT -5. The time now is 03:05 AM.


 Linear Mode

