|
|||||||


| Sponsored Links (Register now to hide all advertisements) |
|
|

|
Thread Tools | Display Modes |


 07-05-2021, 02:38 PM
|
#1 |
|
Senior Member
Join Date: May 2010
Location: Burton, Texas
Posts: 682
|
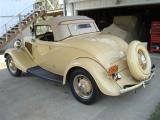
I bought my 34 roadster in 1994 as a 60th birthday present for myself. The car was in non-running condition. The previous owner told me that he had burned up the original engine and installed a freshly rebuilt 36 engine. He felt that he was gypped and suggested that I should look for another engine. When I got it home, I checked the compression, it measured close to 120 psi on all eight cylinders, so I decided to try to get it running.
I got frustrated trying to get the distributor working so I bought a new Mallory distributor from Patricks in Arizona. I installed this distributor and the engine fired right up. It has served me well for 27 years but now the distributor bushings have worn to where the points will not stay adjusted. I plan to replace this distributor with the old 3-bolt original style one that I saved. A respected vendor on this forum repaired/rebuilt this distributor for me. I also plan to use a coil adapter mounted on top of the distributor as the car has been converted to 12-volts/negative ground. I want to use the 12-volt, can-type, no resistor required coil which I have been using with the Mallory distributor. In addition, I want to use an Echlin IH200 condenser and original style sparkplug wires purchased from 3rd-Gen. The hood, generator fan and wire looms are removed. I have test mounted the distributor on the engine. Now I am asking for advice on how to proceed. What is the best (most efficient) sequence to hook up the wiring etc.? I am guessing that I need to unmount the distributor first. Any step-by-step recommendations from others who have done this would be much appreciated. Thank you, Robert. |

|

|
«
Previous Thread
|
Next Thread
»


 Threaded Mode
|
|

| Sponsored Links (Register now to hide all advertisements) |
|
|
All times are GMT -5. The time now is 07:14 AM.