Thanks for sharing your experiences everyone. It's really helpful to a guy who is trying to put together a tool for a job he hasn't done before!
Quote:
Originally Posted by Rich in Tucson

What I do is drop an ear of the flywheel housing (the driver side, which is the lower side) onto the rear motor mount. Then I use a large C-clamp and a few wood scraps to pull the other ear into the other rear mount with a few wiggles, shoves, and further lowering - no frame spreader or other contrivance is necessary.
...I suspect it was first used in 1928...
|
Sounds like a good approach, Rich. I'm aiming to get it as balanced as possible, but expect that some amount of what you described will be necessary.
Quote:
Originally Posted by MikeK
Just turn the crank to fine-tune the angle.
|
I've been thinking about using a bridle arrangement with 2 chains, and adjusting the links to tip the engine forward and backward. The load leveler is much smoother, so I'll have to dig through a few metal scraps and put one together (I'm getting increasingly stubborn about chinese tools...)
Quote:
Originally Posted by marc hildebrant
When I change the spark plugs on my motor, I have noticed that the two outside plugs go in and out with more resistance due to the threads being slightly damaged from lifting the motor that way.
Marc
|
Yikes! I was afraid of this! Did the damage you described happen on a stock head or an aluminum one?
Out of paranoia and a preference to build heavy, I made the head puller to use all four plugs:
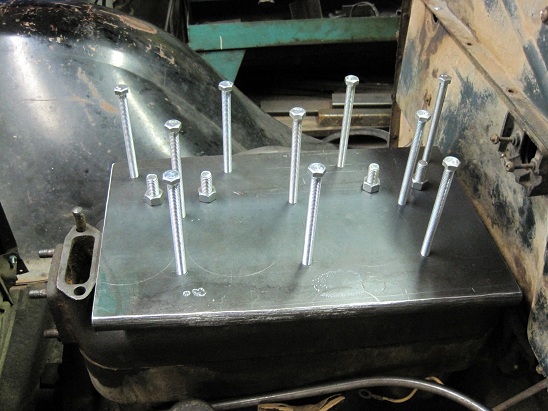
Hopefully the plate would take the brunt of the dynamic load from shifting, leaving the plugs to simply hold the engine. I'm thinking it will be advantageous to use shorter bolts on the studs, and leave them in place to minimize flexing of the spark plug bolts.