|
|
#61 | |
|
Senior Member
Join Date: May 2010
Location: Lancaster, CA
Posts: 916
|
Quote:

__________________
Lancaster, California Visit hotrodreverend.com to view hundreds of pictures and videos of the build of the 1955 Ford Club Sedan! |
|
|
|

|
|
|
#62 | |
|
Senior Member
Join Date: May 2010
Location: Phoenix,AZ
Posts: 1,417
|
Quote:

|
|
|
|

|
| Sponsored Links (Register now to hide all advertisements) |
|
|
|
|
#63 |
|
Junior Member
Join Date: Aug 2013
Posts: 4
|
I am searching for the trim piece that goes on the trunk under the trunk lock for my 55 but not having any luck. Does anyone have info where i might find this piece.
|
|
|

|
|
|
#64 |
|
Senior Member
Join Date: May 2010
Location: Lancaster, CA
Posts: 916
|
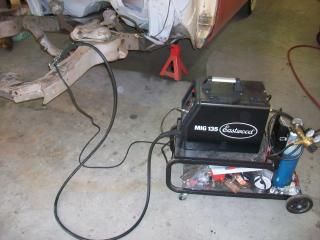
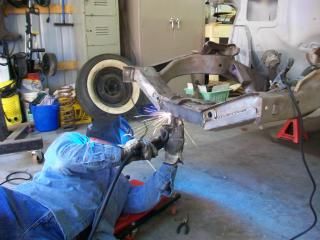
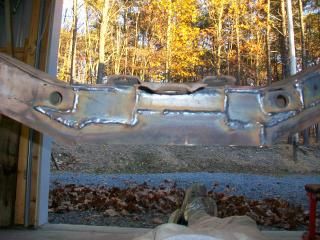
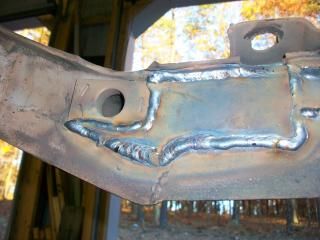
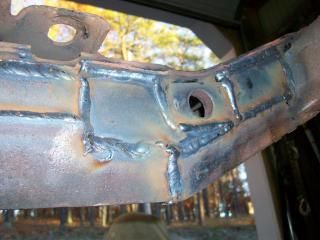
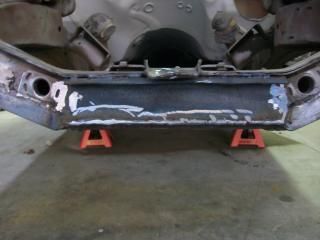
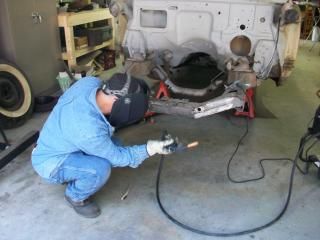
My buddy Mike came over, looked at the crossmember, tapped around a bit, and told me he didn't think it needed to be replaced - let's weld her up! It didn't take him 20 minutes with my MIG 135 from Eastwood and Mike had it finished. We used 1/4" ad 1/8" plate cut to fit. He had good penetration throughout and I have already starting doing a little judicious grinding in a few areas to clean things up a bit. This thing is pretty strong and definitely stronger than stock. I have some Inner Frame Coating on the way from Eastwood, and will hopefully finish cleaning up the frame for paint soon.
__________________
Lancaster, California Visit hotrodreverend.com to view hundreds of pictures and videos of the build of the 1955 Ford Club Sedan! |
|
|

|
|
|
#65 | |
|
Senior Member
Join Date: May 2010
Location: Lancaster, CA
Posts: 916
|
Quote:
 If you are searching for the "crown" emblem, check with dennis carpenter, concours parts, or Mac's... they might have that.
__________________
Lancaster, California Visit hotrodreverend.com to view hundreds of pictures and videos of the build of the 1955 Ford Club Sedan! |
|
|
|

|
|
|
#66 |
|
Senior Member
Join Date: Nov 2013
Location: Portugal
Posts: 374
|
Sponsored Links (Register now to hide all advertisements)
|
|
|

|
|
|
#67 |
|
Senior Member
Join Date: May 2010
Location: Lancaster, CA
Posts: 916
|
It has been some time since my last post, but I have good reason - believe me. There are things more important than our cars, that's for sure. However, the time I can spend in the shop is a good opportunity to meditate, relax, and unwind after dealing with so many people all day long and helping them with their problems. I have been known to crank up a good southern gospel music CD or even one my favorite sermons from a preacher of yesteryear and have at it in the garage with all the work (er, fun).
Back to our blog After the cross member was welded up by my friend Mike, I decided to smooth it up a bit and paint it with 3 coats of Rustoleum. I like the semi-gloss sheen on the frame and will use that for the sub assemblies as well. 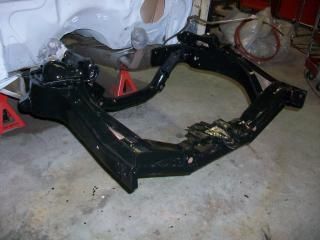  I finally got back in the shop last night after spending a few weeks with other priorities. First up was the steering gear box and the rebuild. I had all of the parts I needed. The worm gear on the shaft was a used unit I found, but it was very near pristine on the grooves and fit perfectly. The bearings were already in good shape so I cleaned and kept those. I ordered a new seal for the sector shaft that holds the pitman arm. I got it from fleabay for something like $4 shipped and the thing fit very, very well. It was a US brand name seal, but memory fails me at the moment to tell you which one. 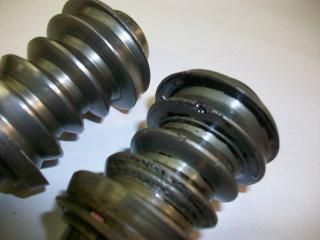 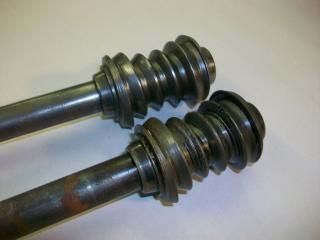 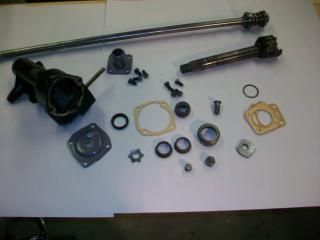 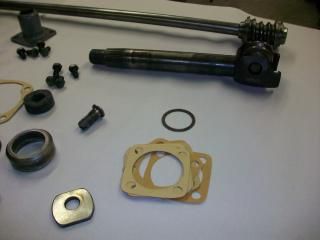 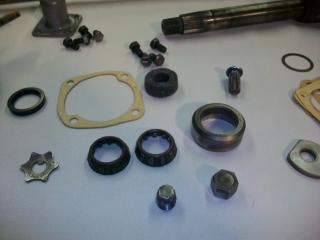 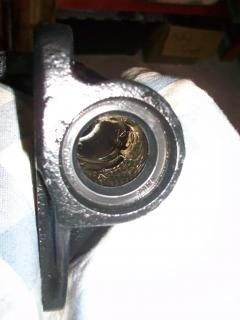 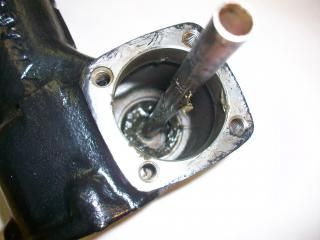 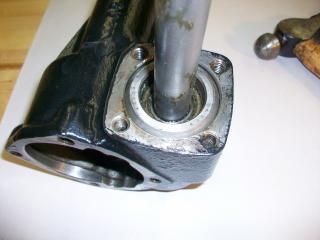 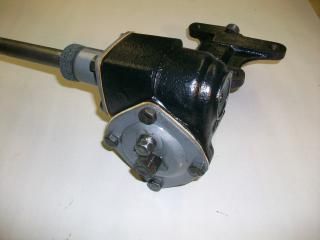 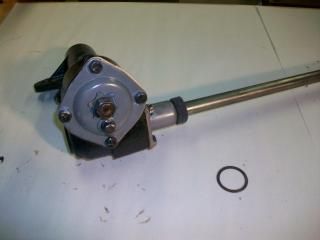 When I got it all completed, I was scratching my head over an "extra" part that I did not recall. After a few minutes it dawned on me that the large washer was actually the keeper for the original rubber seal for the sector shaft. I had forgotten that the seal was actually two pieces, so that large washer was obviously not need because the new seal was now one piece. The shim pack was interesting to deal with. I looked at the original number and thickness of the shims that were installed originally and I tried to install new shims that were an exact match. After torqueing down the bolts I spun the steering shaft and thought it seemed loose. As a matter of fact it was so loose that it actually had a little but of runout (vertically). "Well that can't be right," I muttered. After I looked at it crosseyed for a moment... "Hey bonehead! The replacement worm gear - that's what making the difference here." So I removed one of the original 3 shims and just checked to see what would happen if there were no shims.... TIGHT as it could be! No wonder there is a little frustration over getting the pre-load right. I guess it is a little tricky. I went through my pack of shims and just kept working on it until I found 3 that didn't have any play on the runout vertically but still kept it spinning "right"... now, what "right" actually is, I have no way of knowing. Someone had suggested using Ford's shop manual for the load, but that is with the leverage of the steering wheel. And... I don't have a torque wrench that goes to a very small inch/pounds. I guess I need a spring scale anyway. However, I would like to get this right on the bench before install... any ideas? I greased the gears up pretty good and wrapped it all in plastic until it is installed. I have gear oil for it 80w90. While I was at it I decided to put together the drag link. It was already in good shape - it just needed to be cleaned up and greased really well. I also need to get a new zerk fitting for the thing. 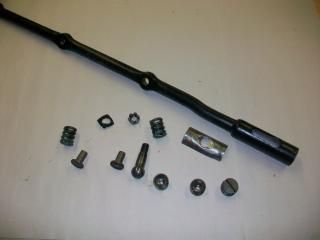 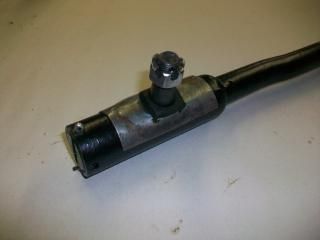 Things were going so well I decided to tempt fate and dismantle both upper control arms. I needed heat on one occasion but things went reasonably well. Again, some of the rubber was about ready to disintegrate so it was a no brainer to replace all of this stuff up front. 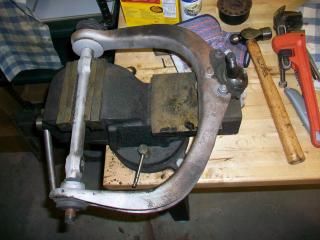 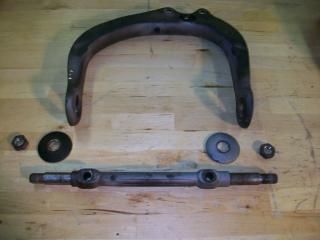 For those of you that really know your stuff.. yes there are 3 large washers per upper arm. The third is in the box.
__________________
Lancaster, California Visit hotrodreverend.com to view hundreds of pictures and videos of the build of the 1955 Ford Club Sedan! Last edited by Hot Rod Reverend; 11-19-2014 at 05:50 PM. |
|
|

|
|
|
#68 |
|
Senior Member
Join Date: Nov 2013
Location: Portugal
Posts: 374
|
Looking very good Reverend.
|
|
|

|
|
|
#69 |
|
Senior Member
Join Date: May 2010
Location: Granite City, Illinois
Posts: 3,008
|
HRR, are you going to leave the "cow-catcher" off of the frame front crossmember? Kinda late now to weld it back on since you got the frame all painted up real nice.
|
|
|

|
|
|
#70 |
|
Senior Member
Join Date: May 2010
Location: Granite City, Illinois
Posts: 3,008
|
I was able to stick a spray can of Rust-o-leum black up in those corners of the frame since it is too small to work a brush in there.
|
|
|

|
|
|
#71 |
|
Senior Member
Join Date: May 2010
Location: Granite City, Illinois
Posts: 3,008
|
Oh yeah that long trim piece at the bottom of the trunk lid for the Fairlane models at one time was being reproduced by one of the resto parts suppliers. I think it was Concours and they wanted about $400.00 for it.
I left that part off of my car because it is very badly pitted and it is still laying on top shelf in the garage. I'd hate to think what they would want to fill, grind and rechrome that piece. |
|
|

|
|
|
#72 |
|
Senior Member
Join Date: Dec 2010
Location: p.e.i.
Posts: 1,060
|
anyone else have a copy of practical auto restoration.the resurrection of vicky a 55 crown vic put out by cars and parts.a good book put out about 25 years ago.
|
|
|

|
|
|
#73 |
|
Senior Member
Join Date: May 2010
Location: Lancaster, CA
Posts: 916
|
yes I have a copy... good photos and such. Sometimes lacking on step by step procedures but for what it is if you have a 55 or 56 it is a real treasure to own. Handy references too for aftermarket part numbers and the like. I would have liked to have seen them do something more with the transmission and/or the rear end in that whole process but it was nice nonetheless.
__________________
Lancaster, California Visit hotrodreverend.com to view hundreds of pictures and videos of the build of the 1955 Ford Club Sedan! |
|
|

|
|
|
#74 |
|
Senior Member
Join Date: May 2010
Location: Lancaster, CA
Posts: 916
|
You are one of the few that caught that! Yep - I decided to leave it off since we beefed it up so much. I really don't see the point of it unless there was some idea of a front impact and absorbing the force? the metal is so thin right there I really didn't see the need.
__________________
Lancaster, California Visit hotrodreverend.com to view hundreds of pictures and videos of the build of the 1955 Ford Club Sedan! |
|
|

|
|
|
#75 |
|
Senior Member
Join Date: Dec 2010
Location: p.e.i.
Posts: 1,060
|
the force was mud and ruts back in the day these cars travelled of roads you wouldnt put a tractor on today.where i live the ruts would be a foot deep and then it would freeze and when you fell into these ruts smash crash.56 was the last year that ford closed the engine in underneath.anyone still have that on their cars.most have been thrown away.
|
|
|

|
|
|
#76 | |
|
Senior Member
Join Date: May 2010
Location: Granite City, Illinois
Posts: 3,008
|
Quote:
But yes to answer your question, both my '55 car with Y-block and my '55 Courier with I-block still have the metal pans under the engine. Those panels are designed to direct air past the engine for cooling purposes as much as providing a splash shield. Not sure which was the primary purpose. I would never leave them off for the cooling effect alone! |
|
|
|

|
|
|
#77 | |
|
Senior Member
Join Date: May 2010
Location: Granite City, Illinois
Posts: 3,008
|
Quote:
Maybe someday I will create a text and photo version of "Restoration of COURIER" similar to this. Still have a good memory of the resto process and many great tips for keeping organized as well as many good polaroid photos that could be scanned and turned into digital for publishing in a journal like this. |
|
|
|

|
|
|
#78 |
|
Senior Member
Join Date: May 2010
Location: Lancaster, CA
Posts: 916
|
Yes - I have the splash pans as well. They are in excellent shape. I removed them some time ago when the car was cooling too well, even with a 190 degree thermostat. I had installed that large "312 radiator" - it has 4 rows I think. In the winter I went as far as to put a piece of cardboard over half of the radiator to stop the flow of air!!! Ridiculous... during the winter the heater core would show that the temp gauge was right at 165... I could barely get hot air to come out of the heater core when I was at speed. At a stop light or in traffic it would do just fine.
And, summer or winter did not matter. that thing cooled like there was no tomorrow. Too cool though - you really don't want a Y block running under 190, or most engines for that matter. The thing becomes a sludge factory because of all of the condensation.
__________________
Lancaster, California Visit hotrodreverend.com to view hundreds of pictures and videos of the build of the 1955 Ford Club Sedan! |
|
|

|
|
|
#79 | |
|
Senior Member
Join Date: May 2010
Location: Lancaster, CA
Posts: 916
|
Quote:
I did just find out about a 56 parts car located about an hour and half from me that has an original 6 cylinder in it. I wonder if the rear end would be right up my alley for the 3 speed overdrive I plan to install in this car.
__________________
Lancaster, California Visit hotrodreverend.com to view hundreds of pictures and videos of the build of the 1955 Ford Club Sedan! |
|
|
|

|
|
|
#80 |
|
Senior Member
Join Date: Dec 2010
Location: p.e.i.
Posts: 1,060
|
dave i was talking about two different things.the cow catcher was for hitting bottom.the 6 should have a 390 rear.
|
|
|

|
 |
«
Previous Thread
|
Next Thread
»
|
|
| Sponsored Links (Register now to hide all advertisements) |
|
|
All times are GMT -5. The time now is 06:48 PM.


 Linear Mode

