


 07-11-2023, 08:39 PM
|
#101 |
|
Member

Join Date: Nov 2022
Location: Esparto, CA
Posts: 75
|
Final work-bit for the day. I love this little fan. I hope the motor works. The external wiring will have to be replaced, obviously, but insulation on armature windings is different so maybe new hook-up wire and a little cleaning is all it needs.

|

|

|
|
07-12-2023, 01:00 AM
|
#102 |
|
Member
Join Date: Nov 2022
Location: Esparto, CA
Posts: 75
|
I am starting to look for a rear bumper. An older one with patina will be fine. New ones are available, but...
Also, it would be nice of the original radio worked. I might take it out to see what we've got. Older radios did not use electrolytic or tantalum capacitors, so that will help. Most likely we'll find a shop that can repair/rebuild it. Unless you guys know of a better solution. |
|
|
|
| Sponsored Links (Register now to hide all advertisements) |
|
|
|
07-14-2023, 01:56 PM
|
#103 |
|
Member
Join Date: Nov 2022
Location: Esparto, CA
Posts: 75
|
I've been told we already have the rear bumper.
The two electric motors (heater and fan) look fine on the inside. I just need to replace their power cords.  Two days ago I picked up a few parts from Sacramento Vintage Ford, fuel line and some wiring pigtails. Really nice folks, and this was on their counter.  I unrolled and fed the fuel line under the car and hooked it up at the tank. I was not happy seeing how the original fuel line just sat loose under the car and will do something different this time. I attempted to connect the pigtails to the headlight but could not get them through the hole. I'll remove the connector/ends today and will try again. I don't really like how the wiring looks where the pigtails connect to the main harness. What do you guys do here? See the photos below.  
|
|
|
|
|
07-15-2023, 02:25 PM
|
#104 |
|
Member
Join Date: Nov 2022
Location: Esparto, CA
Posts: 75
|
It took a lot longer to get that fan motor back together than expected. It was tricky getting all of the parts in the right place at the same time, but I prevailed.
 Next up was the wiring. I had to remove the connector tips to get the pigtail down the hole for the headlight wiring, and even then it was a tight fit. Any time the wires in the bundle crossed over each other it made a thick part and that was the hangup. I'm reusing the headlight connectors, and two of three connections went well. The red wire would not go through the hole, and the day ended before I could finish.  The scene when I left for the day. 
|
|
|
|
|
07-20-2023, 11:57 AM
|
#105 |
|
Senior Member

Join Date: May 2010
Location: Minnesota
Posts: 1,150
|
The headlight sockets appear to be new or are they original? Please use only the original Ford sockets, since the nice shiny reproductions are just that, but they do not have spring steel and when you try to install in the reflector and bulb, they will NOT WORK properly. Ask me how I know?
|
|
|
|
|
07-31-2023, 01:19 PM
|
#106 | |
|
Member
Join Date: Nov 2022
Location: Esparto, CA
Posts: 75
|
Sponsored Links (Register now to hide all advertisements)
Quote:
Thanks for the tip. We are reusing the original sockets. |
|
|
|
|

|
07-31-2023, 01:22 PM
|
#107 |
|
Member
Join Date: Nov 2022
Location: Esparto, CA
Posts: 75
|
Battery question - The space available in front of the driver is about 7.5" tall, and we can't find a battery under 8.5" tall. Are suitable batteries, ones that fit, available, and if not, what do people do, relocate the battery to the trunk?
|
|
|
|
|
08-04-2023, 12:59 AM
|
#108 |
|
Senior Member
Join Date: May 2010
Location: Minnesota
Posts: 1,150
|
There was a woven asbestos cloth cover for the wiring coming out of the headlight switch. Since asbestos is difficult to find, I used the silver colored woven cloth cover used for modern spark plug covers that are rated for high temperature. They typically are used with headers on modern cars.
|
|
|
|
|
08-04-2023, 10:47 AM
|
#109 | |
|
Senior Member

Join Date: May 2015
Posts: 8,465
|
Quote:
__________________
The only thing nice about being imperfect is the joy it brings to others.... "Silver rings, your butt! Them's washers!" "We shot our way out of that town for a dollar's worth of steel holes!" - from 'The Wild Bunch' - 1969 https://www.youtube.com/watch?v=7NReUd2_0u0 |
|
|
|
|
|
08-06-2023, 01:53 PM
|
#110 | |
|
Senior Member

Join Date: Dec 2014
Location: California
Posts: 804
|
Quote:
ph: 800-722-0854 They are very well known, been in business for decades. THEY QUOTE YOU A PRICE BEFORE YOU SEND YOUR RADIO! My radio was completely rebuilt including the fm yellow light!, returned in two weeks. Upon using the radio in the car, I noticed a problem; phoned them. They said ship it to us COD. = within days they found a bad capacitor, and shipped it immediately. I am amazed by these very professional folks. This took place half-dozen years ago. My radio is brand new to this day! Very highly I recommend. Patrick 'Pat' Malone Last edited by highbeams; 08-06-2023 at 02:03 PM. |
|
|
|
|


|
08-06-2023, 08:31 PM
|
#111 |
|
Member
Join Date: Nov 2022
Location: Esparto, CA
Posts: 75
|
Thanks for the recommendation. I found them on the Internet so it looks like they are still in business. I'll give them a call tomorrow.
|
|
|
|
|
08-06-2023, 10:05 PM
|
#112 |
|
Senior Member
Join Date: May 2010
Location: Minnesota
Posts: 1,150
|
You show the filler neck and there should have been a lead washer between the neck and the tank. I hope you found the old one and can replace it with a new lead washer to seal the neck to the tank. I would not recommend any other type of seal for this part.
|
|
|
|
|
08-13-2023, 10:52 PM
|
#113 |
|
Member
Join Date: Nov 2022
Location: Esparto, CA
Posts: 75
|
Thanks. We have the lead washer. We're holding on installing the filler neck until the sheet metal back there has been repaired.
|
|
|
|
|
08-13-2023, 11:12 PM
|
#114 |
|
Member
Join Date: Nov 2022
Location: Esparto, CA
Posts: 75
|
A quick update.
The headlights are all back together. We haven't tested them yet, but what could possibly go wrong?  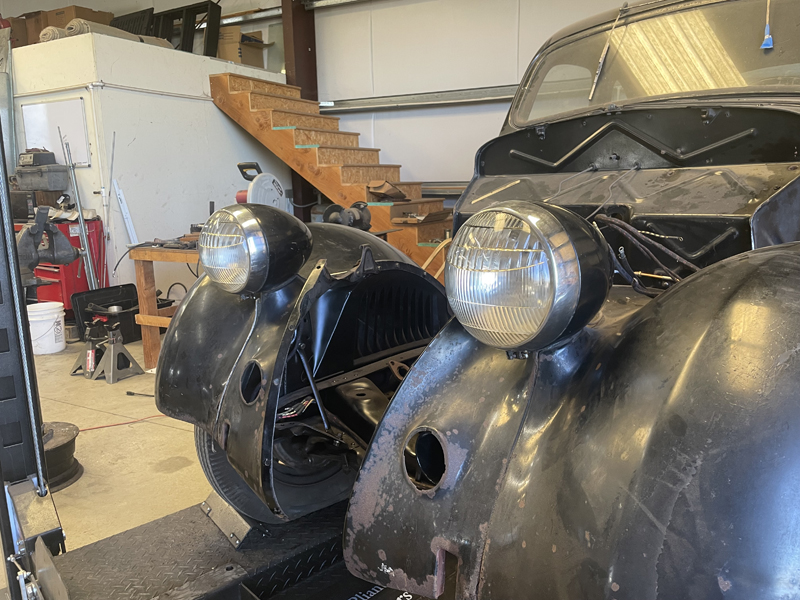 We took the radio out just to make room. We'll see about sending it to the shop recommended above.  I'm still unable to get the defroster fan to work. I guess I'll take it apart again and check for breaks in the wiring. The heater is back together and is working. I flushed the little radiator and replaced the power cord for the fan. We won't put it back in the car until we've taken care of the floor. (Love the patina!) 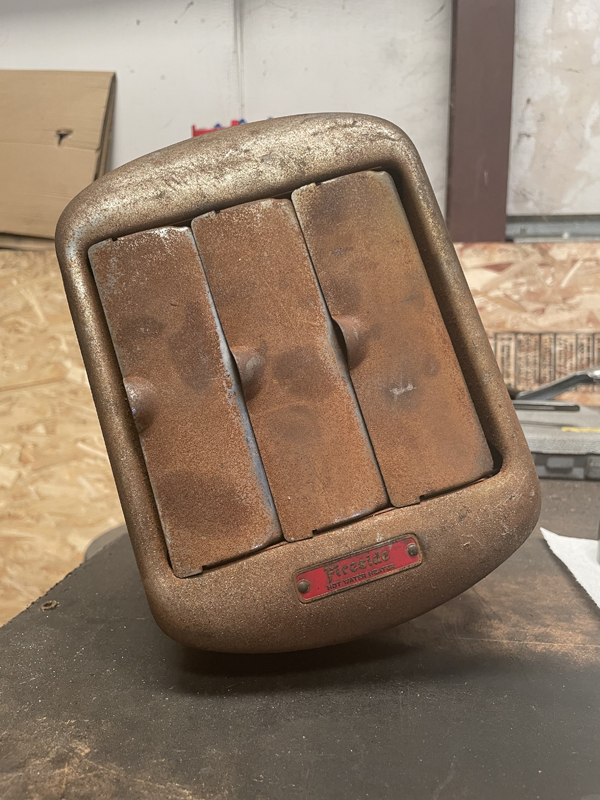 Part of the section of sheet metal on the driver-side floor has rotted away. We're thinking of making a replacement, or if we can find one pre-made, we'll go for that. Richard does not want me to remove the seat so I'll be splicing it in. The wooden sections toward the front are in bad shape but making replacements will be easy. It's just 3/4" plywood. With some of the plywood scraps I can fix the pieces between the frame and floor on the driver-side. The battery tray came out nice. I had some sheet metal bent, then I painted and installed it. The battery sits 3/4" lower than originally but I think that is okay. There's still space between the top of the battery and floor.    Mike |
|
|
|
|
09-18-2023, 08:30 PM
|
#115 |
|
Member
Join Date: Nov 2022
Location: Esparto, CA
Posts: 75
|
Sorry for the lack of updates. We've been making slow progress on uninteresting parts of the car, such as the floor panels. I made new wood panels and cleaned and painted the metal panels. The driver-side metal floor panel has most rotted away so I made a replacement, which will take some doing installing it.
But today, success! I got the rear drums off. It still wasn't easy, and when the drums broke free they sounded like I broke them, but instead they both came off. The puller tool fit and worked well.  As I was trying to get the drum off I needed to used a cheater bar, and even then it required some effort, too much, I feared. I stopped and took it off again to make sure everything was okay. It all looked okay. I tired again and it would not budge. I was about to leave to get my propane torch but decided to try one more time, and this time no additional effort was required to turn the tool. I figured either the threads were traveling or the drum was finally moving. Worrying that the threads were starting to go I removed the puller again to look, and the threads were okay. Once I had it back together again I continued soon I heard a loud bang, and the wrench was suddenly loose. I figured either I had broken something or the drum was free. Fortunately the drum was free. The story for the driver-side brake was about the same. It took some effort but it came off, again, with a bang. The drums themselves look great, very few signs of wear, in fact, very few signs of use. I think a brake job must have been done soon before they disconnected the rear brakes. The problem with the brake was super obvious. The oil seals had failed. Maybe when that brake job was done they left the old ones in. Anyway, the right-rear was well-oiled and oil was everywhere, coating everything. The left rear had some leakage but was mostly dry. 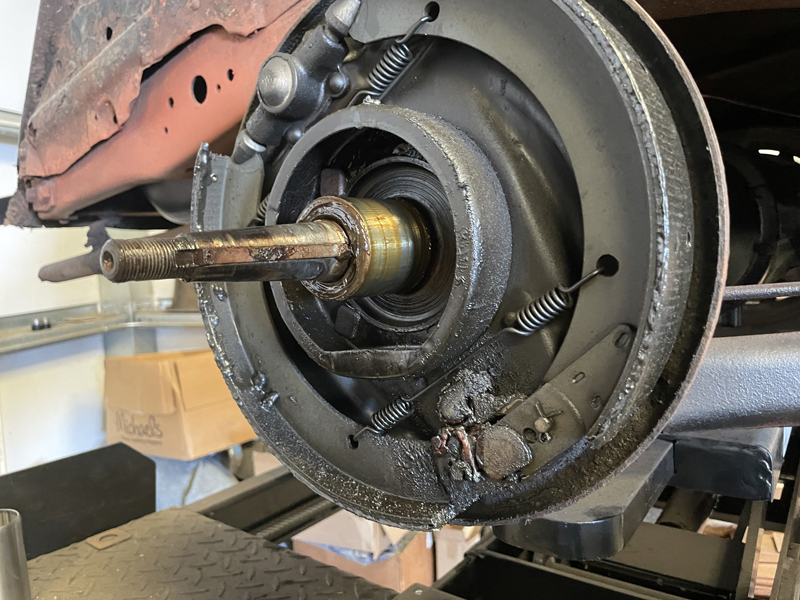   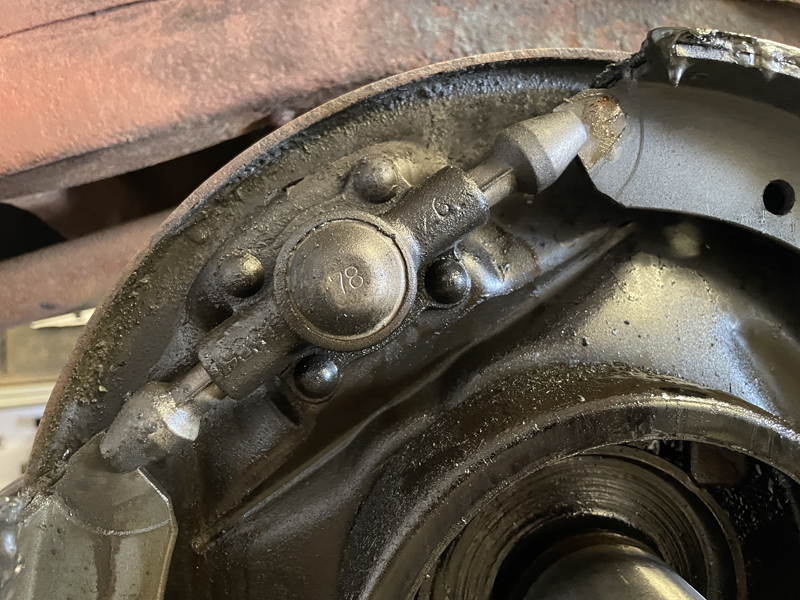  I've got the parts on the bench, soaked with PB-Blaster to loosen everything. Tomorrow I will clean them up and maybe I'll take the drums in to get resurfaced. Meanwhile, I'll locate new brake shoes and seals. Once I have parts it will be easy to finish the rears then I'll start on the fronts. Any recommendations on what other work needs to be done in the rear? I'd like to get the bearing out to clean, inspect, and re-grease. Anything else? Mike |
|
|
|
|
09-18-2023, 11:12 PM
|
#116 |
|
Senior Member

Join Date: May 2010
Posts: 2,526
|
The axle key inner upper edge, can cut into the drum, so try to have a rounded key edge inside/ upward toward drum slot. Club member had this problem. Newc
|
|
|
|
|
09-19-2023, 02:13 AM
|
#117 |
|
Member
Join Date: Nov 2022
Location: Esparto, CA
Posts: 75
|
Thanks for the tip. It's probably come out as I clean things, so I'll make sure it goes back in right.
Also, I'll be using a dab of anti-seize when I put this back together. It'll save someone some trouble 40-some years from now.
|
|
|
|
|
09-19-2023, 06:37 AM
|
#118 | |
|
Senior Member
Join Date: Oct 2016
Location: harpursville ny
Posts: 1,055
|
Quote:
|
|
|
|
|
|
09-19-2023, 11:21 AM
|
#119 |
|
Member
Join Date: Nov 2022
Location: Esparto, CA
Posts: 75
|
Interesting. Why?
Edit - I googled and found nothing to help answer this question. Several people point out that the friction of an un-lubricated taper joint is why everything should be assembled dry. None of the cases I read about ever mentioned a key-way, which these axles have. I'd think the key-way takes care of the friction part of the equation, and the taper is mostly there to ensure alignment. Thoughts? Last edited by m610; 09-19-2023 at 11:36 AM. |
|
|
|
|
09-19-2023, 12:39 PM
|
#120 |
|
Senior Member
Join Date: Oct 2016
Location: harpursville ny
Posts: 1,055
|
The torque should not be on the key as it will wear the key way and can cause the axle to crack. I have seen pics. of this posted here maybe do a search.
|
|
|
|
 |
«
Previous Thread
|
Next Thread
»
 Linear Mode

|
|

| Sponsored Links (Register now to hide all advertisements) |
|
|
All times are GMT -5. The time now is 06:18 AM.